This is part 5 of my series demonstrating my rebuild of my homelab in NixOS.
- Initial creation of the NixOSVM on Proxmox Part 1 .
- Enabling SSH access on NixOS Part 2 .
- Mounting a secondary drive on NixOS Part 3 .
- Decrypting boot early with initrd-ssh Part 4 .
- Installing Docker on NixOS Part 5 (This part)
Overview:
So far in this series we have setup the following:
- A NixOS VM running on Proxmox.
- SSH access to the VM.
- A secondary drive mounted on the VM.
- SSH access in early boot via initrd-ssh.
Which is great, but we are still missing a few things, namely Docker and other tools which will make this homelab complete. We will cover that in this article.
Installing Packages:
NixOS has a very easy way to packages. Again we are going to open configuration.nix file and add the following lines.
Finding Packages
In our configuration.nix you can find a section that looks like the below
This is where we can easily add programs we want to install.
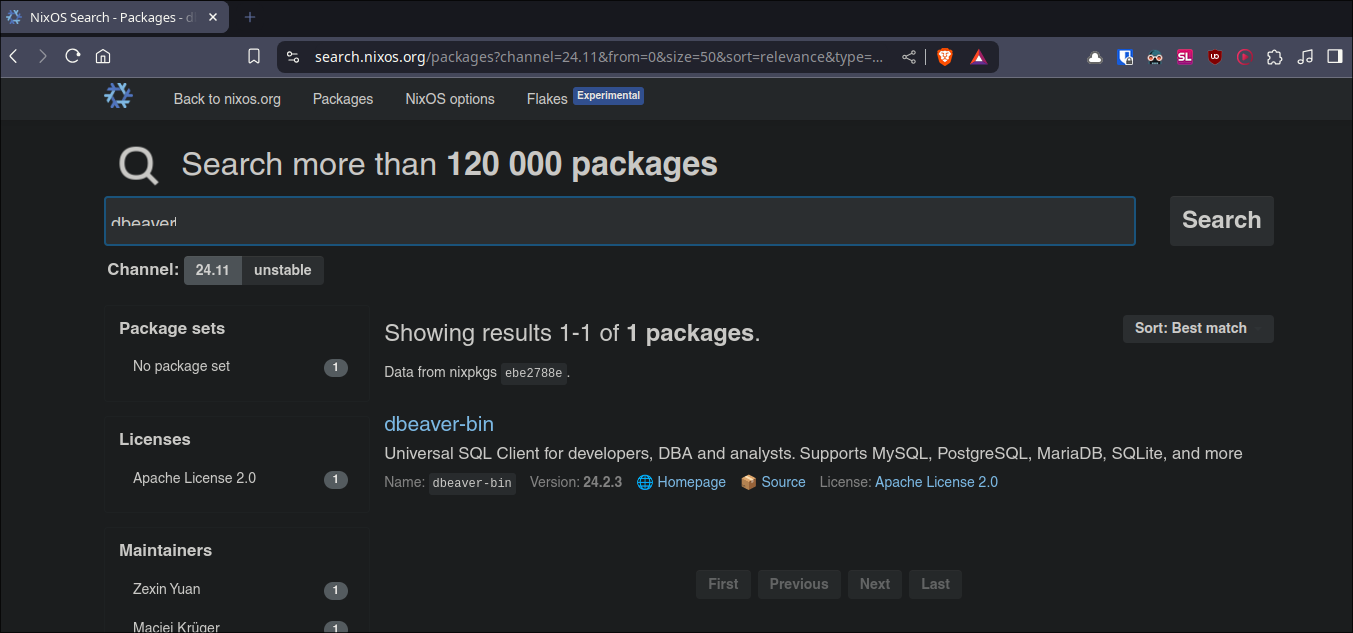
Using search.nixos.org to search for packages:
You can see at the top it says we can actually search for packages, by running nix search [package] however this only works if we activate experimental features which is out of scope for this article, instead we can use https://search.nixos.org/packages
to search for packages.
Installing systemPackages in NixOS:
Step 1: Add the packages to configuration.nix:
So lets install some packages, I am going to install the below packages, vim, acl, wget, git nfs-utils & rsync, as you can see it’s as simple as just adding the package name.
You may have also notices that these are listed under systemPackages, this means these will be available system-wide. It is possible to install packages on a per user basis & use things like home-manager, but again that is out of scope for this article. See Additional Note On Security:
# List packages installed in system profile. To search, run:
  # $ nix search wget
  environment.systemPackages = with pkgs; [
    vim # Do not forget to add an editor to edit configuration.nix! The Nano editor is also installed by default.
    acl
    wget
    git
    nfs-utils
    rsync
  ];
- +Note+: Not all of these are required for this tutorial, however in later tutorials we will be mounting external nfs shares for docker to access and this will require modifying acls, also if you plan to version to control this or pull any external git repo’s down I would also advise installing
git
-
Additional Note On Security:
I did consider installing these under user packages but elected not to for the following reasons:
The security benefit is minimal for these particular utilities since they’re common tools that don’t introduce significant attack surface by themselves.
- For
vim, wget, git, andrsync, there’s minimal security difference between user and system installation.* - For
nfs-utils, system-wide installation is beneficial since it typically involves system services that run as root anyway.
+Note+: Please note I did not say there is “no security differences”, there are minimal.
- For
Step 2: Rebuild the system to install the packages:
Now that we have updated configuration.nix we now need to rebuild the system for our changes to be made.
sudo nixos-rebuild switch
Installing Docker on NixOS
Preamble: What is Docker and Why Use It?
If you’re installing NixOS there is a good chance you already know what docker is, but for those who don’t here is a brief overview
Docker is a platform that allows you to package and run applications in isolated environments called containers. Think of containers like lightweight, standalone packages that contain(see what I did there) everything needed to run a piece of software - the code, runtime, system tools, and settings. These run on top of the existing linux kernel in layers.
For a homelab, Docker is particularly valuable because it allows us to do the following.
- Makes it easy to deploy applications without worrying about dependencies (everything is contained in the container)
- Keeps different applications isolated from each other (unless we want them to talk to each other)
- Allows us to easily update and manage services (we can update a single container, pin it to a specific version or just leave as is)
- Provides a consistent environment across different machines (theoretically if I give you same docker configuration I have
compose.ymlit should be the exact same on your machine) - Makes backing up and moving applications between systems simpler (we can set persistent storage…remember that secondary drive we setup earlier?)
For a homelab, Docker will likely become one of your most-used tools for running services like media servers, monitoring tools, or web applications.
Step 1: Basic Docker Installation
Option A: Default Installation
If you do not plan to use the secondary drive and are happy with the default location for docker, which is usually /var/lib/docker you can put the below in your config and run nixos-rebuild switch.
  # Enable Docker
  virtualisation.docker = {
    enable = true;
    };
  };
Option B: Custom Data Directory Configuration
You might want to change Docker’s default data directory location for several reasons:
- Better storage management: Keeping Docker data on a separate drive helps prevent your system drive from filling up
- Performance: A dedicated drive (especially SSDs) can improve container performance
- Easier backups: Having Docker data on a separate drive makes it simpler to backup and restore your containers
- Space constraints: System drives often have limited space compared to secondary storage
If you plan on using the secondary drive, NixOS makes it easy to change where Docker stores its data. We just need to add the following information to our configuration.nix docker section:
  # Enable Docker
  virtualisation.docker = {
    enable = true;
    daemon.settings = {
      "data-root" = "/mnt/docker";
    };
  };
This configuration will store all Docker-related data including:
- Images
- Containers
- Volumes
- Build cache
- Network configurations
This is one of the many reasons I love NixOS, the simplicity of the configuration.nix file is amazing, it is so easy to understand and modify. (don’t get me wrong there are some things that are a bit tricky and that I still don’t understand, but overall it is a very easy to understand and modify system).
Step 2: Apply Docker Configuration
sudo nixos-rebuild switch
Step 3: Handling Docker Permissions
Understanding Docker Permission Errors
If you try and run any docker commands right now they will fail with the below error, there are 3 ways around this error:
There are 3 ways around this error:
- Run every docker command with
sudo:- Reason why we are not doing it: Running Docker commands with sudo gives those commands full root access to your system. This is dangerous because:
- A misconfigured container could gain access to your entire system
- Any security vulnerabilities in Docker could be exploited with root privileges
- Command history might expose sudo commands that could be misused
- Reason why we are not doing it: Running Docker commands with sudo gives those commands full root access to your system. This is dangerous because:
- Install docker rootless on NixOS:
- I have never managed to get this to run successfully whilst exposing restricted ports.
- Add our user to the docker group:
- This is the best solution for this specific use case so lets do that.
- While this still grants significant privileges, it’s more controlled than using sudo and follows Docker’s recommended practice for non-production environments.
- Run every docker command with
+Note+: I am aware there are other ways to run docker containers within NixOS, declarativley as well as using other tools, however for these tutorials this is my preferred approach.
Adding User to Docker Group
Again we will be making changes to our configuration.nix file, in it you will find a section that looks like the below:
You can see that groups are added via the extraGroups list. So we just need to add "docker" to this.
# Define a user account. Don't forget to set a password with 'passwd'.
  users.users.martin = {
    isNormalUser = true;
    description = "martin";
    extraGroups = [ "networkmanager" "wheel" "docker" ];
    packages = with pkgs; [];
  };
- +Note+: You may have also noticed that we can add user packages here but for this tutorial we don’t need to.
Nerdy Nix List Fact:
Nix has lists as a fundamental data structure, but +doesn’t+ have a distinct “array” type as found in some other programming languages. So if you see the square bracket notation [ ... ] in Nix, it’s always referring to a list.
Lists in Nix are immutable sequences of values that can contain elements of different types. The terminology distinction matters because Nix’s type system is quite specific - it has lists, sets (attribute sets), and other primitive types, but not “arrays” in the traditional programming sense.
Step 4: Apply User Changes
sudo nixos-rebuild switch
Step 5: Verify Installation
Activate Group Changes
If we try and run docker commands it still wont’ work as the new changes are not reflected in the current shell, the easiest way to verify this is working is to logout and back in, once done you should be able to run docker commands.
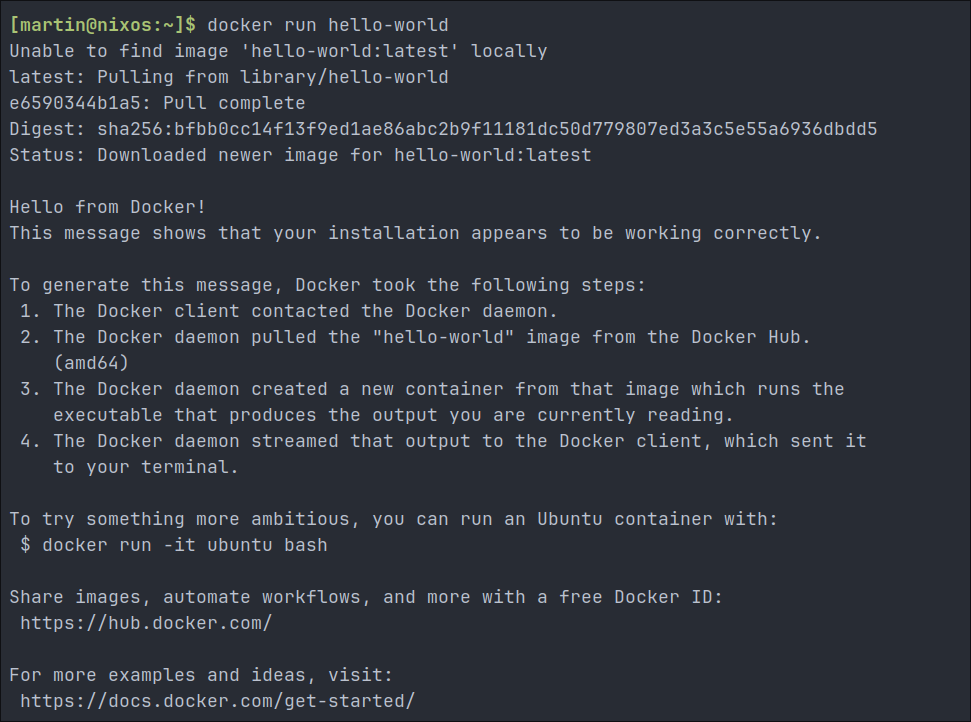
Test Docker Installation
Lets run hello-world to verify it’s all working.
docker run hello-world
As we can see it’s working as expected.
Conclusion/Next Time:
You now have a system that has docker installed, in the next post we will actually create our docker compose file.
Sign-off:
As always hack the planet homelab!


