This is part 1 of my series demonstrating my rebuild of my homelab in NixOS.
- Initial creation of the NixOSVM on Proxmox Part 1 . (this part)
- Enabling SSH access on NixOS Part 2 .
- Mounting a secondary drive on NixOS Part 3 .
- Decrypting boot early with initrd-ssh Part 4 .
- Installing Docker on NixOS Part 5
The Catalyst:
I have stepped away from doing writeups for a little while, purely due to wanting to mix things up and the fact that I was just grinding for a year prior to get my CPTS certification; I actually have a number of writeups for active boxes written just not on the site due to the terms and conditions by HTB. And as I needed something else to spend my time with I created a Proxmox cluster using two nodes (I know I know you need 3 nodes for it actually be a cluster) & also set up a Proxmox backup server. However that took all of an hour to do, honestly, it was one of the easiest setups I have ever done (I will create a writeup for this soon enough.)
As the Proxmox cluster setup was painless I needed another project. I decided to migrate my containers from Truenas Scale to a Virtual Machine in the Proxmox cluster, with a separate drive being mounted to the VM to host all the docker data. The reason being is that although I like Truenas Scale & their apps I don’t like the fact that I have to configure things with a GUI. I want to be able to create a docker compose.yml file with all the services I want to run and simply run docker compose up -d. This approach means that I can also commit the compose.yml to git for version control and if I ever need to rebuild, I can just spin up another VM, git-clone the repo & re-mount the data drive. This also means I can have the data drive backed up with the Proxmox backup server. Another primary driver for this approach has been due to me working more with Ansible & Docker at my workplace as means to create reproducible builds.
So I did this, created the Ubuntu VM & additional drive in Proxmox, installed docker & docker compose, wrote the compose.yml, transferred the existing docker data from Truenas scale, and everything was working perfectly. I had my media server, reverse proxy etc and things were ticking over nicely for all of an hour…until I heard the voice “NixOS…..join us for truly reproducible builds and version controlled configuration files” thus began my journey with NixOS. Because why use continue to use a perfectly working system when I can switch to a new distro/OS (where it turns out even though I have been working with arch as my daily driver for years I will have a STEEP learning cure) and struggle to get things running.
Why NixOS:
Reason 1: Single Source of Truth:
- Initially I was drawn to the idea of having a single configuration file, that was a single source of truth. If you wanted to change something about your system you just modified a single file and rebuilt the host, simple.
- Now, that is and is not kind of true. You can 100% do that with a
configuration.nixstored in/etc/NixOSand control your entire system from that, which I have done for my homelab.- Since creating the homelab I have also migrated my laptop to NixOS & that was a bit more involved…thanks
home-managerbut I will create a separate post for that.
- Since creating the homelab I have also migrated my laptop to NixOS & that was a bit more involved…thanks
- While you can use a single configuration file
configuration.nix, NixOS supports modularizing your configuration into multiple files that can be imported. This makes it much easier to organize and maintain larger configurations while still maintaining the “single source of truth” principle. - This declarative approach means you can easily replicate the exact same system state across multiple machines - perfect for maintaining consistency across a homelab.
- Since your entire system configuration is just text files, you can version control it with Git, making it easy to track changes over time.
- Now, that is and is not kind of true. You can 100% do that with a
Reason 2: Immutable Builds:
- NixOS uses a unique approach where all packages are stored in the Nix store (
/nix/store) with cryptographic hashes as part of their paths. While users can still modify their home directories and data, the system packages and configurations managed by Nix cannot be modified after they’re built. - This immutability prevents “dependency hell” since different versions of packages can coexist without conflict - each package has its own unique path in the Nix store.
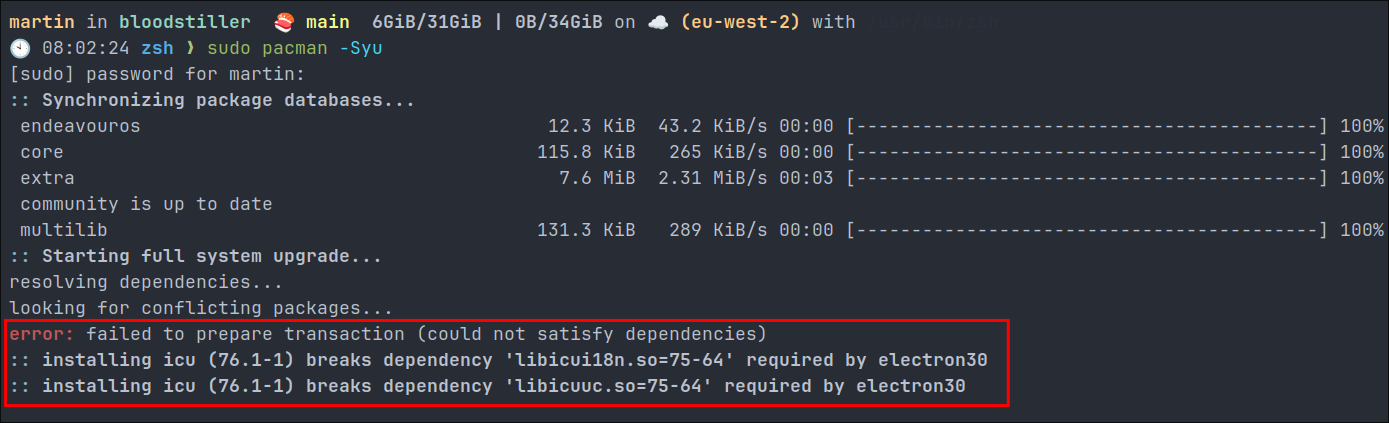
- In a cruel twist of fate I had this issue this morning; I am currently still running arch linux on my desktop (the transition takes a little more planning for this machine) and I have encountered dependency hell, this has only happened to me a 3/4 times since running arch linux but I wouldn’t get this on Nix.
- In a cruel twist of fate I had this issue this morning; I am currently still running arch linux on my desktop (the transition takes a little more planning for this machine) and I have encountered dependency hell, this has only happened to me a 3/4 times since running arch linux but I wouldn’t get this on Nix.
- For security reasons, this immutability is amazing. Since system packages can’t be modified after installation, it’s much harder for an adversary to create backdoors or elevate privileges by modifying system binaries.
- The immutable nature of builds also ensures reproducibility - given the same inputs, you’ll get the same outputs every time, which is crucial for reliable system management.
Reason 3: Easily Roll-back to Previous Configuration:
- NixOS keeps versions (called generations) every time you rebuild your system, meaning that if you have an issue you can roll-back to a previous working configuration without issue by easily rebooting; the trade-off is this does require additional storage. However, these versions can be deleted.
- By default, NixOS keeps 20 generations to prevent unlimited disk usage, but this is configurable & generations can be manually deleted.
- Rollbacks aren’t just for system configurations - you can roll back individual packages as well.
- You can boot into any previous generation directly from the GRUB menu, making it easy to recover from problematic configurations.
Additional Benefits:
- System updates are atomic - they either complete successfully or not at all, eliminating the risk of ending up with a partially updated system “dependency hell”
- The
nix-shellfeature lets you try packages without installing them system-wide, perfect for testing or development environments or quickly running a package.- For instance like below I wanted to quickly get an overview of the folder/file structure of the directory I was in but did not have
treeinstalled, so I runnix-shell tree -pand I am placed into temporary environment with the program installed, I can run it as expected. 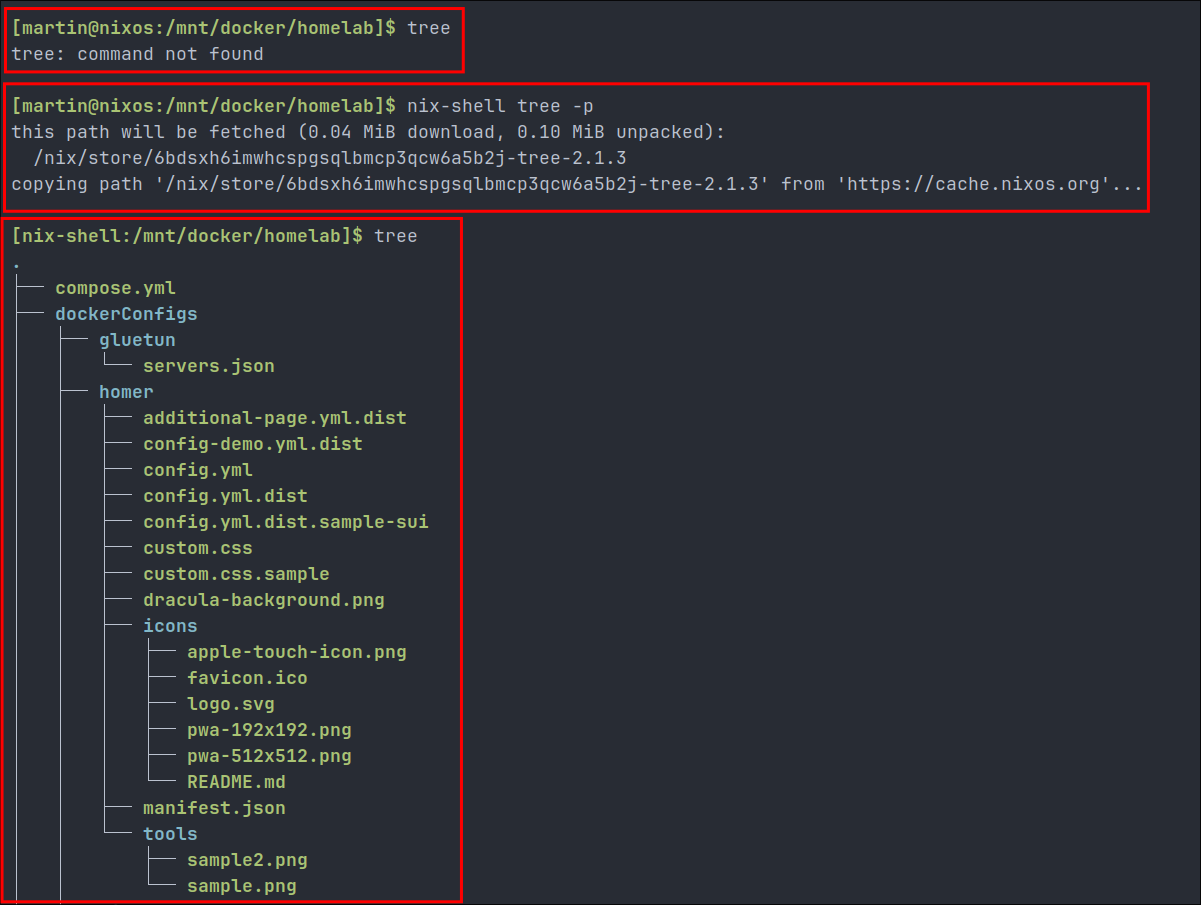
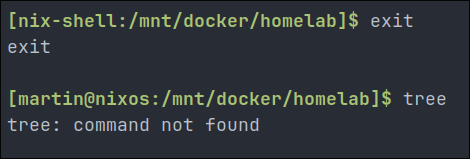
- Once I have finished I just type “
exit” and the package is removed, temporary environment destroyed and I no longer have access it to it.
- For instance like below I wanted to quickly get an overview of the folder/file structure of the directory I was in but did not have
Flakes:
- It would be rude if I did not mention flakes, and I could possible incur the ire of the nix community (who are from what I have found, very nice actually, see https://discourse.nixos.org/
- While not needed for this basic homelab setup, Nix Flakes provide an “experimental”* but powerful way to make Nix configurations even more reproducible and portable. They work by creating a
flake.lockfile (similar topackage-lock.jsoninNode.jsorCargo.lockin Rust) that pins the exact git commit hashes of all your dependencies, including nixpkgs itself. This means that even if you come back to your configuration months later, you’ll get exactly the same build. I use them in my other setups for this predictability, but they’re completely optional and the traditional approach works great for getting started and also not required for this setup. They also make it easier to share and reuse configurations between machines since each flake is a self-contained unit with all its dependencies explicitly declared.- * they are labeled as experimental but they really aren’t now, they have wide adoption.
- While not needed for this basic homelab setup, Nix Flakes provide an “experimental”* but powerful way to make Nix configurations even more reproducible and portable. They work by creating a
Creating the NixOS VM:
Download the NixOS ISO:
- First we are going to need an ISO file go with the Minimal ISO at the bottom of the page.
- https://nixos.org/download/#NixOS-iso
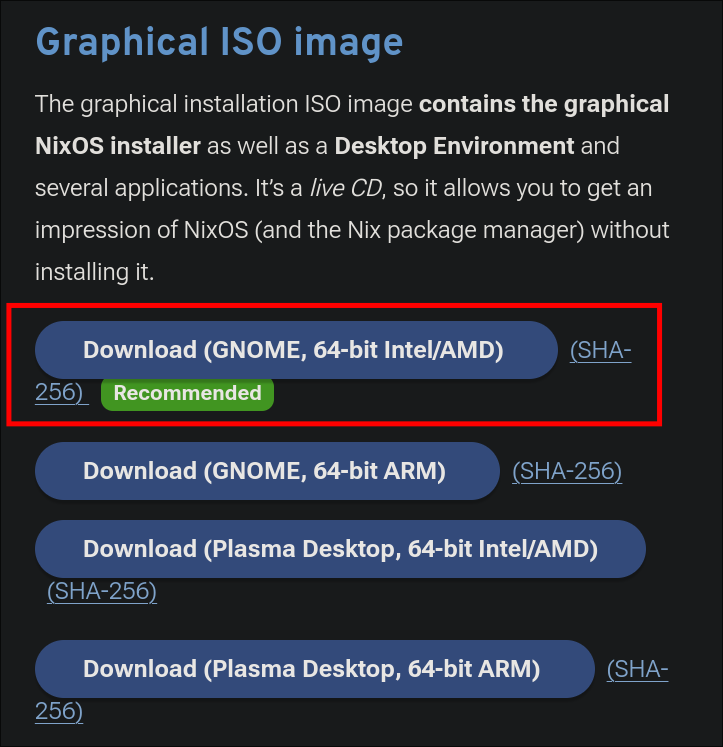
- “Why are you recommending the GUI installer if we are going to be running this headless”, great question, this version comes with a simple GUI and is easier for everyone to follow than doing it via CLI, and you can elect to not install a Desktop Environment.
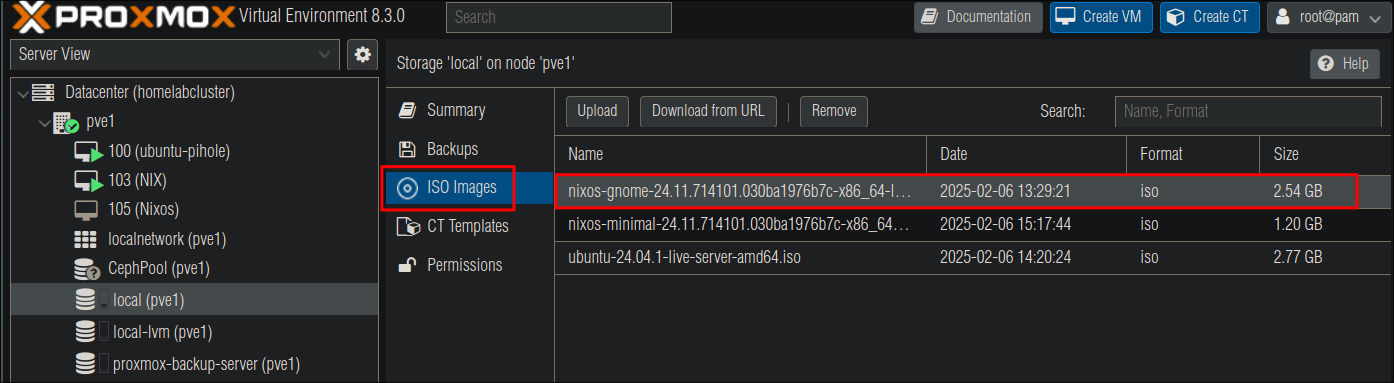
Upload the NixOS ISO:
-
I am doing this on Proxmox, but you can do it using whatever virtualization/vps you use, just substitute these steps for whatever your preferred platform is.
-
Login to your Proxmox node/cluster and upload the image to the ISO Images storage:
Creating a VM on Proxmox:
-
Select the Node of your cluster (if you have more than one) & click “Create VM”
-
Assign a Hostname:
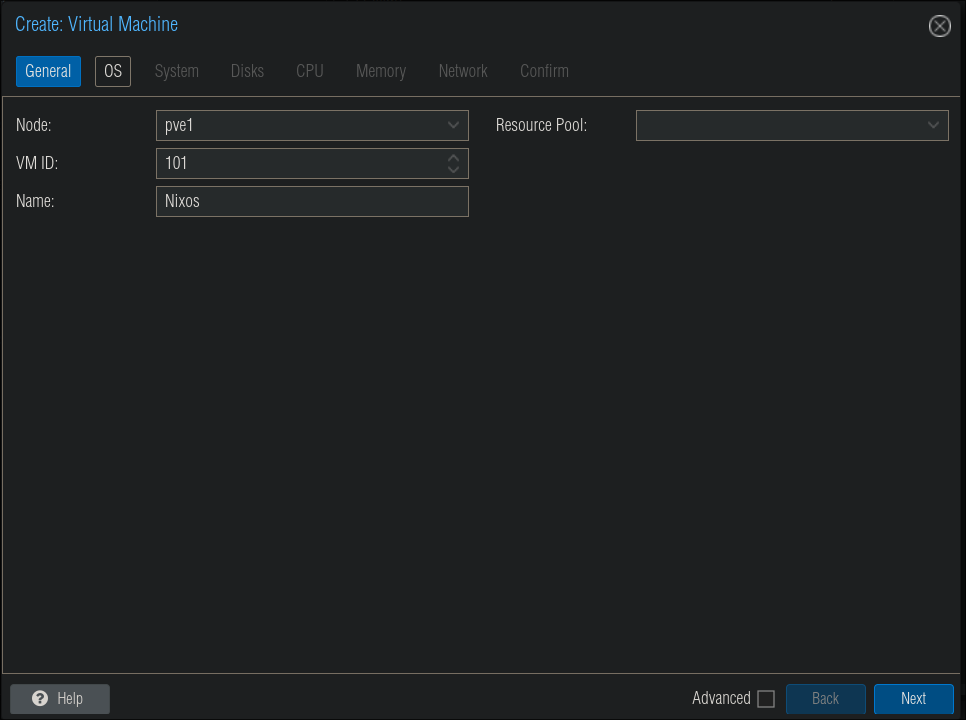
- I would also select start on boot so if your Proxmox instance goes down it will automatically restart the VM & services on boot. (You will need to have the “Advanced” box ticked at the bottom.)
-
Installation Media:
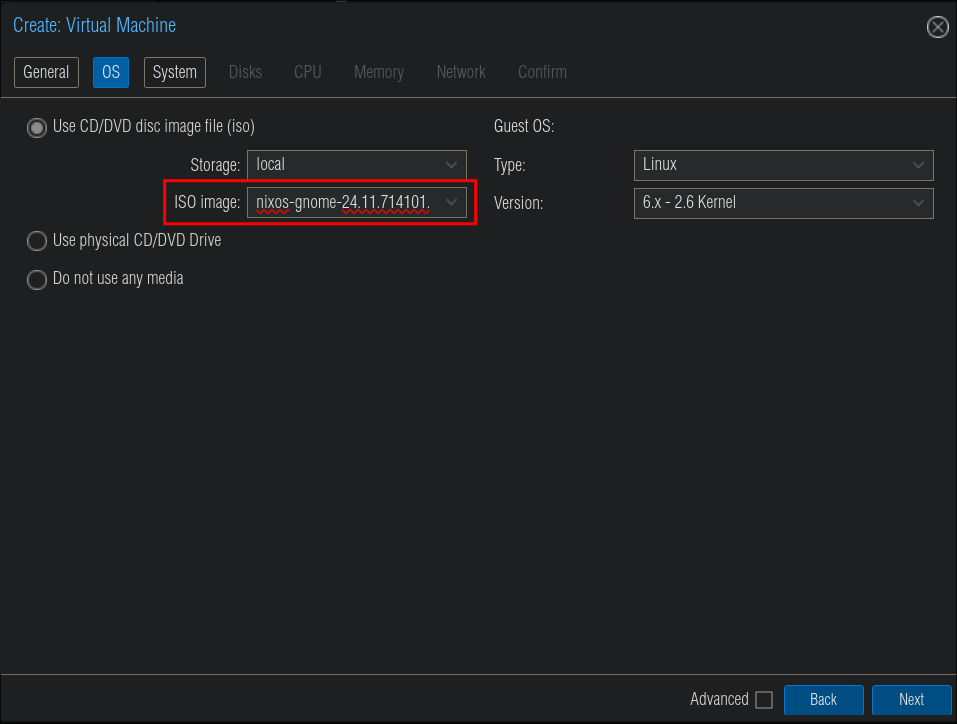
- Select the NixOS iso.
-
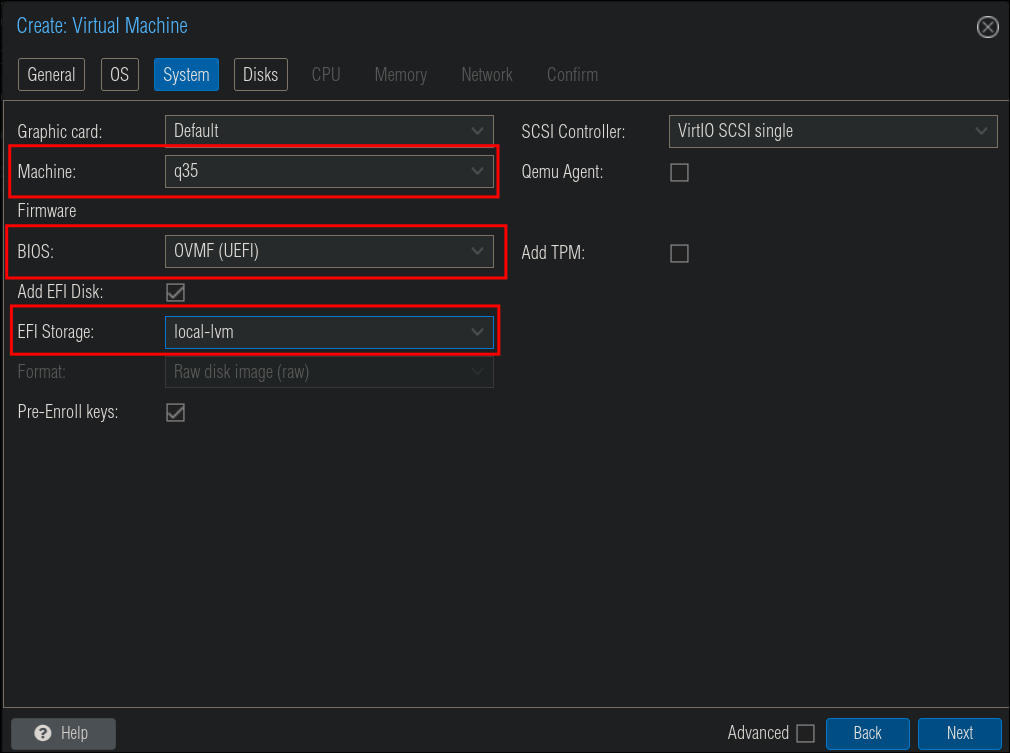
System:
-
As we don’t want to use legacy-bios (as we want to use systemd boot we are going to select OVMF (UEFI)) & the machine type will be q35

- Storage:
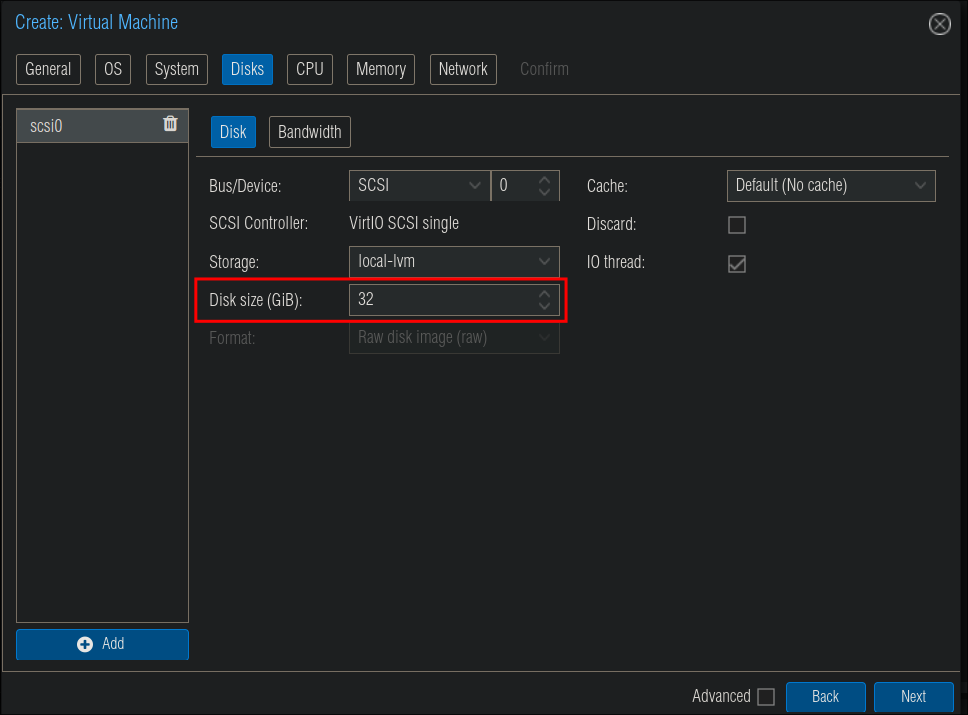
- +important+: The default storage size for new VM’s is 32GB, I would personally recommend upping this, the reason being is that, as mentioned previously, NixOS keeps versions whenever you rebuild the system VM. These versions can be deleted but if you do intend to make frequent changes or test things I would recommend upping the size of storage if you have the means.
-
CPU/Cores:
- As we are running fairly lightweight containers & OS I found that 1 Socket & 2 Cores was more than enough.
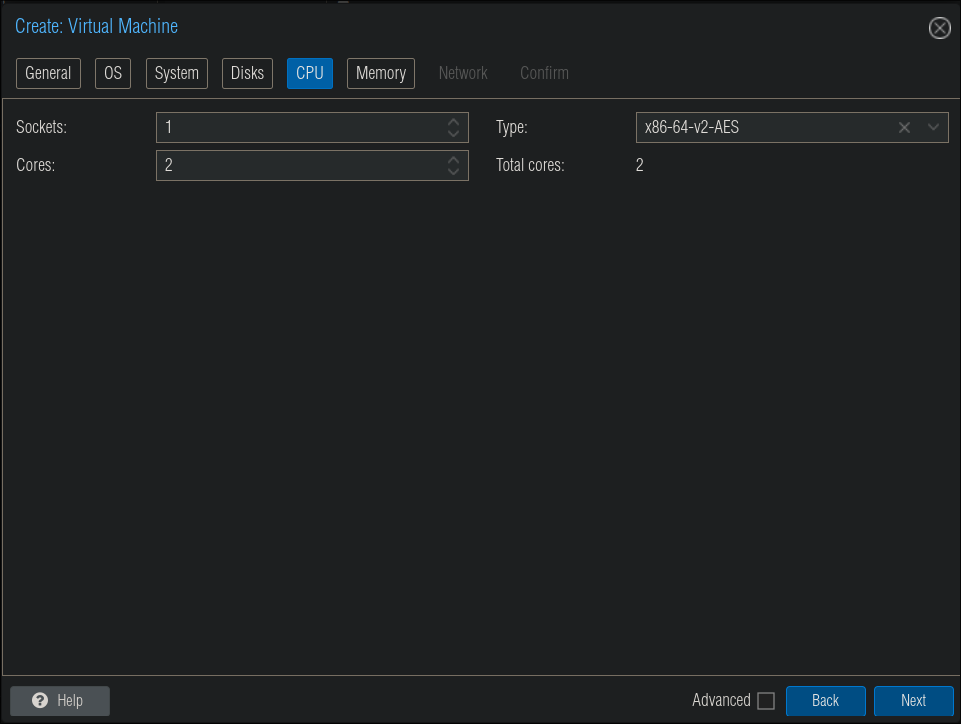
- +Note+: My Proxmox cluster is running on Think Centre M910q’s which have 7th Gen i5’s so not the most robust of equipment and they handled it fine so if you think you don’t have enough juice these are 6 year old CPU’s.
-
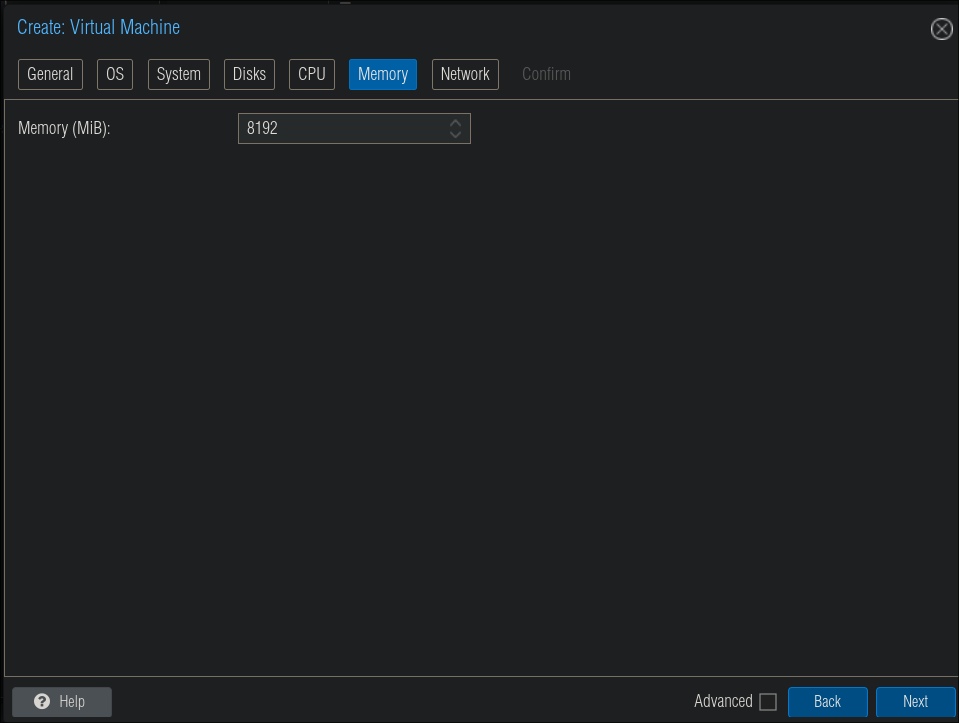
Memory:
- I have assigned 8GB which I found was more than enough for this & each of my nodes has 24GB.
-
Network:

- I left the Network tab as default however if you want to assign a dedicated NIC etc you can do that here, but my nodes have 1 Ethernet port so is not applicable.
-
At the “Confirm” screen you should have something that looks similar to the below.
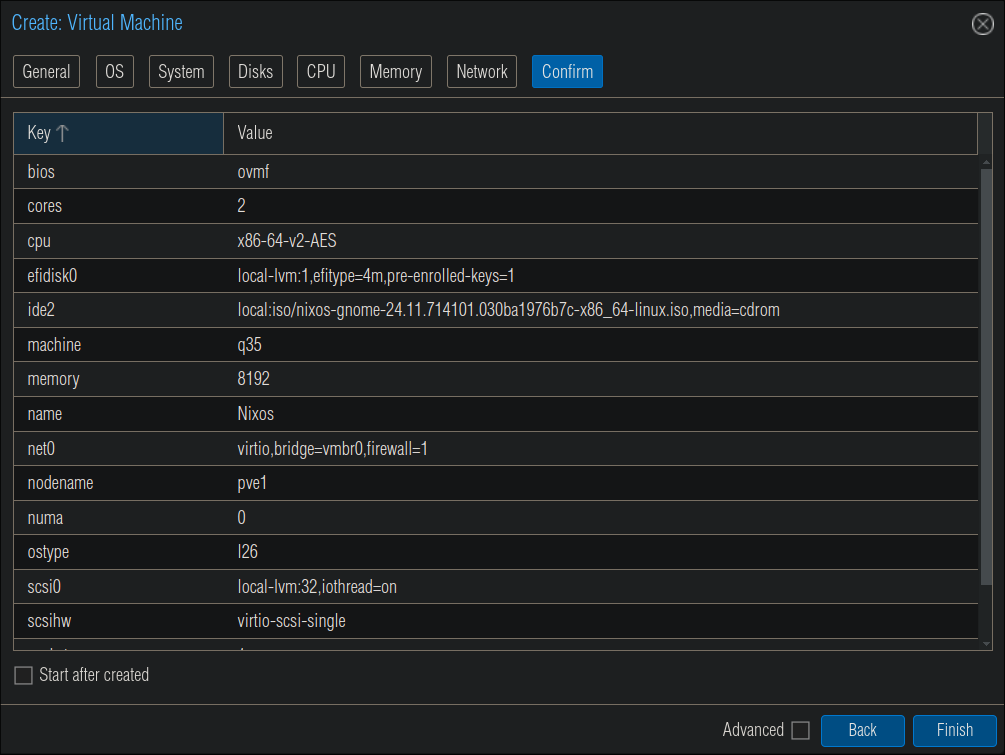
- +Note+: Ensure you do not have “Start after created” enabled as we want to add an additional drive for our docker data.
Creating an additional drive to host our docker data:
-
The primary reason for doing this is to have data persist across changes. If I decide to change OS in the future if I have my persistent data on an external drive I can easily mount this gives me far more flexibility with the lab.
-
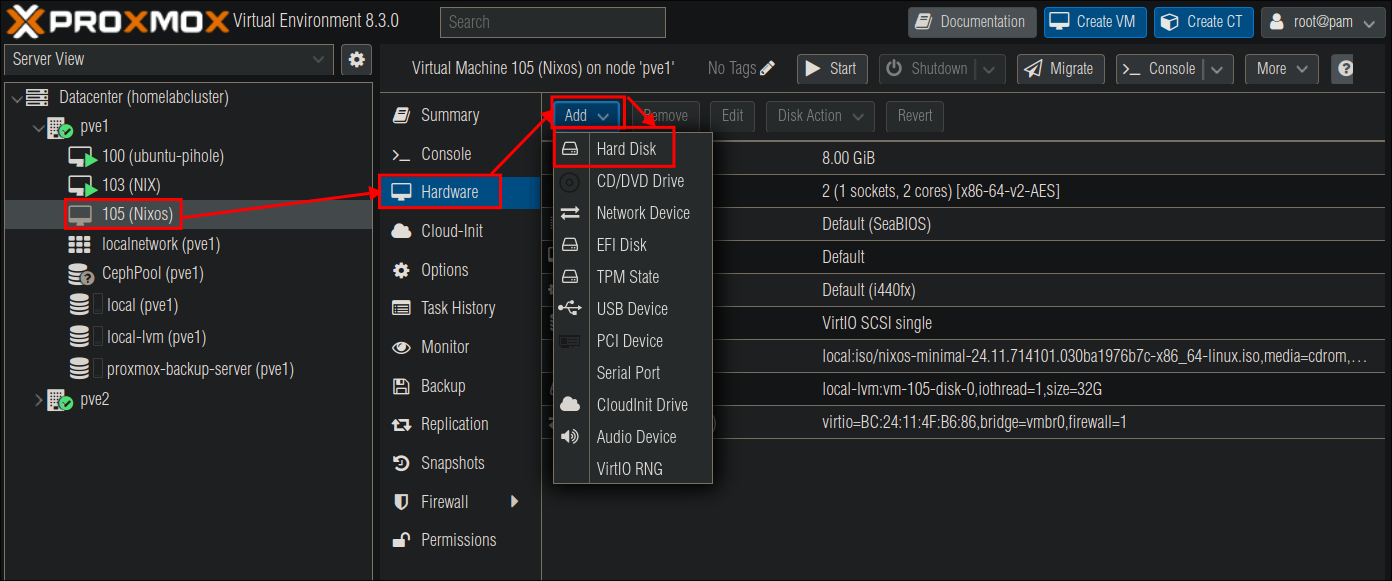
Click the VM, –> “Hardware” –> “Add” –> Hard Disk
-
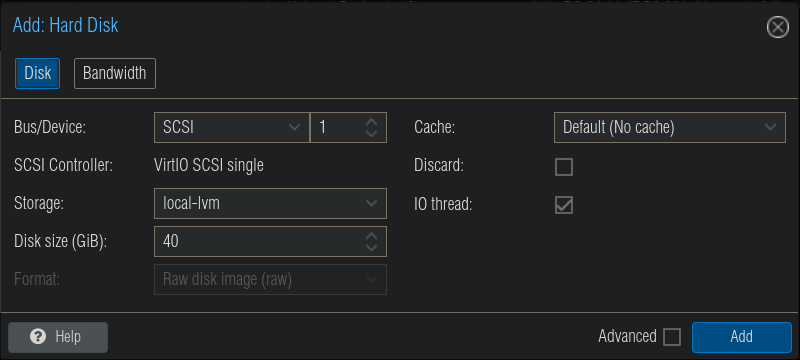
In the new window, set the size of the drive. I opted for 40GB as this drive is mainly used to hold just docker config data. The actual main storage for my containers, like media is passed by NFS mounts from my NAS.
-
Now when you look at the Hardware for the VM you should see two SCSI drives.
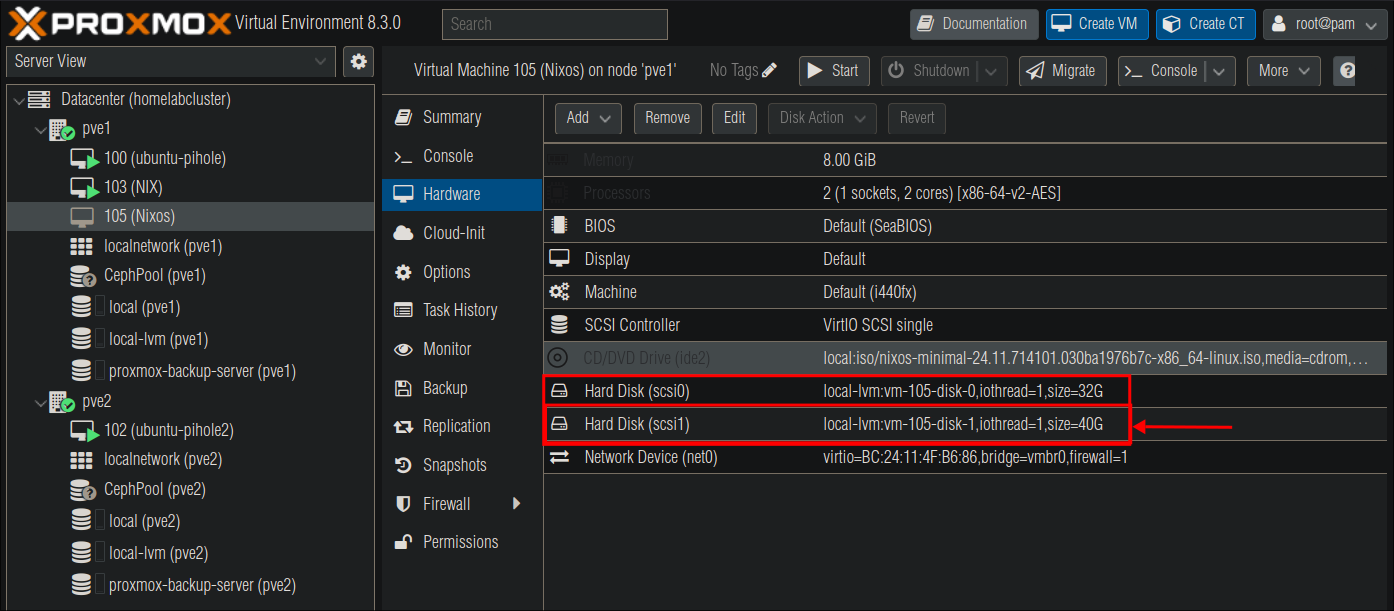
- +Note+: Ignore the size of my drives, these are purely for illustrative purposes.
- I also know this can be done at machine creation time however I wanted to split things up to make it simple for everyone.
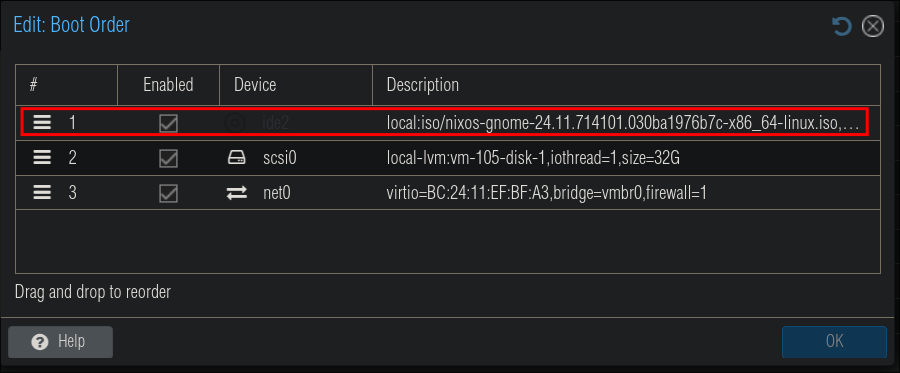
Change Boot Order:
So we can boot from the installer ISO we need to modify our boot order.
Select your VM & then “Options” & double click “Boot Order”
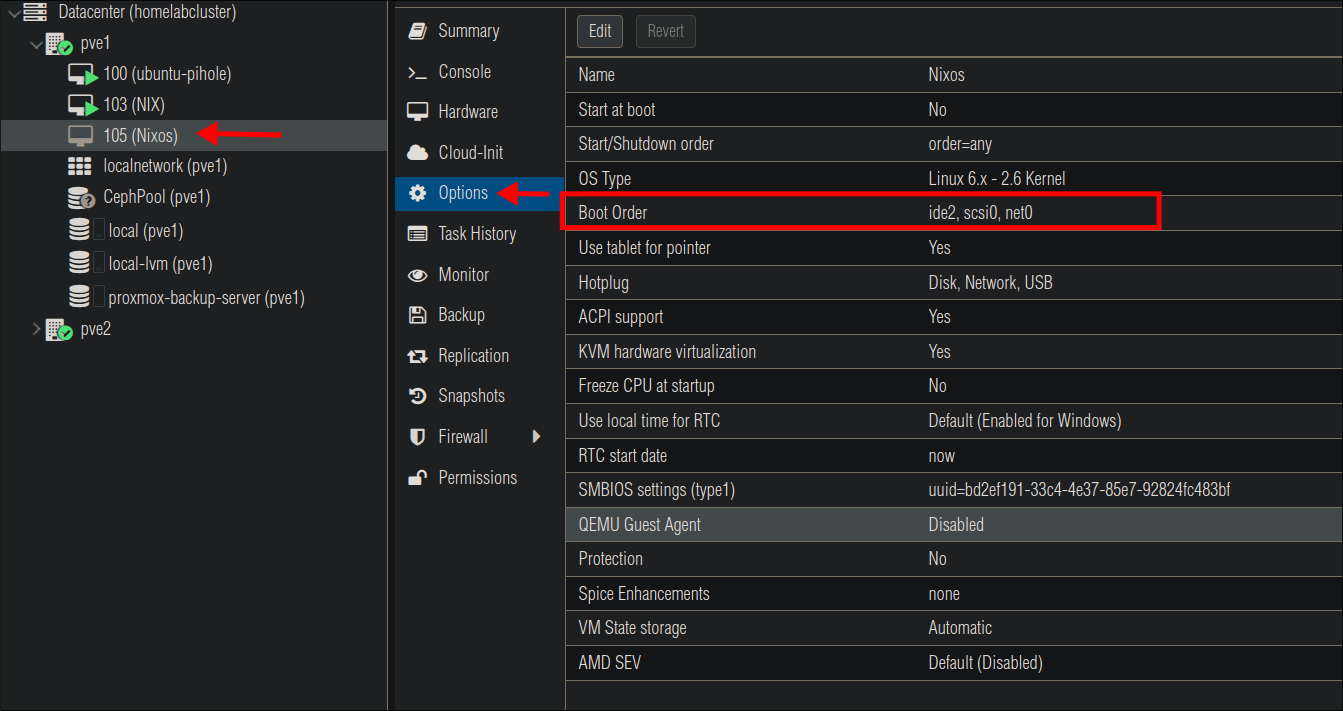
Drag the ISO to the top of the boot order & click “OK”
Disabling Secure Boot So We Can Boot:
For some reason the system will not boot unless we disable secure boot from the UEFI interface to do this, do the following:
Select the VM and click “Console”

This will open the console window
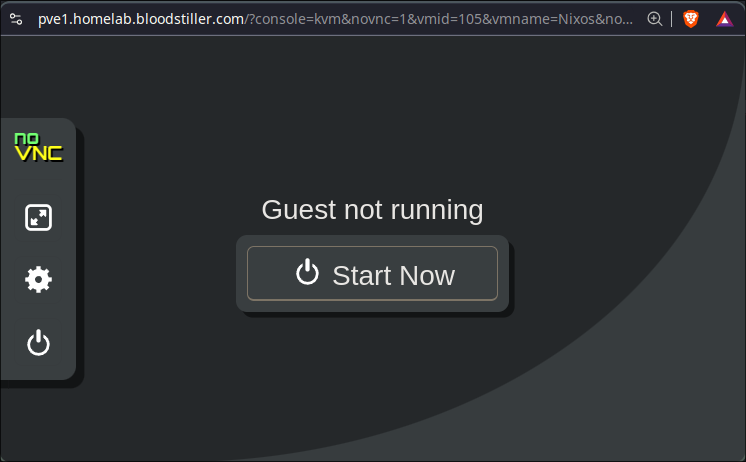
Click “Start Now” and as soon as it boots hit “ESCAPE” on your keyboard, this will show the EUFI manager interface:
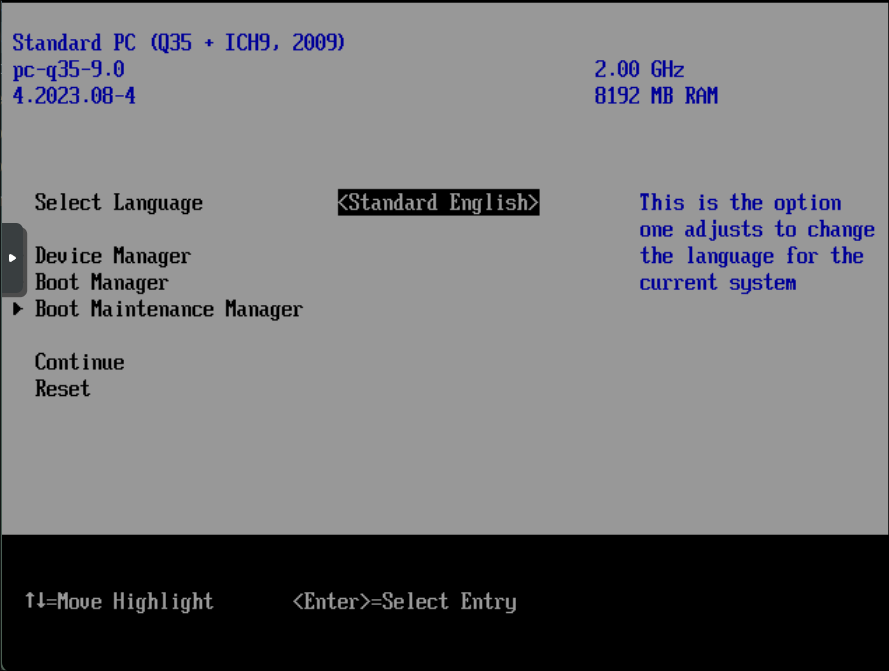
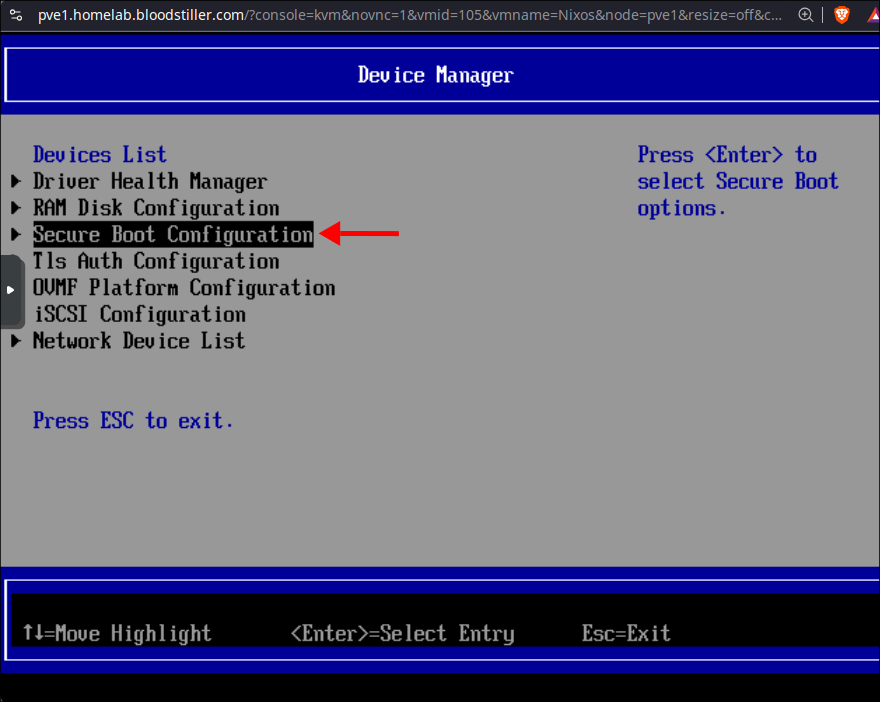
Use your keyboard to select “Device Manager” & hit “ENTER”
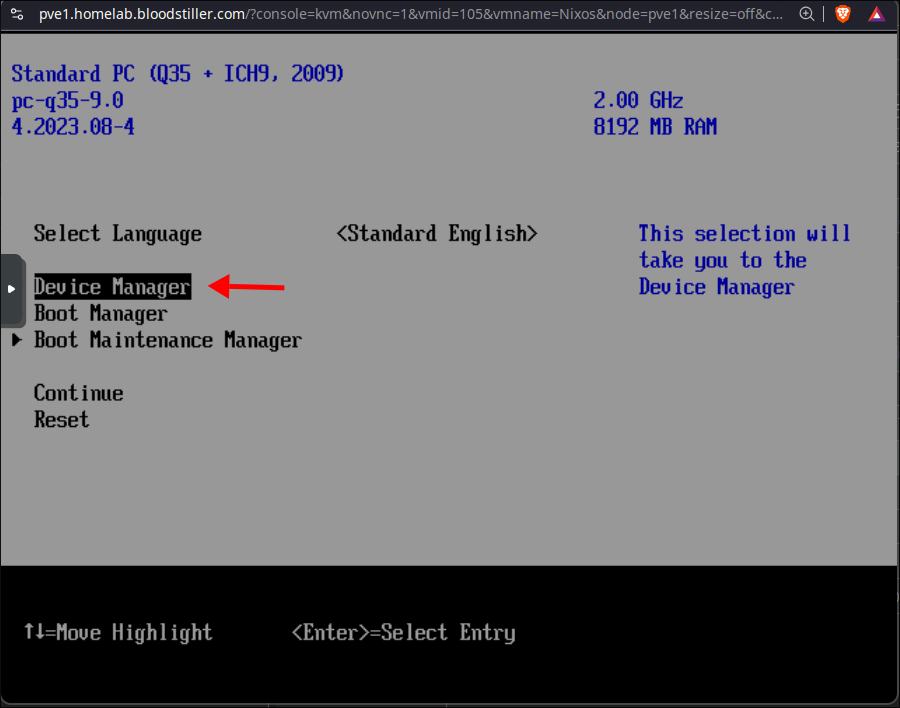
On the next page select “Secure Boot Configuration”
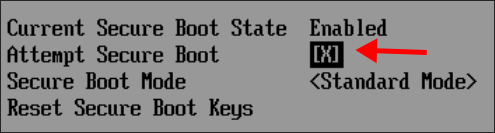
In the next screen, press down on your keyboard until you highlighted the [X]
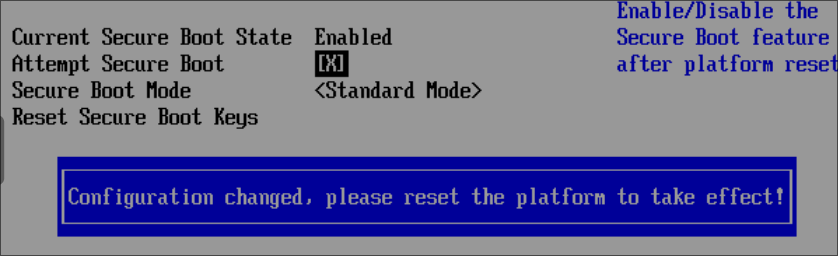
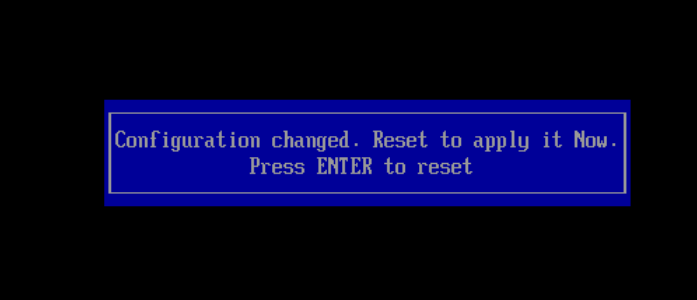
Press “ENTER” on your keyboard (the below message will display, hit “ENTER again”)
Now back out of this menu and the next by pressing “ESCAPE” twice
Select “Continue”
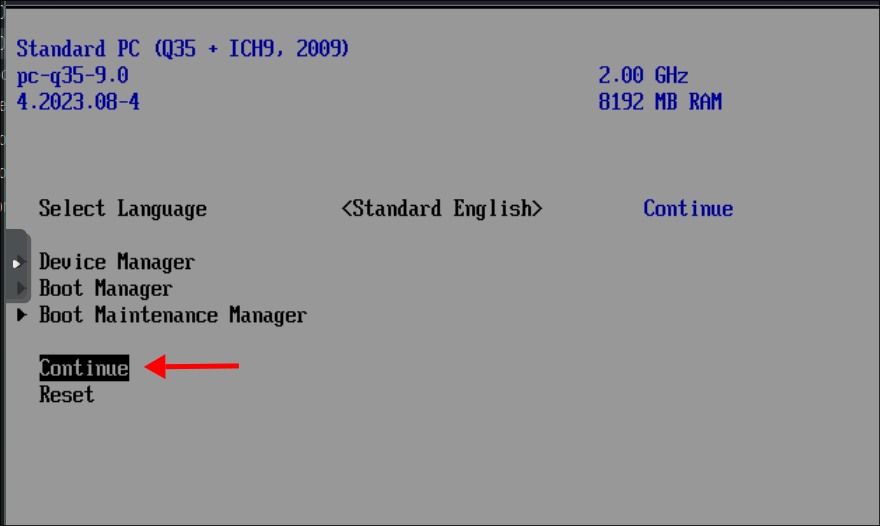
Then press “ENTER” again.
Installing NixOS:
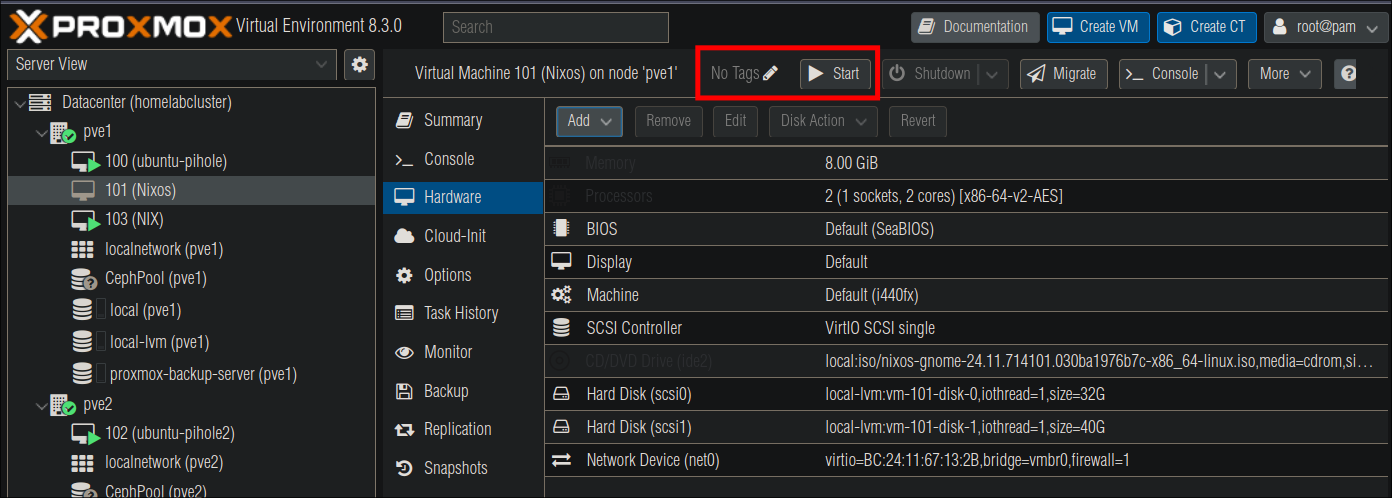
The VM should auto start, if it does not just follow the below steps.
Start the VM:
-
Start the host.
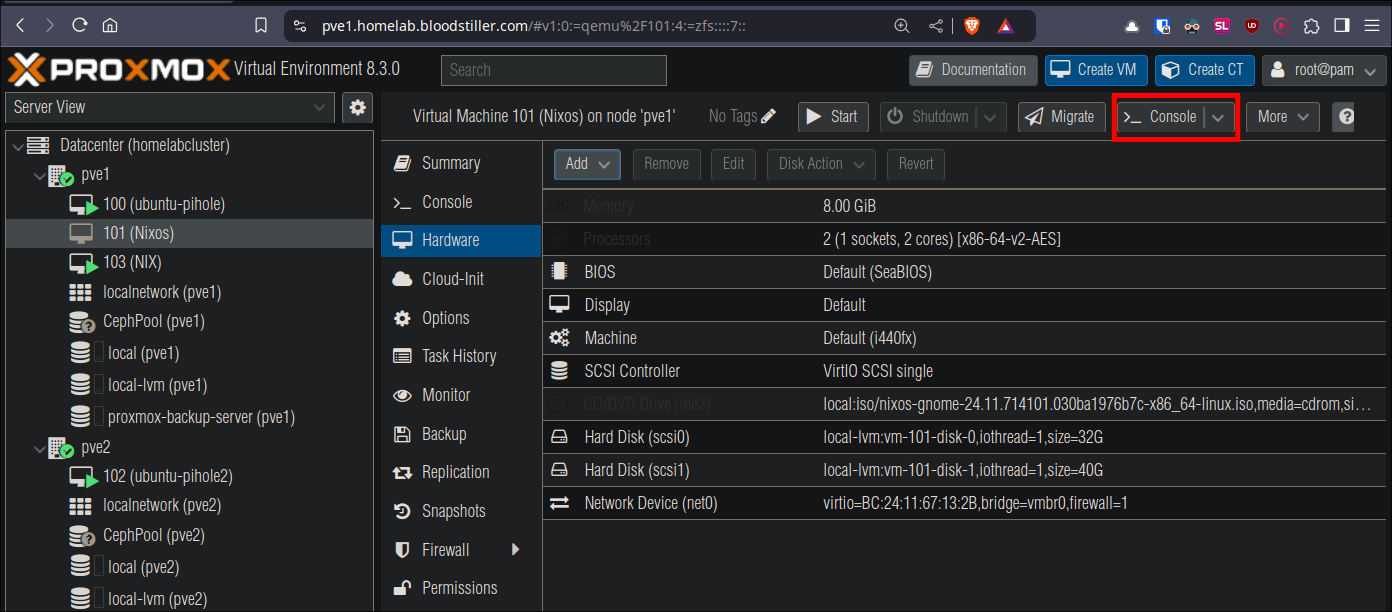
-
Open the console.
Follow the installer prompts:
-
The installer is the Calameres installer so if you have ever installed Linux before you may have encountered this installer.

- +Note+: I will not cover all steps as I hope you can select your language & keyboard layout yourself if you’ve managed to configure Proxmox.
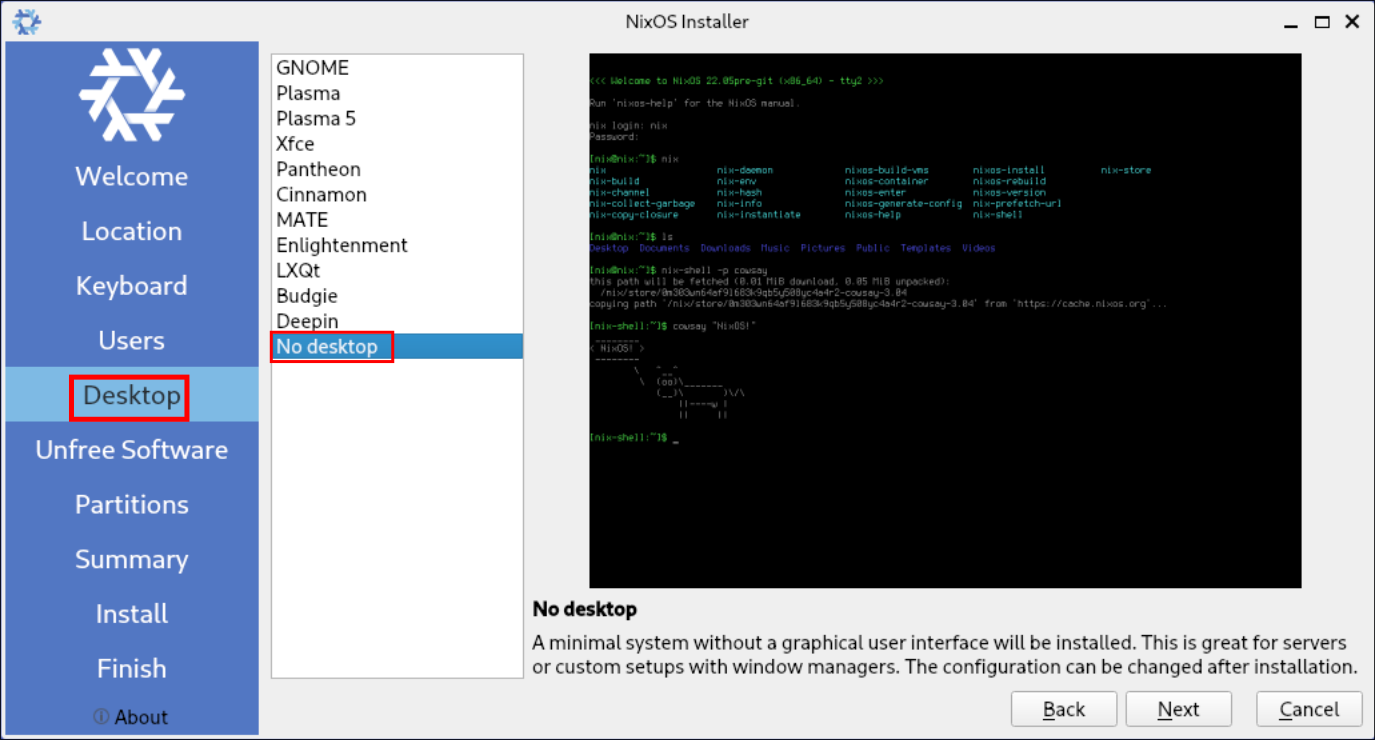
-
Ensure that “No desktop” is selected as it is not required for this setup.
-
If you do intend to use “Unfree Software” I would tick the box, however for this setup it’s not required.
-
Disks:
- Erase disk & ensure “No Swap” is selected.

- +Note+: I would always encourage users to Encrypt the system however this is up-to yourselves, if you do encrypt the system if it ever reboots you will need to enter the LUKS password, there are various ways to do this remotely, e.g. using Tailscale & setting up initrd ssh, which I will cover in later tutorials, but if you don’t care you can skip this step.
-
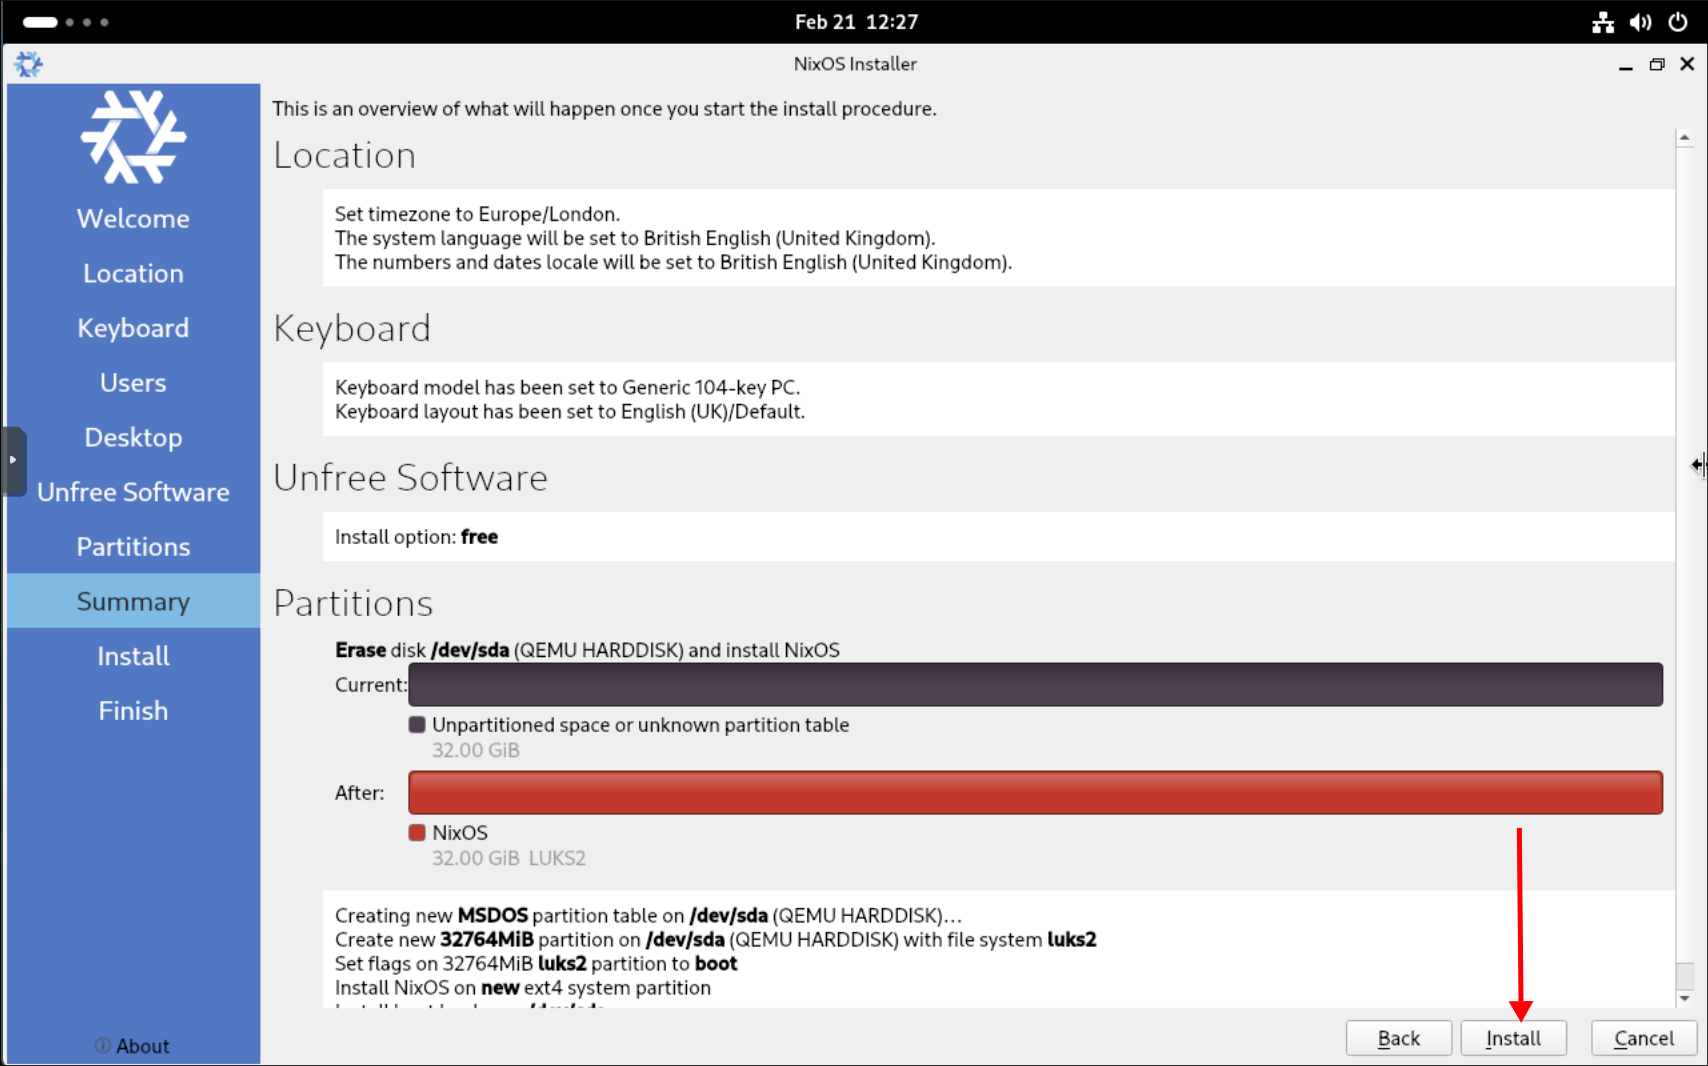
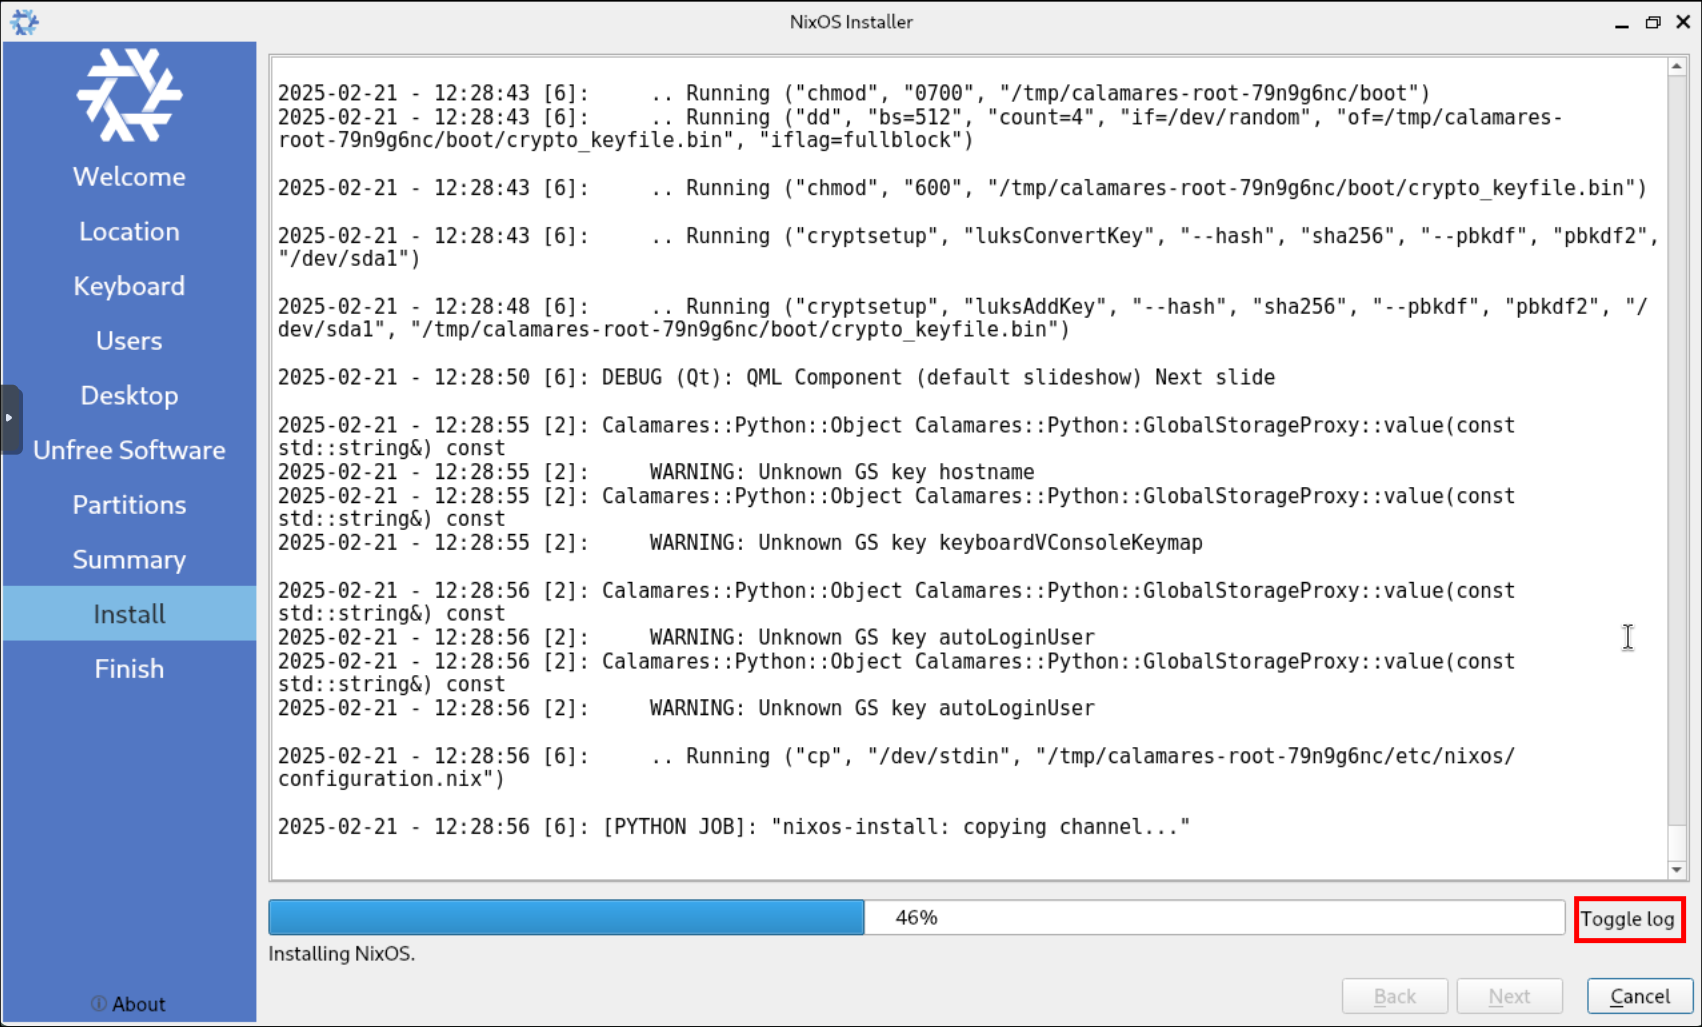
Install:
-
+Tip+: Click “Toggle Log” as soon as you star the install, the reason being is that the installer appears to stick at 46% percent for a lot of people whereas if you have the log viewable you can actually see it is progressing even though it may appear it is not.
-
Once complete restart the host:

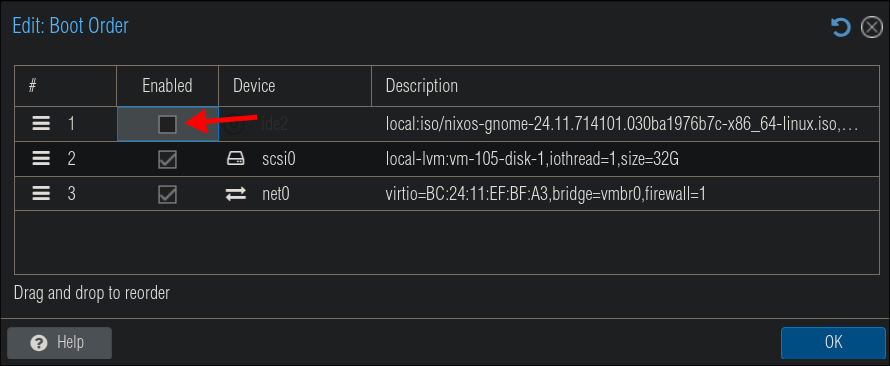
Change Boot Order…again:
You may find it boots to the installer again, if so shutdown the VM using the console.

Select your VM & then “Options” & double click “Boot Order”
Un-tick the “Enabled” box on the ISO & click “OK”
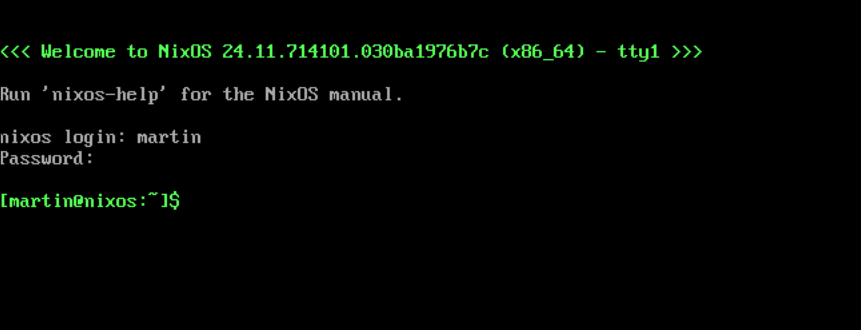
Login to NixOS:
-
As we are using Proxmox our first login will be via using the console, use the credentials you provided in the VM creation.
-
-
As this is already getting pretty long I will go over the configuration for the VM in my next post.
As always hack the
planethomelab!